Fixing baggy jeans is simple! This guide shows beginners how to easily hem their oversized jeans for a perfect fit without sewing. Get ready to transform your pants into a staple wardrobe piece with straightforward steps and helpful tips.
How to Hem Baggy Jeans: Genius Beginner Guide
Are your favorite jeans a little too loose around the ankles or even in the waist? It’s a common problem, and finding jeans that fit just right can be a challenge. Don’t worry, you don’t need to be a sewing expert to fix this! This article will walk you through easy, no-sew methods to tailor those baggy jeans to your exact measurements. We’ll cover everything you need to know, from selecting the right tools to achieving a clean, professional look. Get ready to give your denim a fresh, flattering fit!
Why Hemming Your Baggy Jeans is a Game-Changer

Baggy jeans can sometimes feel unflattering, dragging on the ground or making your outfit look unkempt. Properly hemmed jeans, however, instantly elevate your style. They create a cleaner silhouette, make your legs appear longer, and ensure your shoes are showcased perfectly. Whether you’ve inherited a pair that’s too big, bought the wrong size, or they’ve stretched out over time, learning to hem them is a practical skill that saves you money and frustration. It allows you to wear jeans you might otherwise discard, making them a more versatile part of your wardrobe.
Gathering Your Hemming Essentials

Before you start, having the right supplies makes the process much smoother. Thankfully, you likely have most of these items already, or they are inexpensive to acquire.
No-Sew Hemming Supply List:
- Fabric Scissors: Sharp scissors are crucial for a clean cut. If you have a good pair of crafting scissors, they will work. Avoid using dull scissors, as they can snag the fabric.
- Measuring Tape or Ruler: Precision is key. A flexible measuring tape is ideal for curves, but a stiff ruler works too.
- Fabric Marker or Chalk: To mark your hemline accurately. A washable fabric marker or tailor’s chalk is best, as it won’t permanently stain your jeans. For a quick fix, a regular pencil can work in a pinch.
- Iron and Ironing Board: Essential for creating crisp folds and activating no-sew hemming tape.
- No-Sew Hemming Tape: This is the magic ingredient for a no-sew hem. It’s a fusible bonding web that melts with heat to permanently bond fabric layers. Brands like Dritz or Hem Tape are widely available.
- Optional: Pins: Straight pins can help hold the hem in place before ironing, especially if you’re new to this.
Method 1: The Iron-On Hem Tape (Fusible Webbing) Method

This is the most popular and effective no-sew method for hemming jeans. It creates a durable, clean finish that looks like a traditional hem.
Step-by-Step Guide to Iron-On Hem Tape:
- Prepare Your Jeans: Wash and dry your jeans without fabric softener. This pre-shrinks the denim and removes any treatments that might interfere with the hemming tape. Make sure they are completely dry and free of wrinkles.
- Try Them On: Put on the jeans with the shoes you typically wear with them. This is the best way to determine the correct length and ensure they don’t drag.
- Mark Your Desired Length: While wearing the jeans (or have someone help you), decide where you want the new hem to fall. Use your fabric marker or chalk to make a small dot or line on the inside of the leg at that point. Do this for both legs, ensuring they match.
- Remove the Jeans and Measure: Take off the jeans. Lay one leg flat on a clean surface. Measure from the marked point down to the original hem. You’ll need to decide how much extra fabric you want to fold up. A common preference is to fold up about 1 to 1.5 inches to create a clean double fold. For a more significant “puddle” look, you might only need a shorter fold.
- Mark the Cut Line: Based on your measurement and desired fold, mark a new cutting line. For example, if you want to fold up 1.5 inches and the original hem is 0.5 inches, you’ll need to cut off about 2 inches from the bottom (plus an extra 0.5-1 inch for the initial fold). It’s always better to cut off slightly less than you think you need, as you can always trim more later. A good rule of thumb is to cut off the original hem plus 1-1.5 inches for your new folded hem.
- Cut the Excess Fabric: Using your sharp fabric scissors, carefully cut along the marked cutting line. Ensure both legs are cut evenly.
- Prepare the New Hem (First Fold): Turn up the raw edge of the fabric about 0.5 to 1 inch towards the inside of the pant leg. Press this fold firmly with your iron to create a crisp crease.
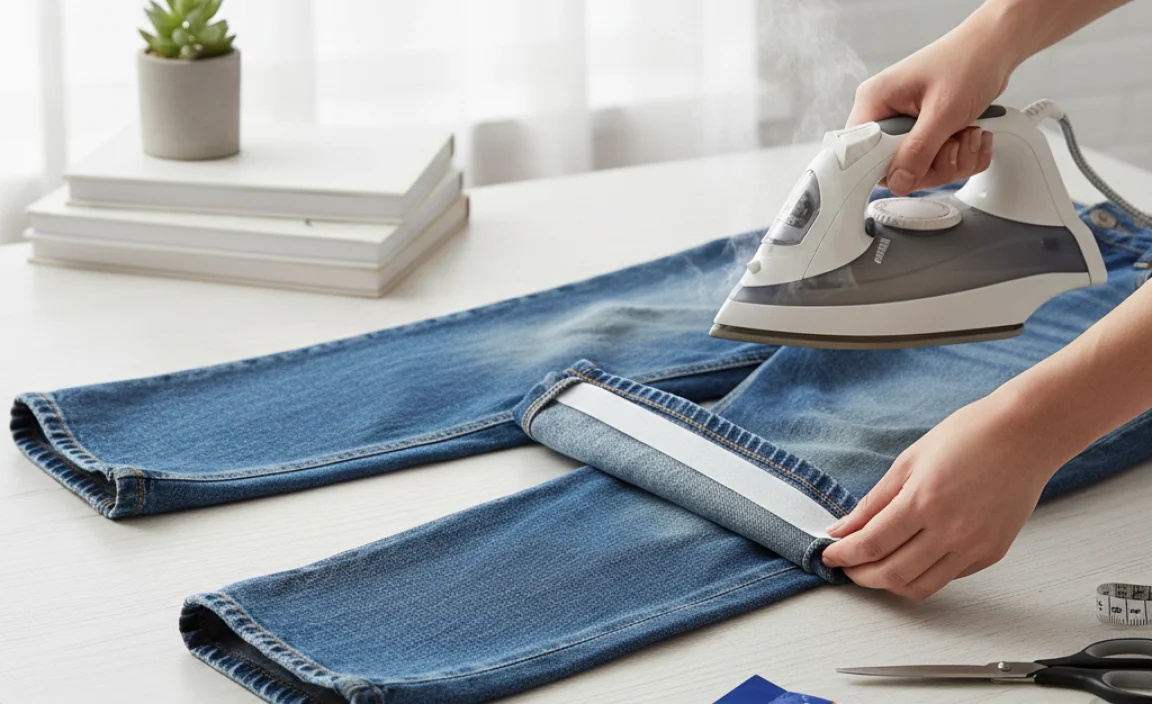
- Insert the Hemming Tape: Cut a piece of no-sew hemming tape to match the length of the folded hem. Gently slide one edge of the hemming tape into the creased fold you just made, pressing it against the inner fabric. Ensure it lies flat and covers the raw edge.
- Create the Second Fold: Now, fold the entire hem over again, so the folded raw edge is encased inside. The hemming tape should be sandwiched between the two layers of fabric. Press this entire fold firmly with your iron.
- Iron to Activate: Follow the instructions on your hemming tape packaging for the correct heat setting and ironing time. Typically, you’ll need to press firmly with a hot iron (usually on the cotton setting, without steam) for 10-20 seconds on each section of the hem to activate the adhesive. Ensure you iron both the inside and outside of the hem for a secure bond.
- Let it Cool: Allow the hem to cool completely before touching or wearing the jeans. The adhesive needs time to set.
- Check for Security: Once cooled, gently tug on the hem to ensure it’s well-bonded. If any part feels loose, re-iron that section for a few more seconds.
Tip: For a more authentic look, try to match the original stitching color if you choose to add some decorative stitches later, or if you’re using the method below that involves a sewing machine.
Method 2: The Fold, Tuck, and Stitch (Minimalist Sewing)

If you have a sewing machine or are comfortable with a needle and thread, this method offers a slightly more permanent and authentic look. It’s still very beginner-friendly.
Step-by-Step Guide to Fold, Tuck, and Stitch:
- Prepare and Measure: Follow steps 1-4 from Method 1. You’ll need to prepare your jeans, try them on, mark your desired length, and cut off the excess fabric, leaving about 1.5 to 2 inches of fabric below your mark for the hem.
- Create the First Fold: Turn up the raw edge of the fabric about 0.5 to 1 inch towards the inside of the pant leg. Press this fold firmly with your iron.
- Tuck and Second Fold: Now, fold the entire hem up again. This second fold should also be about 0.5 to 1 inch, encasing the raw edge completely within the fold. Press this second fold firmly. You should now have a clean, double-folded hem with no raw edges visible.
- Secure with Pins: Use pins to hold the hem in place. Insert pins perpendicular to the folded edge.
- Sewing the Hem:
- Machine Sewing: Thread your sewing machine with a thread color that matches your jeans (or a contrasting color for a visible detail). Use a simple straight stitch. Start sewing about midway down the seam of the pant leg to hide the knot. Sew around the entire circumference of the hem, about 1/8 to 1/4 inch from the top folded edge. Backstitch at the beginning and end to secure the stitches.
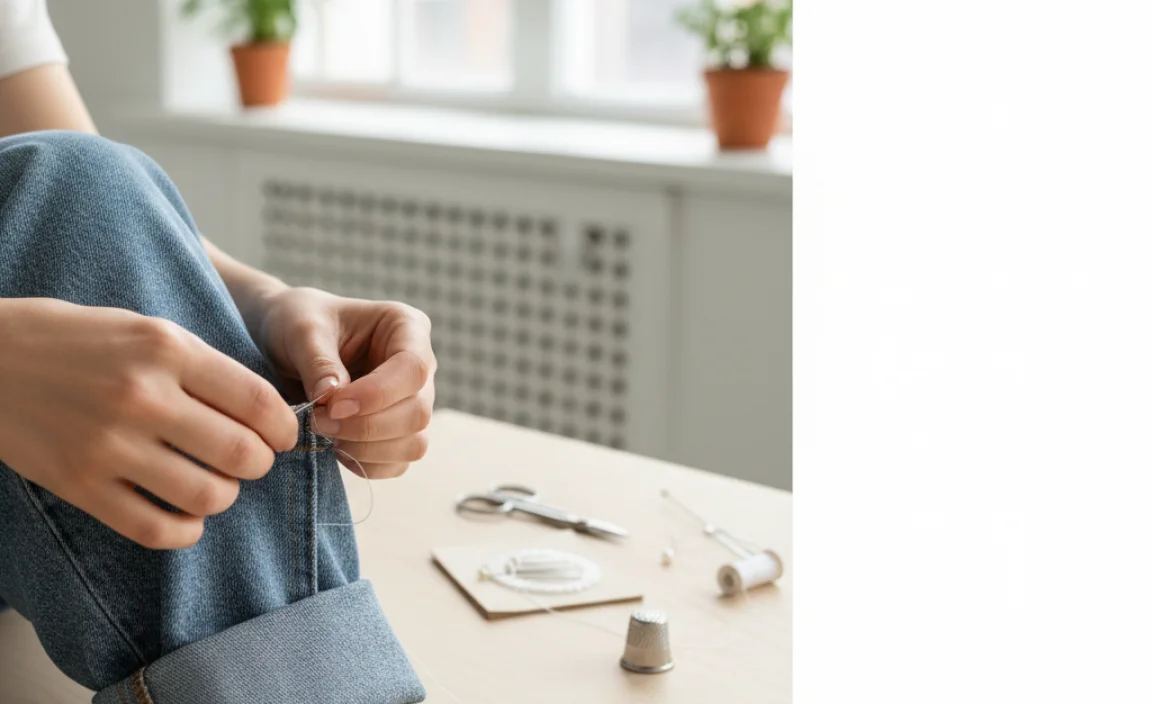
- Hand Sewing: Use a strong needle and matching thread. A simple running stitch or a whipstitch can work well. Sew around the entire hem, keeping your stitches as even as possible and about 1/8 to 1/4 inch from the top folded edge. Tie off securely at the end.
- Press the Hem: Once sewn and secured, give the entire hem a final press with your iron.
Method 3: The Cut-Off Raw Hem (Trendy & Quick!)

This is the quickest method and results in a trendy, casual look. It requires no sewing or hemming tape, just a pair of sharp scissors. However, this hem will fray over time.
Step-by-Step Guide to the Cut-Off Raw Hem:
- Prepare and Measure: Wash and dry your jeans. Put them on with your shoes to determine the desired length. Mark where you want the new hem to fall.
- Mark the Cut Line: Take off the jeans. Measure from the marked point down to where the original hem currently sits. Decide how much length you want to remove. For a raw hem, you can be a bit more generous with your cut, as the fraying effect will soften the look. A cut that’s 1 to 2 inches above the original hem is usually a good starting point.
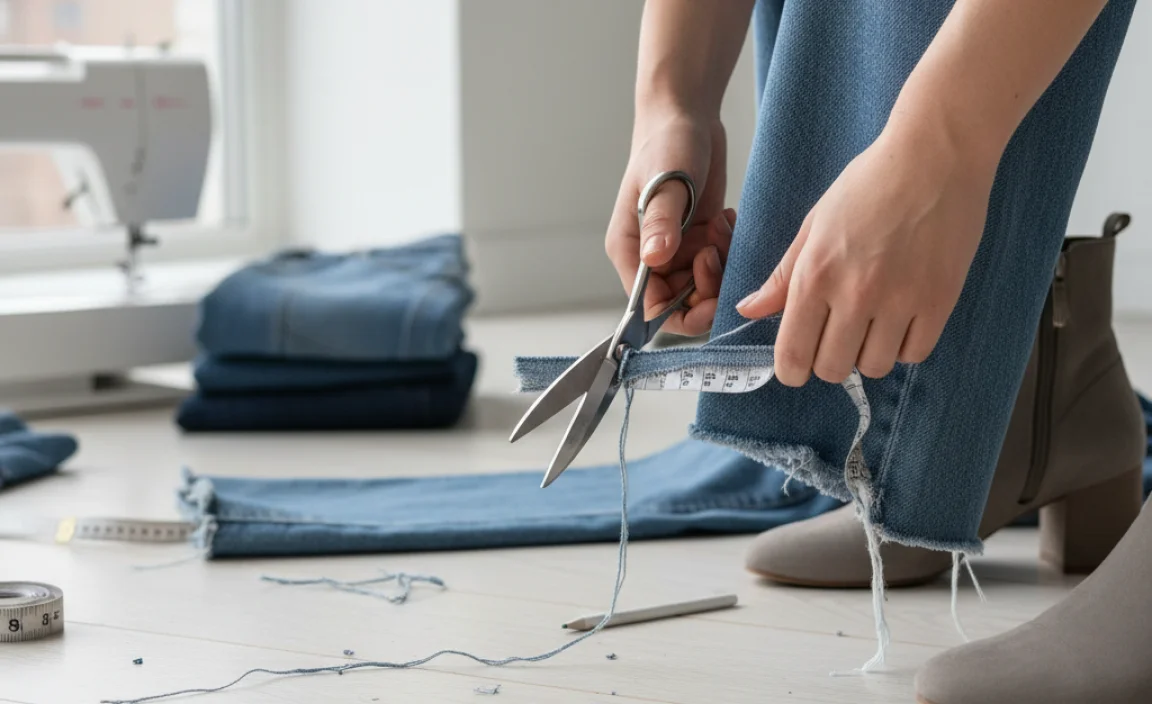
- Cut the Excess Fabric: Using sharp fabric scissors, cut straight across the leg at your marked line. Make sure the cut is even around the entire leg.
- Encourage Fraying: Wear the jeans! The more you move, walk, and wash them, the more the edges will fray. You can also gently pull at the threads along the cut edge to speed up the fraying process.
- Control Fraying (Optional): If you want to control how much they fray, you can add a few strategically placed stitches with a needle and thread (or a sewing machine) just above your cut line. This stops the fraying from going too far up the leg. Another option is to use a tiny amount of fabric glue or fray check liquid along a line just above where you want the fraying to stop.
Choosing the Right Method for Your Jeans
The best method depends on the look you’re going for and your comfort level with crafting.
| Method | Pros | Cons | Best For |
|---|---|---|---|
| Iron-On Hem Tape | No sewing required, durable, clean finish, relatively quick. | Requires an iron, can be permanent and difficult to alter if you make a mistake, might not hold up as well with frequent rough wear or washing. | Beginners, creating a polished look without sewing, quick fixes, adjusting length on work pants or trousers needing a clean look. |
| Fold, Tuck, and Stitch | Durable, looks like a traditional sewn hem, can be done by hand or machine, very secure. | Requires basic sewing skills or a machine, takes a bit longer than iron-on. | Achieving an authentic sewn hem look, jeans that will be worn frequently or roughly, those comfortable with a needle and thread. |
| Cut-Off Raw Hem | Fastest method, trendy casual look, no special tools needed beyond scissors, requires no sewing skill or iron. | Will fray and can become longer over time, not suitable for formal wear, requires managing fraying to desired level. | Casual or distressed denim styles, quick styling updates, experimenting with lengths. |
Tips for a Professional Finish
Even with simple methods, a few tricks can make your hem look like it came from a tailor:
- Sharpest Scissors Possible: This cannot be stressed enough. Dull scissors will chew up the denim and lead to an uneven, messy edge.
- Plenty of Light: Work in a well-lit area so you can see your measurements and markings clearly.
- Ironing is Crucial: For the iron-on tape method, make sure you press firmly and long enough for the adhesive to fully activate. For all methods, pressing creases helps achieve a neat look.
- Fabric Choice Matters: Thicker denim can be trickier to fold neatly. You might need to use more pressure when ironing or consider a slightly wider hem allowance.
- Consider the Shoe: Always try on your jeans with the shoes you intend to wear. The hemming length can vary significantly depending on whether you’re wearing sneakers, boots, or heels. Wearing them during the marking phase is essential.
- Watch a Video: Sometimes, seeing a technique in action can clarify any confusion. Look up video tutorials for “no-sew jean hem” or “how to iron on hemming tape” for visual guidance.
Dealing with Stretchy Jeans
Many modern jeans have a bit of stretch. This can affect how they hang and how you should hem them. Stretchy fabrics can sometimes stretch out further when you’re measuring and manipulating them. For stretchy jeans, a no-sew hem using iron-on tape or a sewn hem is generally more reliable than a raw hem, which might stretch out unevenly.
Important Note: When measuring stretchy jeans, try to do so gently to avoid stretching the fabric. If using iron-on tape, ensure you follow the directions carefully, as excessive heat can sometimes damage the elastic fibers in stretch denim. Always test a small, inconspicuous area if you’re concerned.
When to Consult a Professional
While these methods are excellent for most situations, there are times when professional tailoring might be the best option:
- Designer Jeans or Expensive Denim: If your jeans are a significant investment, you might want a professional to handle the hemming to ensure perfection.
- Complex Fits: Jeans with flared legs, wide legs that need significant reshaping, or very thick denim can be challenging for beginners.
- Special Waistband Styles: If your jeans have a unique waistband construction, a tailor can manage it better.
- When You Want a Perfect, Undetectable Hem: A skilled tailor can often create a hem that is virtually indistinguishable from the original.
A good tailor can typically hem a pair of jeans for a reasonable fee, often comparable to the cost of buying new ones if you were to count your time and materials spent on a failed DIY attempt on expensive denim. You can often find local tailors or alteration shops by searching online. Websites like AM Solutions offer resources and information on the value of clothing alterations and repairs.
Frequently Asked Questions About Hemming Jeans
Q1: How much fabric should I leave for hemming my jeans?
For a clean, finished hem using iron-on tape or sewing, leave about 1 to 1.5 inches of fabric below your desired finished length. This allows enough room for a double fold to encase the raw edge.
Q2: Can I hem jeans without an iron?
Yes, you can hem jeans without an iron using a hand-sewn stitch (like a running stitch or whipstitch) after folding and pinning. However, an iron is essential for the most popular no-sew method using iron-on hemming tape.
Q3: How do I make sure my hems on both legs are even?
The best way is to try on the jeans with the shoes you’ll wear them with and mark the length while wearing them. Then, lay one leg flat and measure from the mark to the original hem. Use this measurement to mark the second leg, ensuring it’s an identical distance from the inside seam of each leg when laid flat, or have someone help you measure evenly.
Q4: Will my no-sew hem last through washes?
A properly applied iron-on hemming tape should last through many washes and wears. However, it’s best to wash them on a delicate cycle and air dry to prolong the life of the hem. If the hem starts to loosen, you can often re-iron it to reactivate the adhesive.
Q5: What if I cut my jeans too short?
For the iron-on tape and sewn methods, if you cut off too much, you’ll need additional fabric to add length back on. This is difficult to do seamlessly. For a raw hem, you can sometimes add a lace or fabric trim to the bottom to gain a little length, or accept that they are now capris! It’s why it’s always recommended to cut off less than you need first, and then trim more if necessary.
Q6: Can I hem old, thick, or worn-out jeans?
Yes, but thicker denim can be harder to fold and press neatly. For very worn jeans, the fabric might be fragile. Be extra gentle when measuring and cutting. A raw hem might be more forgiving on
.lwrp.link-whisper-related-posts{
margin-top: 40px;
margin-bottom: 30px;
}
.lwrp .lwrp-title{
}.lwrp .lwrp-description{
}
.lwrp .lwrp-list-container{
}
.lwrp .lwrp-list-multi-container{
display: flex;
}
.lwrp .lwrp-list-double{
width: 48%;
}
.lwrp .lwrp-list-triple{
width: 32%;
}
.lwrp .lwrp-list-row-container{
display: flex;
justify-content: space-between;
}
.lwrp .lwrp-list-row-container .lwrp-list-item{
width: calc(25% – 20px);
}
.lwrp .lwrp-list-item:not(.lwrp-no-posts-message-item){
max-width: 150px;
}
.lwrp .lwrp-list-item img{
max-width: 100%;
height: auto;
object-fit: cover;
aspect-ratio: 1 / 1;
}
.lwrp .lwrp-list-item.lwrp-empty-list-item{
background: initial !important;
}
.lwrp .lwrp-list-item .lwrp-list-link .lwrp-list-link-title-text,
.lwrp .lwrp-list-item .lwrp-list-no-posts-message{
}@media screen and (max-width: 480px) {
.lwrp.link-whisper-related-posts{
}
.lwrp .lwrp-title{
}.lwrp .lwrp-description{
}
.lwrp .lwrp-list-multi-container{
flex-direction: column;
}
.lwrp .lwrp-list-multi-container ul.lwrp-list{
margin-top: 0px;
margin-bottom: 0px;
padding-top: 0px;
padding-bottom: 0px;
}
.lwrp .lwrp-list-double,
.lwrp .lwrp-list-triple{
width: 100%;
}
.lwrp .lwrp-list-row-container{
justify-content: initial;
flex-direction: column;
}
.lwrp .lwrp-list-row-container .lwrp-list-item{
width: 100%;
}
.lwrp .lwrp-list-item:not(.lwrp-no-posts-message-item){
max-width: initial;
}
.lwrp .lwrp-list-item .lwrp-list-link .lwrp-list-link-title-text,
.lwrp .lwrp-list-item .lwrp-list-no-posts-message{
};
}


