


Quick Summary: Learn how to easily hem baggy jeans by hand with this simple, step-by-step guide. Achieve a perfectly tailored fit from your own home, saving time and money while giving your favorite jeans a fresh new look without needing any special sewing skills.
Baggy jeans are a style staple, but when they become too loose or too long, they can lose their charm and make you feel less put-together. Finding that perfect fit can be frustrating, especially when you love a particular pair but they’ve lost their original shape or you’ve picked up a second-hand gem that needs a little tweak. The good news is you don’t need a sewing machine or professional alteration skills to fix them. This guide will walk you through a straightforward, hand-sewing method to perfectly hem your baggy jeans, giving them a clean, custom fit that feels just right. Get ready to revive your wardrobe with this easy fix!
Why Hemming Baggy Jeans By Hand is a Great Solution

Baggy jeans can be incredibly comfortable, but over time or with wear, they might start to sag or feel a bit too long, impacting how they look and feel. Instead of discarding them or paying for alterations, hemming them by hand is a practical and cost-effective solution accessible to everyone. It’s a skill that can save your favorite denim pieces and give you a custom fit tailored precisely to your preference.
Benefits of Hand-Hemming Your Jeans
- Cost-Effective: Saves money compared to professional alterations or buying new.
- Custom Fit: Allows you to achieve the exact length and fit you desire.
- Convenient: No need to leave home or wait for appointments.
- Skill Building: A simple, useful skill that empowers you for future clothing adjustments.
- Revive Old Jeans: Breathe new life into jeans that have become too loose or long.
- Eco-Friendly: Extends the life of your clothing, reducing waste.
Essential Tools and Materials

Before you start, gather these simple items. Having everything ready makes the process smooth and enjoyable.
- Your Baggy Jeans: The star of the show!
- Fabric Scissors: Sharp scissors dedicated to fabric for clean cuts.
- Measuring Tape or Ruler: For precise length measurements.
- Fabric Chalk or a Washable Fabric Pen: To mark your hemline.
- Pins: To hold the fabric in place while you work.
- Needle: A standard sewing needle will do.
- Thread: Choose a color that matches your jeans or a contrasting one if you prefer visible stitching. A strong all-purpose thread is ideal.
- Iron and Ironing Board: To press creases for neatness and to help set your hem.
- Seam Ripper (Optional): Useful if you need to remove an old hem.
Step-by-Step Guide to Hemming Baggy Jeans By Hand

This method focuses on creating a clean, durable hem that looks intentional. Follow these steps carefully for the best results.
Step 1: Prepare Your Jeans
Start by trying on your baggy jeans to determine the desired length. Stand in front of a mirror and decide where you want the new bottom of the jeans to fall. It’s often best to have someone else help you mark the length, or use a full-length mirror. Consider the shoes you’ll most likely wear with these jeans, as this can affect the perceived length.
Once you’ve decided on the length, take your jeans off and lay them flat on a clean surface, ensuring the legs are smooth and free of wrinkles.
Step 2: Measure and Mark Your Cut Line
Measure from the crotch seam down to where you want the hem to sit. Many people prefer their jeans to hit just at the top of their shoe or slightly above. Remember, you’ll be folding the fabric up, so you need to account for the hem allowance.
A common hem allowance for jeans is about 1 to 1.5 inches (2.5 to 4 cm). This amount allows for a neat double fold, which provides durability and a professional finish. Using your measuring tape or ruler, measure from the existing bottom hem upwards along the leg seam. Mark this measurement with your fabric chalk or pen.
Repeat this on the other leg, making sure to measure from the same point and marking at the same height to ensure an even hem. For complete accuracy, measure from the bottom edge of the existing hem upwards. If the original hem is uneven, measure from the lowest point of the original hem upwards to create a straight line for your new hem.
Now, you need to determine your cut line. This is where you will trim the excess fabric. Add your desired hem allowance (e.g., 1.5 inches) to the desired final length measurement. For example, if you want the jeans to end at 30 inches and your hem allowance is 1.5 inches, your cut line will be at 31.5 inches from the top of the inseam (or measured from the starting point). It’s often easiest to mark your desired final length, and then mark your cut line below it, showing where you’ll trim.
Draw a straight, even line all the way around each leg of the jeans at your calculated cut line. Use your ruler or measuring tape to ensure this line is parallel to the floor when the jeans are laid flat.
Step 3: Cut the Excess Fabric
Using your sharp fabric scissors, carefully cut along the marked line on each leg. Go slowly and steadily to ensure a straight cut. Don’t rush this step, as a clean, straight cut makes hemming much easier and results in a neater finish.
Tip: If you have a difficult time getting a perfectly straight cut, you can use a rotary cutter and a self-healing mat for even greater precision.
Step 4: Create the First Fold (The Double Fold Hem)
Now, you’ll start the hemming process. Take the raw edge of the fabric you just cut and fold it inwards towards the inside of the jeans. The fold should be about 0.5 to 0.75 inches (1.5 to 2 cm). Press this fold down firmly with your iron. This creates a neat-looking raw edge and prepares for the second fold.
Once you’ve pressed the first fold, take this bended section and fold it inwards again. This second fold should be large enough to cover the raw edge and create the final desired hem width. For a standard jean hem, this second fold is usually around 1 inch (2.5 cm). Press this second fold very well with your iron. This double fold encloses the raw edge, preventing fraying and providing a clean, finished look that mimics a factory hem.
Use pins to secure the folded hem in place. Place pins perpendicular to the folded edge, about every 1-2 inches, to hold the fabric snugly.
Step 5: Hand Stitch the Hem
Thread your needle with a piece of thread that is about 18–24 inches long. Tie a knot at one end. For a strong hem, double up your thread by folding it in half and knotting both ends together.
You’ll be using a technique called a blind stitch or a slip stitch. This stitch is designed to be nearly invisible from the outside of the fabric.
Start at the inseam of the doubled-over hem. Insert your needle from the inside of the folded hem upwards, bringing it out just before the pinned edge. Make a very small stitch on the outer fabric of the jean leg, catching just one or two threads. Then, bring your needle horizontally across the inside of the folded hem to the next spot where you want to make a stitch. Insert the needle into the fold and take another small stitch on the outer fabric. Repeat this process, taking small, even stitches on the outside of the jean while making slightly larger stitches on the inside of the folded hem.
How to get a truly invisible stitch:
- Bring your needle out from the folded hem.
- Insert the needle into the main jean fabric just below the folded edge, catching only a thread or two.
- Pull the thread through, creating a tiny stitch on the outside.
- Slide your needle about 0.5 inches (1.25 cm) along the inside of the folded hem.
- Insert the needle into the fold and take another tiny stitch on the outside, and repeat.
Ensure your stitches are small and consistent for the best look. Work your way around the entire circumference of each jean leg. When you reach the starting point, tie off your thread securely with a knot on the inside of the hem.
Step 6: Final Press and Finishing Touches
Once both legs are stitched, remove all the pins. Give the hem a good press with your iron one last time. This will help the stitches lay flat and ensure the hem is crisp and clean.
Try on your newly hemmed jeans and admire your work! You’ve successfully given them a perfect, customized fit.
Alternative Hemming Techniques

While the double-fold blind stitch is highly recommended for a clean, durable finish, other methods can be used depending on the look you want and the fabric.
1. Cuffed Hem (Rolled Hem)
This is a casual look where you fold the jeans up multiple times without permanent stitching. It’s great for a temporary fix or a specific style.
How to do it:
- Determine how much you want to shorten your jeans.
- Fold the raw edge up once by about 1 inch.
- Fold it up again by another 1 inch or more, depending on your desired cuff width.
- Press firmly with an iron.
- Secure each fold with a few hand stitches or sewing machine stitches on the inside so the cuff stays put.
2. Straight Stitch Hem
This is a more visible stitch but can add a decorative element. It’s essentially a single fold hem secured with a straight stitch.
How to do it:
- Cut jeans to desired length, leaving about 1 inch for hem allowance.
- Fold the raw edge up by 0.5 inches and press.
- Fold up again by another 0.5 inches to cover the raw edge, and press again.
- Stitch close to the upper folded edge with a straight stitch, either by hand or machine. Use a matching or contrasting thread.
3. Original Hem Preservation
If you love the worn look of the original hem, you can try to reattach it.
How to do it:
- Carefully use a seam ripper to detach the original hem from the leg.
- Measure and cut the jean leg to the desired length, ensuring you leave enough fabric to reattach the original hem.
- Turn the jean leg inside out.
- Align the original hem with the new bottom edge of the jean leg, right sides together.
- Pin it securely.
- Hand stitch or machine stitch it in place, trying to mimic the original stitch pattern. This requires precision and patience.
- Turn the leg right side out and press.
Tips for Success
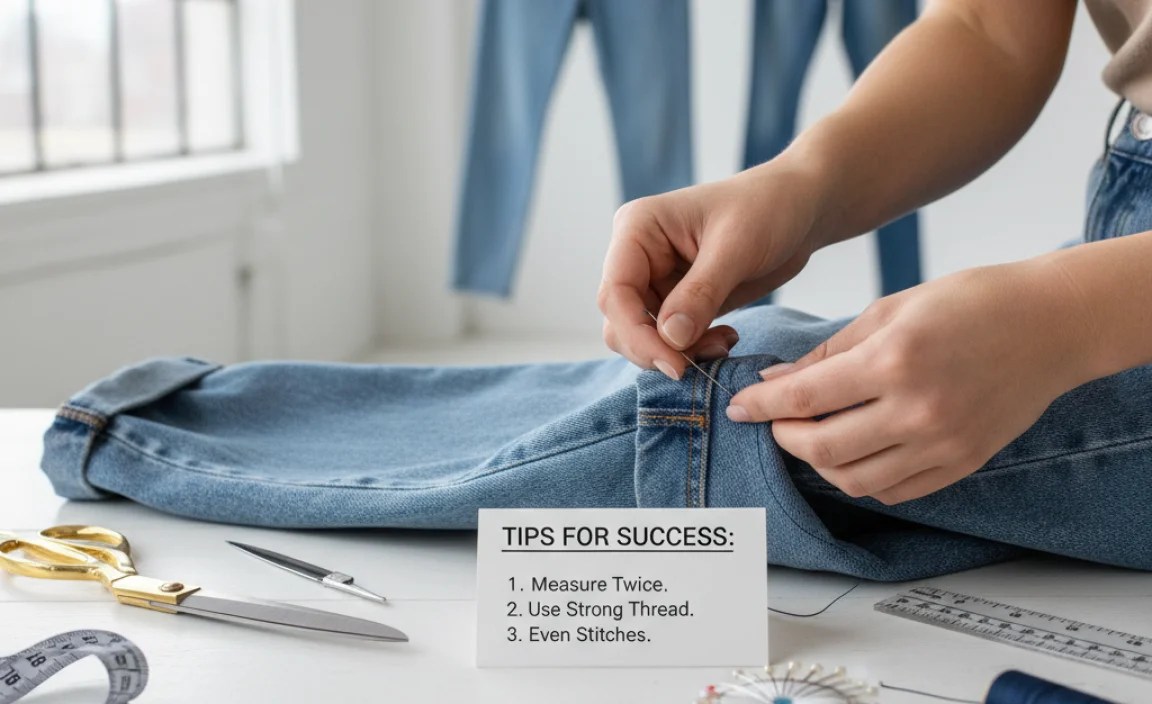
Here are some extra pointers to ensure your hand-hemming project goes smoothly and yields professional results.
- Practice First: If you’re nervous, try hemming a scrap piece of denim or an old fabric scrap first to get a feel for the stitches and tension.
- Thread Color: For an authentic look, use a thread color that closely matches your jeans. For a slightly more visible and classic jean stitch, use a thicker, contrasting thread (like gold or tan) for the exterior stitch if you opt for a straight stitch hem.
- Stitch Length: Keep your hand stitches small and consistent. This is key to a durable and neat-looking hem. Aim for about 1/8 to 1/4 inch between stitches.
- Tension: Don’t pull the thread too tightly, as this can cause the fabric to pucker. Ensure your stitches are firm but not constrictive.
Understanding Fabric and Measurement
Denim can vary in thickness and stretch. Understanding these properties helps in choosing the right hemming technique and ensuring a good fit.
Types of Denim and Their Impact on Hemming
The type of denim can influence how your hem lays. Stiffer, heavier denim holds a crease and a folded hem better. Stretch denim, which contains elastane or spandex, might require more careful handling to avoid distortion.
Here’s a quick look:
| Denim Type | Characteristics | Hemming Considerations |
|---|---|---|
| Raw/Selvedge Denim | Stiff, durable, often 100% cotton. Designed to fade uniquely. Original hems have finished edges. | Holds shape well. Can be difficult to fold initially due to stiffness. Preserving the original hem is often desired. A double-fold hem works beautifully. |
| Stretch Denim | Contains elastane/spandex for comfort and flexibility. Can be 10oz to 14oz. | More prone to stretching out of shape. Use lighter tension when sewing. Ensure the fabric settles back into place before stitching. A blind stitch is ideal to minimize visual impact. |
| Mid-Weight Denim | Common for everyday jeans, around 11oz to 13oz. Good balance of comfort and durability. | Generally easy to work with. Holds a crease well for folded hems. Most hemming techniques work without issues. |
| Lightweight/Summer Denim | Softer, thinner fabric, often under 10oz. Very comfortable in warm weather. | Can be prone to fraying if not hemmed carefully. A double-fold hem is crucial to encase raw edges. May require smaller stitches for a neat finish. |
The Importance of Inseam vs. Outseam Measurements
When hemming jeans, it’s crucial to understand which measurement you’re working with. The inseam is the length from the crotch to the bottom of the leg on the inside of the leg. The outseam is the length from the waistband to the bottom of the leg on the outside.
Most people measure and hem based on the inseam for a consistent leg length. However, if your jeans have a very uneven rise or a unique cut, you might need to be more mindful of the outseam as well to ensure both legs hang correctly.
For a standard, even hem, you’ll want to ensure that your cut line is perfectly straight around the bottom of the leg when laid flat. If you’re unsure, measure the inseam on both legs and mark them. Then, check the outseam length to ensure they match your desired final look.
Frequently Asked Questions (FAQ)
What is the best stitch for hemming jeans by hand?
The blind stitch (or slip stitch) is generally considered the best for hemming jeans by hand because it’s nearly invisible from the outside, giving a very clean, professional finish that mimics machine-sewn hems. It involves catching only a few threads of the main fabric while stitching through the folded hem.
How much fabric should I leave for the hem allowance?
A good hem allowance for jeans is typically between 1 to 1.5 inches (2.5 to 4 cm). This provides enough fabric to create a durable double fold, which neatly encloses the raw edge and prevents fraying, ensuring a lasting hem.
Can I hem jeans if they have frayed edges?
Yes, you absolutely can! If you want to keep a bit of that frayed look, you can trim the excess fabric to your desired length, fold up about 0.5 inches (1.25 cm) to create a small fold, and then stitch along the top of that fold. This secures the fabric while allowing some of the original fray to show. Alternatively, you could try to reattach the original, frayed hem if you carefully removed it.
How do I ensure the hem is even on both legs?
The best way is to lay the jeans flat and smooth out any wrinkles. Measure from the crotch seam down to your desired hem length on both legs. Mark these points. Then, measure from the bottom edge of the existing hem upwards to mark your cut line, ensuring it’s at the same height on both legs. Using a ruler or measuring tape consistently from the same starting point on each leg is key.
What if my jeans are stretch denim?
Stretch denim can be a bit trickier as it can distort. When hemming, use a lighter tension on your thread, take your time, and allow the fabric to settle back into place after each stitch. A double-fold hem with a blind stitch is still recommended. Avoid pulling the fabric taut while sewing, as this can lead to a wavy hem once the tension is released.
How do I achieve a clean, straight cut?
Use a sharp pair of fabric scissors. For best results, lay the jeans flat and smooth, and use a ruler or measuring tape to draw a straight chalk line before cutting. If you have a rotary cutter and mat, they can offer even greater precision for cutting curved or straight lines.


