


Is your favorite pair of jeans a bit too long and baggy? You can easily hem them yourself! This guide shows you how to get that perfect fit without complicated tools, making your jeans look custom-made and stylish in no time. Learn simple techniques for a neat finish.
How To Hem Baggy Jeans: Effortless Guide
You know that feeling – your go-to jeans are just a little too long, pooling around your ankles and making you feel less put-together. It’s a common problem, but thankfully, fixing it is simpler than you might think. No need to spend money on hemming services or struggle with bulky fabric. With a few basic tools and some clear steps, you can transform those baggy jeans into a perfectly fitting pair. Let’s get started and give your favorite denim a new lease on life.
Why Hemming Baggy Jeans Matters

Baggy jeans that are too long can do more than just look a bit sloppy. They can shorten your legs visually, make it harder to walk comfortably, and even get damaged more easily by dragging on the ground. A proper hem ensures your jeans fit your body well, enhancing your silhouette and making them much more versatile. It’s a small change that makes a big difference in how your clothes look and feel. Getting the length just right can turn an okay pair of jeans into your absolute favorite. We’ll focus on techniques that are straightforward and deliver a professional-looking result, even if you’ve never sewn before. This guide assumes you want to know “how to hem baggy jeans without bleach”, ensuring you maintain the original look of your denim.
Gathering Your Hemming Supplies

Before we dive into the steps, let’s make sure you have everything you need. You don’t need a sewing machine for most of these methods, making it accessible for everyone. Having the right tools will make the process smoother and the results neater.
- Fabric Scissors: Sharp scissors are crucial for clean cuts.
Consumer protection guidelines often highlight the importance of good tools for garment care. - Measuring Tape or Ruler: For accurate length measurement.
- Fabric Chalk or a Disappearing Ink Pen: To mark your hemline.
- Pins: To hold the fabric in place while you work.
- Iron and Ironing Board: For pressing seams and creating crisp folds.
- Thread: Choose a color that matches your jeans as closely as possible.
- Sewing Needle: A standard needle will suffice for hand-sewing.
- Optional: Seam Ripper: If you need to undo any previous hemming or are using a method that involves removing the original hem.
- Optional: Fabric Glue or Hem Tape: For no-sew options.
Choosing Your Hemming Method
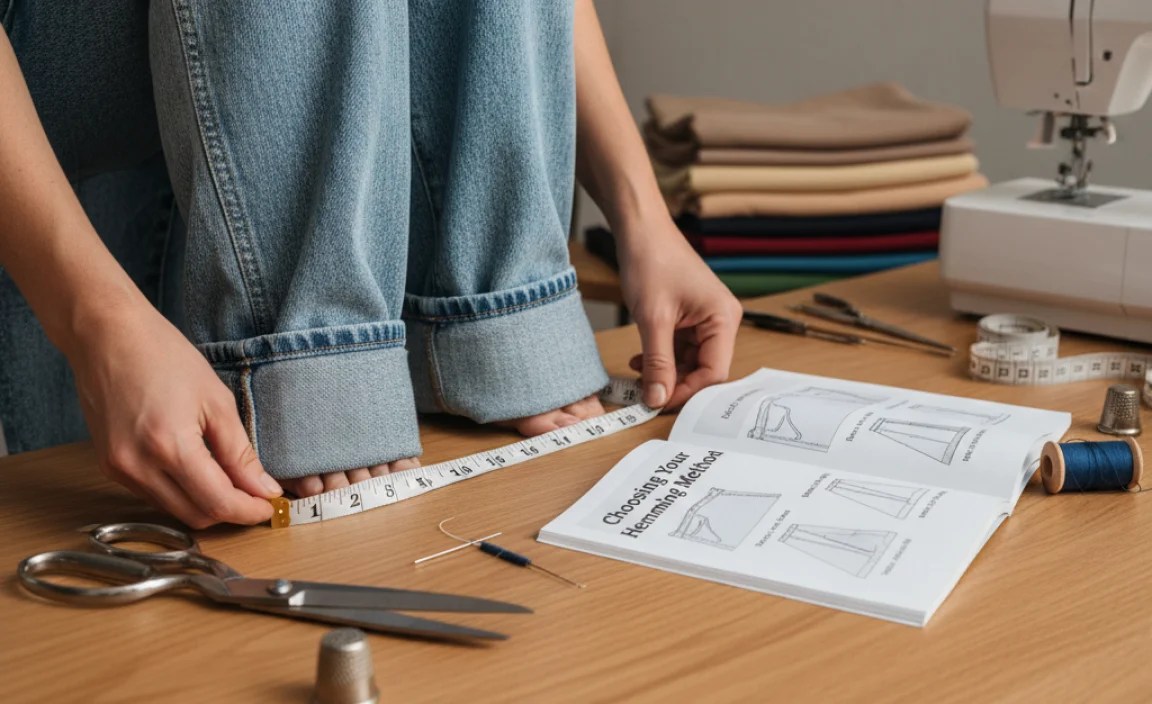
There are several ways to hem your jeans, each with its own advantages. We’ll explore a few popular and effective methods, suitable for beginners.
Method 1: The No-Sew Hem with Hem Tape (Quickest & Easiest)
This is the go-to for speed and ease. Hem tape is a fusible webbing that melts with heat from an iron to bond fabric together. It’s perfect for a quick fix or for those who want to avoid sewing altogether.
Steps for No-Sew Hemming:
- Prepare Your Jeans: Wash and dry your jeans to pre-shrink them. Try them on to determine the desired length. Lay them flat on a table.
- Mark the Length: Decide how much you want to shorten them. A typical hem allowance is 1-2 inches. Using fabric chalk or a pen, mark a line all around one leg where you want the bottom edge to fall. Then, fold the leg up along this line and press a sharp crease with your iron. This fold is where the finished hem will sit.
- Measure for Hem Tape: Fold the bottom of the jean leg up to meet the crease you just made. This creates a double fold. Measure the width of this folded section. This is the amount of fabric you’ll be folding away.
- Cut the Hem Tape: Cut a piece of hem tape equal to the circumference of the jean leg, adding about an inch extra.
- Insert the Hem Tape: Carefully unfold the bottom hem of the jean leg (the part that was dragging on the floor). Lay the hem tape inside the folded section, against the inside of the fabric, so it sits between the two layers of denim where you want them to be bonded. Ideally, position it slightly up from the raw edge of the original hem.
- Iron and Bond: Following the instructions on your hem tape packaging (they usually require medium-high heat with no steam), iron over the folded section. Press firmly for the recommended time (often 10-15 seconds per section). Lift the iron and press again to ensure a strong bond.
- Check the Bond: Let it cool completely, then gently tug on the layers to ensure they are securely attached. Repeat on the other leg.
Pros and Cons of No-Sew Hemming:
| Pros | Cons |
|---|---|
| Very fast and requires no sewing skills. | May not be as durable as a sewn hem and can sometimes detach after multiple washes. |
| Creates a clean, invisible finish if done carefully. | Requires an iron and the specific hem tape product. |
| Good for quick alterations and temporary fixes. | Might add a slight stiffness to the hem edge. |
Method 2: The Basic Sewn Hem (Durable & Classic)
This is the most traditional and durable method. It involves folding the fabric twice and sewing it in place. You can do this by hand or with a sewing machine.
Steps for Basic Sewn Hemming:
- Prepare Your Jeans: As with the no-sew method, wash and dry your jeans. Try them on and lay them flat. Decide on your desired length and mark a line using fabric chalk or a pen.
- Create the First Fold: Fold the bottom of the jean leg upwards along your marked line. Press this fold firmly with your iron. This crease marks where the finished hem front will lie.
- Create the Second Fold (Hem Allowance): Now, fold the raw edge of the fabric up towards the inside of the pant leg, so it meets the first crease you made. You’re essentially enclosing the raw edge. The amount of fabric you’re folding up here is your hem allowance. For jeans, 1 to 1.5 inches is common. Press this second fold firmly.
- Pin in Place: Secure the folded hem with pins, placing them about every 2-3 inches. Make sure the pins go through both layers of denim and are perpendicular to the edge.
- Hand Sewing:
- Thread your needle with a piece of thread about 18-24 inches long, tying a knot at the end.
- Start from the inside of the pant leg, near a seam. Pull the needle through to the outside of the hem.
- Make a small stitch back into the fold, catching just a thread or two of the front layer of denim.
- Now, bring the needle back to the inside of the pant leg.
- Take another small stitch on the inside, going through the fabric of the folded hem allowance.
- Continue this “spinach stitch” (also known as a blind stitch or hemming stitch) all the way around the leg. The goal is to catch minimal fabric on the outside so the stitches are nearly invisible.
- When you reach the starting point, tie off the thread securely with a knot on the inside of the hem.
- Machine Sewing (Optional): If using a sewing machine, set it up with a sturdy needle (like a denim needle) and doubled thread if necessary. Topstitch along the folded edge from the outside of the pant leg, sewing as straight as possible. You can also sew from the inside for a more invisible finish, similar to the hand-sewing method.
- Press Again: Once sewn, press the hem with your iron for a crisp finish. Repeat on the other leg.
Pros and Cons of Basic Sewn Hemming:
| Pros | Cons |
|---|---|
| Very durable and long-lasting. | Takes more time than no-sew methods. |
| Can be done by hand or with a sewing machine. | Requires some basic sewing skill. |
| Provides a professional-looking finish. | Hand-sewing can be tedious for some. |
Method 3: Keeping the Original Jean Hem (For a Casual Look)
Sometimes, the frayed or cuffed hem of your original jeans is part of their charm. If your jeans are too long, you might want to shorten them while preserving that original bottom edge. This can create a perfectly imperfect, casual look that many people love.
Steps for Preserving Original Hem:
- Try On and Mark: Put on your jeans and determine exactly where you want the new hem to fall. Have a friend mark them with pins or use fabric chalk/a disappearing pen to mark the desired finished length. Remember to account for the thickness of the original hem.
- Lay Flat and Measure: Take off the jeans and lay them flat. Measure from your marked line down to the bottom of the original hem. This measurement is crucial. The original hem will now be folded up and secured to the inside of the leg.
- Prepare the Leg: Cut off the excess fabric below your marked line, leaving about 1-2 inches of fabric from the original hem band.
- Unpick the Original Hem: This is the most delicate part. Using a seam ripper, carefully unpick the stitches holding the original hem band to the leg of the jeans. Work slowly to avoid tearing the fabric. Once unpicked, detach the hem band.
- Press the Original Hem Flat: Iron the detached hem band so it’s flat. Also, iron the raw edge of the jeans where the hem band was attached.
- Reattach the Hem: Lay the jean leg flat. Place the raw edge of the jean leg against the inside of the pressed-open original hem band, aligning them as they were originally.
- Pin Securely: Pin the hem band back onto the jean leg, ensuring it’s straight and even.
- Sewing: You can machine sew this by topstitching from the outside, following the line of the original stitching (or just below it). Alternatively, hand-sew it for a more controlled approach. Use a strong thread that matches the original.
- Finish: Press the entire hem area. The original hem should now be at your desired length.
This method requires a bit more patience, especially the unpicking phase. However, the result is a unique look that retains the character of your favorite jeans. For more on denim care and alteration tips, look to resources like National Archives consumer protection guides.
Pros and Cons of Preserving Original Hem:
| Pros | Cons |
|---|---|
| Maintains the original look and thickness of the jean hem. | Requires careful unpicking and reattachment. |
| Creates a unique, casual, and stylish appearance. | Can be time-consuming and requires precision. |
| Ideal for keeping the “broken-in” feel of your favorite jeans. | Not suitable if you want a clean, modern hemline. |
Tips for a Flawless Finish

Whether you’re sewing or using hem tape, a few extra steps can make your hemming look professionally done:
- Always Measure Twice, Cut Once: This old adage is especially true for hemming. Ensure your marked line is straight and that both legs are the exact same length.
- Use Sharp Tools: Dull scissors or needles can lead to ragged edges and uneven stitches.
- Pressing is Key: Don’t skip the iron. Pressing each fold before sewing and pressing the final hem will create sharp, clean lines that make a huge difference.
- Match Your Thread: Use a thread that matches your jeans as closely as possible for a less visible stitch. For very visible topstitching, you might want to use a contrasting color if that’s the style of your jeans.
- Practice on Scraps: If you’re unsure about your sewing skills, practice your stitch on a scrap piece of denim first.
- Consider the Fabric: Stiffer denim will hold a crease better than very soft or stretchy denim. Adjust your hemming approach accordingly.
Frequently Asked Questions (FAQ)
Q1: How much fabric should I leave for hemming jeans?
For most jeans, a hem allowance of 1 to 1.5 inches is sufficient. This allows for a double fold, which encloses the raw edge and provides a neat finish.
Q2: Can I hem jeans without a sewing machine?
Absolutely! You can use hem tape and an iron for a no-sew option, or hand-sew a hem using a basic hemming stitch. Both methods can yield excellent results.
Q3: How do I make sure both legs are the same length?
The best way is to lay the jeans flat and measure carefully. Pin one leg to your desired length, then keep that leg as your guide while you measure and mark the second leg to match it exactly.
Q4: What kind of needle and thread should I use for hemming jeans?
For hand-sewing, a standard sewing needle is usually fine, but a denim needle is recommended if you have one. Use strong polyester thread that matches your jeans. If using a sewing machine, a denim needle (size 90/14 or 100/16) and heavy-duty thread are best.
Q5: My jeans are stretch denim. Will that affect hemming?
Stretch denim can be a bit trickier. If hand-sewing, use a slightly longer stitch to accommodate the stretch. If using a machine, a stretch stitch or a zig-zag stitch can prevent the seam from breaking when the fabric stretches. For no-sew methods, ensure the hem tape is suitable for knits or stretch fabrics if available.
Q6: How do I hem jeans without making them look stiff or bulky?
Using a thimble to push the needle through can help avoid stretching the fabric unevenly. Pressing each fold firmly also helps create a crisp line. For no-sew methods, ensure you’re not using too much hem tape and that it’s ironed on smoothly. Keeping the hem allowance to 1-1.5 inches also prevents excessive bulk.
Q7: How do I hem jeans without bleach or changing their color?
All the methods described (no-sew with hem tape, basic sewn hem, and preserving original hem) do not involve bleach or harsh chemicals. They focus on altering the length and shape of the fabric itself, leaving the original color and wash of your jeans intact. The key is to use techniques that work with the existing fabric.
Conclusion
Baggy jeans that are too long no longer have to be a frustration. With these straightforward hemming methods, you can achieve a custom fit that makes your favorite denim look and feel fantastic. Whether you opt for the speedy no-sew approach with hem tape, the classic durability of a sewn hem, or the characterful preservation of the original cuff, the power to tailor your jeans perfectly is in your hands. Remember to measure carefully, press your folds, and use sharp tools for the best results. Now go forth and conquer those pesky long pant legs – your wardrobe (and your confidence) will thank you.


