Quick Summary: Learn how to hem baggy jeans effortlessly for a perfect fit. This guide provides simple, step-by-step instructions for a clean, stylish look without needing advanced sewing skills or a washing machine.
How to Hem Baggy Jeans: Proven Effortless Style
Do your favorite jeans always seem a little too long, pooling around your ankles? It’s a common problem, and one that can seriously affect the look of an outfit. Baggy jeans that don’t fit right can make you feel sloppy, not stylish. But don’t worry! You don’t need to be a master tailor or even own a sewing machine to fix this. With a few basic tools and this straightforward guide, you can easily hem your baggy jeans to achieve a polished, put-together appearance.
We’ll walk you through everything, from understanding what “baggy” truly means for your jeans to achieving a crisp, clean hem that looks like it was done by a professional. Get ready to transform those ill-fitting favorites into your go-to denim!
Why Hemming Your Baggy Jeans Matters

The right fit in denim is crucial for both comfort and style. Jeans that are too long can create a “puddled” effect at your shoes, making your legs appear shorter and your overall silhouette look a bit unkempt. Conversely, a perfectly hemmed pair of jeans can instantly elevate your look, making you appear more polished and confident. Hemming isn’t just about removing excess fabric; it’s about tailoring your wardrobe to fit you perfectly, regardless of whether you’re wearing sneakers, boots, or heels. It’s a simple alteration that makes a huge difference.
Understanding “Baggy” and Your Jeans

Before we grab a needle and thread, let’s define what “baggy” means in the context of your jeans. Baggy can refer to a few things:
- Overall Roominess: The entire leg of the jean is loose and wide.
- Excess Length: The denim bunches up at the ankle.
- Low Rise Issues: The waist sits too low, making the overall proportion feel off.
For this guide, we’re primarily focusing on tackling excess length and minor roominess that makes the jeans look a bit too big overall. If your jeans are excessively wide in the thigh or seat, hemming the length will still improve the look, but you might consider a more involved tailoring process for a dramatically different fit.
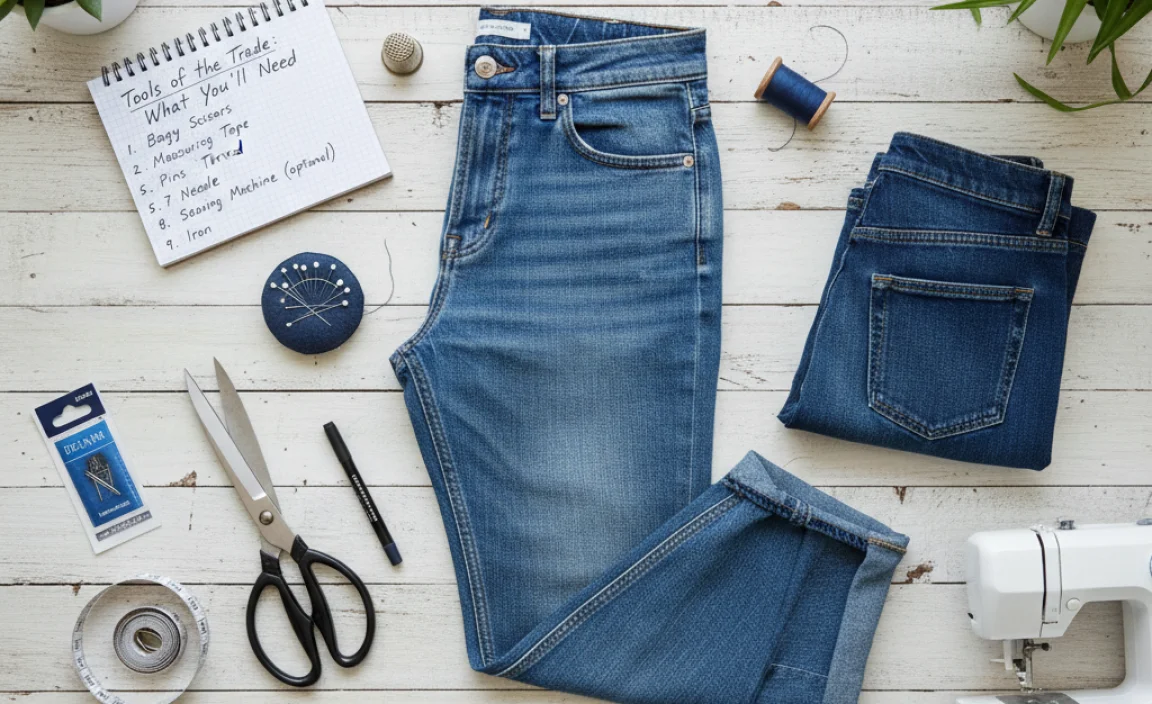
Tools of the Trade: What You’ll Need

You don’t need a fancy sewing studio to get a great hem. Here are the simple tools that will help you achieve a neat finish. Having these on hand makes the process smooth and efficient.
- Fabric Scissors: Sharp scissors are key for a clean cut. Dull scissors can snag the fabric and create an uneven edge.
- Measuring Tape or Ruler: For precise measurements to ensure an even hem.
- Fabric Chalk or a Washable Fabric Marker: To mark where you’ll cut and fold.
- Iron and Ironing Board: Essential for pressing creases and creating sharp folds.
- Thread: Choose a color that matches your jeans. For most denim, a dark blue, black, or tan thread works well.
- Sewing Needles: A standard sewing needle will work, but a denim needle is even better if you have one, as it’s designed to pierce thicker fabrics.
- Straight Pins: To hold the fabric in place while you sew.
- Your Baggy Jeans: Of course!
- Optional: Hemming Tape (Fusible Web): A no-sew alternative for a quick fix.
Method 1: The Classic Sewn Hem (For Long-Lasting Style)

This is the most durable and professional-looking method. It involves a bit of hand-sewing but is surprisingly simple.
Step 1: Try On and Mark
Put on the jeans you plan to hem. Wear the shoes you’ll typically wear with them. Stand in front of a mirror. Pinch the excess fabric at the hem to determine the desired finished length. Pin the fabric in place to hold your chosen length. Make sure the hem looks even all the way around. Carefully take off the jeans, keeping the pins in place.
Step 2: Measure and Mark the Cut Line
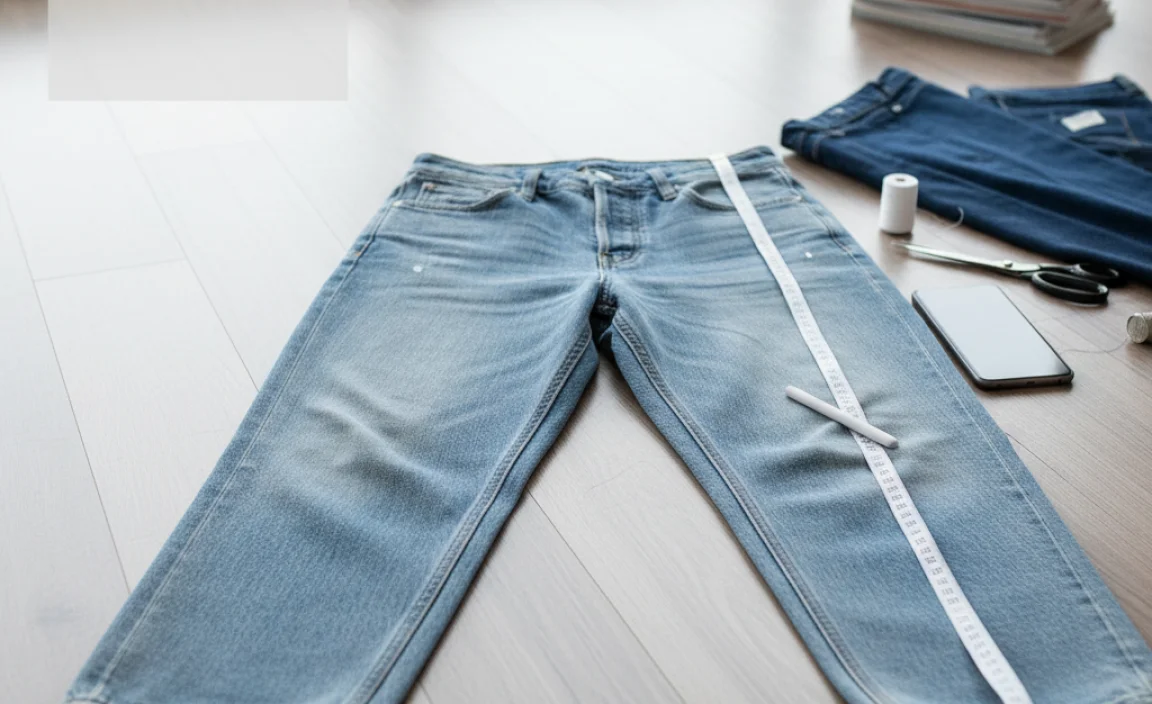
Lay the jeans flat on a table or the floor. Measure from the pinned hem up to the desired finished length. Use your fabric chalk or marker to draw a line indicating where you will cut. Remember to account for the amount you’ll fold for the new hem. A good rule of thumb is to add about 1 inch (or 2.5 cm) below your marked finished length for the fold. This will be your cut line. Ensure this line is perfectly straight and parallels the original hem.
Step 3: Cut Away Excess Fabric
Using your sharp fabric scissors, carefully cut along the marked cut line. Work slowly to ensure a straight, clean line. If your jeans have a “whiskering” or decorative detail near the original hem, try to preserve as much of it as possible if it’s part of the look you want.
Step 4: Create the New Hem Fold
Now, fold the raw edge of the fabric upwards by about ½ inch (1.25 cm) towards the inside of the jean leg. Press this fold firmly with your iron. Then, fold it up again by another ½ inch (1.25 cm) so that the raw edge is completely enclosed within the fold. Press this second fold sharply with your iron. Pin the folded hem in place.
Step 5: Hand-Sew the Hem
Thread your needle with a matching color of thread. Tie a knot at the end of the thread. Starting from an inside seam, begin to stitch along the top edge of the folded hem. Use a simple running stitch or a blind stitch for a more invisible finish. A blind stitch involves catching just a thread or two of the jean fabric above the folded hem and then passing the needle through the folded hem. Repeat this, keeping your stitches small and consistent. Continue all the way around the leg. When you reach the beginning, tie off your thread securely and snip any excess.
For extra durability, you can go back and add a second line of stitching just below the first, mimicking the original factory hem. This also adds a nice detail.
Step 6: Finishing Touches
Once both legs are hemmed and sewn, give the hems a final press with your iron to ensure they are crisp and lie flat. Try on your newly hemmed jeans!
Method 2: The No-Sew Hem (Quick & Easy Fix)

If you’re short on time or prefer not to sew, hemming tape (also known as fusible web) is a fantastic alternative. It uses heat from an iron to bond the fabric together.
Step 1: Measure and Mark
This step is the same as in the sewn method. Put on your jeans with the shoes you plan to wear. Determine your desired length and pin the excess fabric. Take off the jeans and lay them flat. Measure up from the pinned hem to your desired finished length. Mark your cut line, remembering to add about 1 inch (2.5 cm) below that for the fold.
Step 2: Cut Excess Fabric
Carefully cut along your marked cut line with sharp fabric scissors.
Step 3: Prepare for Hemming Tape
Fold the raw edge up by ½ inch (1.25 cm) towards the inside of the jean leg and press with an iron. Then, fold it up again by another ½ inch (1.25 cm) so the raw edge is concealed. Press this second fold firmly with your iron. Pin the hem securely in place.
You can also skip the pinning and instead use fabric clips if you have them.
Step 4: Apply the Hemming Tape
Unfold the second fold of the hem just enough to slide a strip of hemming tape between the two layers of fabric. Ensure the hemming tape runs the entire length of the hem. Follow the manufacturer’s instructions for your specific hemming tape, as application times and temperatures can vary. Generally, you’ll place a hot dry iron onto the taped area for a specified number of seconds.
You might need to press over each section of the hem multiple times to ensure a strong bond. Refer to the hemming tape packaging for best results. Some brands recommend placing a damp cloth over the tape before ironing.
For a professional finish, you can sometimes find hemming tape that is very thin and almost invisible once applied. These offer a clean look without bulk.
Step 5: Final Press and Check
Once the hot iron has fused the hemming tape, let the hem cool completely before removing the pins. Give the hem a final press to ensure it’s smooth. Turn the jean leg right side out and give it a final check.
For a stronger bond, you can turn the jean leg inside out and repeat the ironing process on the inside seam of the hem.
Choosing the Right Hemming Method
Both sewing and hemming tape have their advantages. Here’s a quick comparison to help you decide:
| Feature | Sewn Hem | No-Sew Hem (Hemming Tape) |
|---|---|---|
| Durability | High. Very long-lasting. | Good, but may weaken with frequent washing/wear. |
| Appearance | Professional, can be made almost invisible with blind stitch. Allows for original jean hem details if careful. | Generally neat, but can add slight stiffness or a visible line depending on tape thickness. |
| Tools Required | Needle, thread, scissors, measuring tape, iron. (Denim needle recommended) | Hemming tape, scissors, measuring tape, iron. |
| Skill Level | Beginner sewist, requires basic stitch knowledge. | Absolute beginner, no sewing skills needed. |
| Time Investment | Moderate. Takes longer than no-sew. | Quickest option for an immediate fix. |
| Washing Machine Use | Can withstand regular machine washing and drying. | Generally machine washable, but gentler cycles and air drying are recommended for longevity. Check tape instructions. |
Hemming Different Jean Styles
The techniques above apply to most straight-leg, bootcut, and some skinny jeans. However, some styles might require slight adjustments:
- Wide-Leg or Flare Jeans: These often have a heavier hem or a more dramatic flare. Be sure to measure and mark carefully to maintain the intended shape of the flare. You might need to trim more fabric here.
- Jeans with Original Cuffs or Details: If your jeans have a factory-folded cuff that you want to keep, you’ll need to carefully unravel it. Measure the original cuff width and factor that into your new hem length. Then, re-fold and sew or use tape to recreate a similar cuff if desired, or proceed with a standard hem below it. For inspiration on restoring original hems, resources from denim restoration sites can offer insights into preserving unique finishes.
- Raw Hem Jeans: If you’re looking to create a raw hem, you’ll cut to the desired length and then intentionally fray the edges by washing and drying the jeans, and gently teasing out threads. This requires a different approach.
Pro Tips for a Perfect Hem
To ensure your hemming project looks its best, keep these tips in mind:
- Always Measure Twice, Cut Once: Precision is key. Double-check your measurements before making any cuts.
- Use Sharp Tools: Dull scissors and worn-out needles will make the job harder and the result less professional.
- Iron, Iron, Iron: Pressing each fold firmly with your iron is crucial for crisp lines and a neat finish, whether sewing or using tape.
- Match Your Thread: For a seamless look, use thread that is as close a match as possible to your jeans. Dark denim might look best with dark blue or black thread.
- Consider the Original Hem: If your jeans have a distinctive original hem (e.g., a thicker selvage edge), try to preserve it if you’re aiming for an authentic look. Unpick the original hem carefully, cut the leg to the new length, and then reattach the original hem. This is more advanced but yields the best results for specific styles.
- Work in Good Light: Ensure you have ample light to see your markings and stitches clearly.
- Practice Makes Perfect: If you’re nervous, try hemming an old pair of pants first.
Common Blunders to Avoid
Even with the best intentions, a few missteps can happen. Here are common mistakes to steer clear of:
- Uneven Hemlines: Not measuring carefully or not holding the fabric evenly can result in one leg being shorter than the other, or the hem dipping on one side.
- Cutting Too Much Fabric: This is irreversible! It’s always better to err on the side of leaving a little extra length, as you can always trim more off.
- Using the Wrong Scissors: Paper scissors aren’t designed for fabric and can leave you with a jagged edge.
- Skipping the Pressing Step: An un-pressed hem will look messy and won’t lay flat, undermining the entire effort.
- Stitching Too Loosely or Too Tightly: Loose stitches can look sloppy and may break easily. Stitches that are too tight can pucker the fabric.
- Not Trying Them On With Shoes: The height of your shoes can significantly impact how long your pants should be. Always try on with the intended footwear.
Frequently Asked Questions About Hemming Jeans
Q1: How much fabric should I leave for a new hem?
A1: For most jeans, you’ll want to leave about 1 inch (2.5 cm) of fabric below your desired finished length. This allows for a ½-inch double fold, creating a clean, enclosed edge.
Q2: Can I hem jeans without a sewing machine?
A2: Absolutely! You can easily hem jeans by hand with a needle and thread, or use no-sew hemming tape and an iron for a quick and effective solution.
Q3: How do I make sure both legs are the same length?
A3: The best way is to lay the jeans flat, pin the first leg to your desired length, then carefully place the second leg directly on top of the first, matching the seams and the pinned hemline. Mark and cut the second leg while it’s aligned with the first.
Q4: What kind of thread should I use for hemming jeans?
A4: It’s usually best to use a thread that matches the color of your jeans. For classic denim, a dark blue, black, or tan thread works well. For a stronger, more durable stitch, consider using a heavy-duty or denim-specific thread.
Q5: How do I hem jeans that are too baggy, not just too long?
A5: Hemming primarily addresses length. If they are also baggy overall, you’ll need to take in the side seams or inseams. For a simple fix, you can try creating a slightly narrower double fold. For significant bagginess, consider professional tailoring.
Q6: Will hemming jeans affect the original look?
A6: Yes, if you cut off the original hem and create a new one, it will look different. However, if you carefully recreate the original stitch line or use a skilled hand-sewing technique, you can get a very similar professional finish. Preserving the original cuff is a more advanced technique.
Q7: How often should I wash hemmed jeans?
A7: Treat your hemmed jeans like any other garment. For sewn hems, regular machine washing is fine. For no-sew hems, consider gentler wash cycles and air drying to preserve the integrity of the hemming tape.
Conclusion: Embrace Your Perfectly Fitted Jeans
Transforming baggy, ill-fitting jeans into a pair that perfectly complements your style is entirely within your reach. Whether you prefer the classic durability of a sewn hem or the speed and simplicity of a no-sew approach with hemming tape, these methods provide proven, effortless ways to achieve store-bought precision right at home. By following these clear, step-by-step instructions, armed with just a few basic tools, you can confidently tackle this common wardrobe issue.
Don’t let ill-fitting denim hold you back any longer. With a little patience and these practical techniques, you’ll have your favorite jeans sitting at the ideal length, ready to boost your confidence and refine your look. Enjoy the satisfaction of a perfect fit and the renewed versatility of your updated denim!


