


Don’t let your bootcut jeans drag! This guide makes hemming them a breeze, even if you’ve never sewn before. Get perfectly-fitting jeans with simple, clear steps and common-sense tips for a professional look at home.
Tired of your favorite bootcut jeans pooling around your ankles or getting frayed edges? It’s a common frustration, but one that’s surprisingly easy to fix yourself. You don’t need to be a sewing expert to achieve a neat hem. With a few basic tools and some clear instructions, you can adjust the length of your bootcut jeans to perfection. This guide will walk you through every step, making the process simple and stress-free. Prepare to give your jeans a custom fit and a polished finish!
Why Hemming Bootcut Jeans is Easier Than You Think

Bootcut jeans are designed to flare out slightly at the ankle, which can make them tricky to hem. The wider leg opening means you need to be precise to ensure the flare looks natural after shortening. The good news is that bootcut styles are actually quite forgiving for beginners. The inherent width of the leg opening provides a bit more wiggle room compared to very slim or straight-leg styles. This means minor imperfections are less likely to be noticeable. Plus, denim is a sturdy fabric that stands up well to home hemming, and a slightly thicker thread can mask any beginner-level stitches. It’s a fantastic way to save money and revive jeans that are just a little too long.
Gathering Your Hemming Essentials
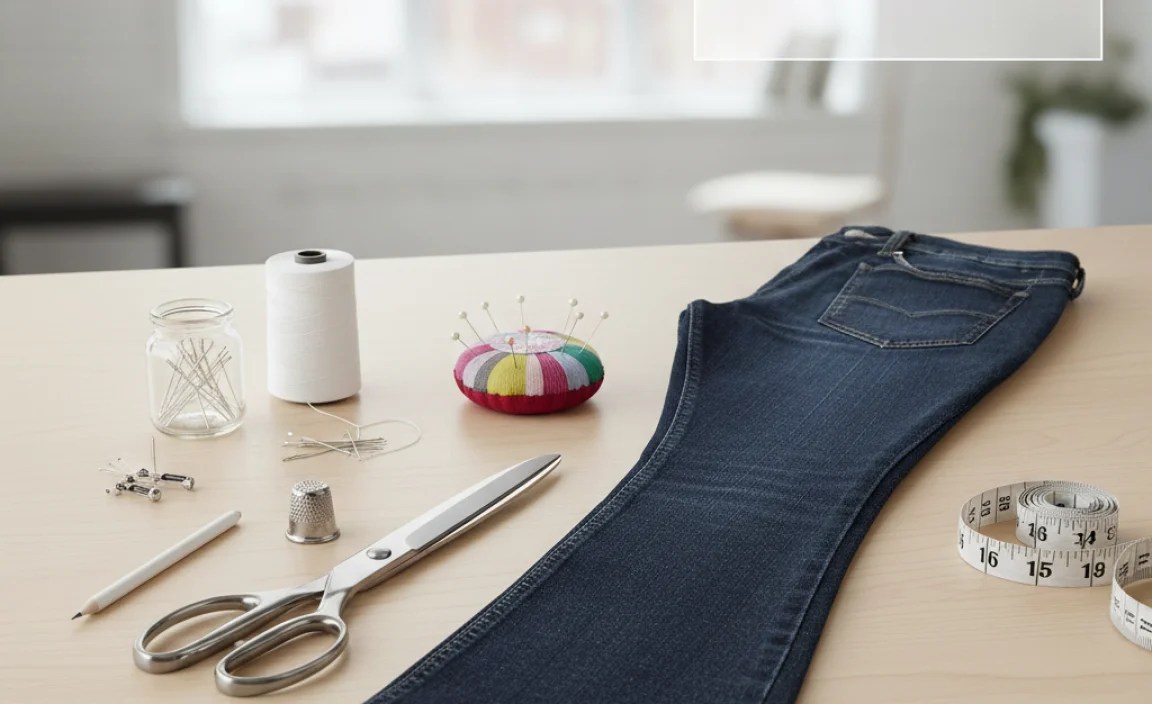
Before you start cutting and sewing, having the right tools makes a world of difference. You don’t need a fancy sewing machine for this project; many successful hems can be done by hand. Here’s what you’ll need:
Essential Tools and Materials:
- Your Bootcut Jeans: Make sure they are clean and dry.
- Fabric Scissors: Sharp scissors designed for fabric will make clean cuts.
- Measuring Tape or Ruler: For accurate measurements.
- Fabric Chalk or a Disappearing Ink Pen: To mark your cutting line.
- Straight Pins: To hold the fabric in place while you work.
- Sewing Needle: A standard sewing needle is fine.
- Thread: Choose a thread color that closely matches your jeans. For a more authentic look, consider using a slightly thicker “jeans” or “denim” thread.
- Iron and Ironing Board: To press seams and creases.
- Optional: Sewing Machine: If you have one and are comfortable using it, it can speed up the sewing process.
- Optional: Seam Ripper: In case you make a mistake or want to remove the original hem.
The No-Fuss Measurement Process

Getting the measurement right is the most crucial step. Measure twice, cut once is the golden rule here!
Step 1: Try On Your Jeans
Wear the shoes you typically wear with your bootcut jeans. This is vital because different heel heights or shoe styles will change how your jeans fall on your feet. Stand in front of a full-length mirror.
Step 2: Determine Your Ideal Length
Let your jeans lay naturally. You want them to just graze the top of your shoes, or have a slight break (where the fabric folds slightly) above the sole. Avoid letting them puddle on the floor, as this looks messy and can cause excessive wear. If you prefer a cleaner look with no bunching on your shoes, aim for the hem to be about half an inch to an inch above your shoe’s sole.
Step 3: Mark the First Pant Leg
Using your fabric chalk or disappearing ink pen, make a small mark on the outer seam of one pant leg where you want the hem to fall. It’s often easiest to mark this on the side where your shoe might obscure little imperfections.
Step 4: Measure and Mark the Second Pant Leg
This is where precision really matters. Fold the jeans in half, aligning the inseam and outer seam carefully. Then, measure from the marked spot on the first pant leg down to the corresponding spot on the second pant leg to ensure they are the exact same length. Mark the second leg. You can also pin the first leg at your desired length and then carefully fold it over and mark the second leg while it’s pinned.
A common mistake is to simply measure the inseam and outer seam separately. While you can do this, ensuring the jeans are perfectly aligned when folded is key. For bootcut jeans, the outer seam is usually longer than the inseam. Measuring a consistent point across both legs after folding prevents a lop-sided hem.
Cutting with Confidence
Once you’ve marked where you want to cut, it’s time to make the cut. This is less intimidating than it sounds!
Step 5: Add Your Hem Allowance
You need to leave extra fabric for the actual hem. A standard hem allowance for jeans is about 1.5 to 2 inches. This gives you enough material to create a neat double fold. Add this amount below your marked cutting line. For example, if your desired hem falls at the 1-inch mark on your ruler from the floor, you’ll cut at the line that is 1.5 to 2 inches lower than that. Mark this new cutting line all the way around both pant legs.
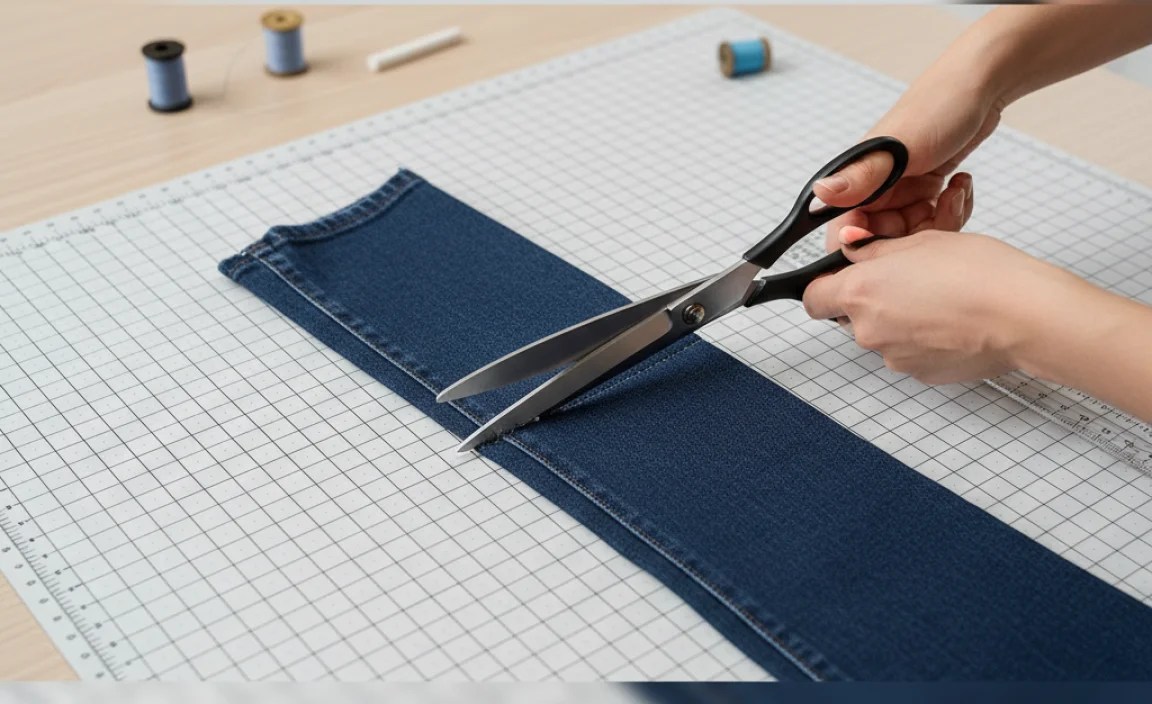
Step 6: Cut Along Your New Line
Carefully cut through both layers of fabric along the marked cutting line. Try to make your cut as straight and even as possible. If you’re worried about wobbly lines, you can measure and mark dashes all the way around your circumference, then connect them with your marker before cutting. Smooth fabric makes for a straighter cut.
The Art of the Fold: Creating Your Hem

This is where a professional finish truly begins. For bootcut jeans, a double fold is recommended to hide the raw edge and create a clean, durable hem that mimics the original.
Step 7: The First Fold
Take the raw edge of the fabric you just cut and fold it upwards towards the inside of the pant leg by about 0.5 to 0.75 inches. Use your fabric chalk to mark this fold line. Press this fold flat with your iron. This creates a small, neat edge.
Step 8: The Second Fold
Now, fold the fabric up again, this time folding the already-folded edge upwards. The second fold should be wide enough to encase the raw edge and meet or slightly overlap the original hemline of your jeans. A fold of about 1 to 1.25 inches is usually sufficient. Press this second fold firmly with your iron. Ensure the raw edge is completely hidden inside this double fold.
Step 9: Pinning the Hem
Once the hem is pressed and you’re happy with how it looks, use straight pins to secure the folded hem in place. Place the pins perpendicular to the folded edge, about every 1-2 inches. This keeps the hem from shifting as you sew.
Sewing Your New Hem: Hand vs. Machine
You have two main options for sewing your hem, each with its own advantages.
Option A: Sewing by Hand
This is a great option for beginners and requires no special equipment. The key is a small, consistent stitch.
The Blind Hem Stitch (or Catch Stitch):
This stitch is ideal because it’s nearly invisible from the outside of the jeans.
- Start by threading your needle with a length of thread that’s about as long as your forearm. Tie a knot at the end.
- Begin sewing from the inside of the pant leg, near the top of the folded hem allowance.
- Pick up a tiny thread from the jean fabric just above the folded hem.
- Then, pick up a small loop of fabric from the folded hem itself. Alternate these tiny stitches.
- Try to make your stitches on the jean fabric about 0.5 inches apart. The stitches on the folded hem should be smaller.
- Continue around the entire leg.
- When you reach the beginning, tie off your thread securely with a knot on the inside of the pant leg.
If the blind stitch seems too daunting initially, a small, neat running stitch can also work. Just ensure your stitches are small and as even as possible, and that you are catching both the folded hem and the original jean fabric. For extra durability, you can backstitch a few stitches at the beginning and end.
Option B: Sewing with a Machine
If you have a sewing machine, this is the fastest method.
- Thread your machine with a matching-colored thread. If you have a “jeans” or “denim” needle for your machine, use it! They are stronger and designed for thicker fabrics.
- Set your machine to a short, straight stitch.
- Starting on an inside seam where the stitching will be less visible, begin sewing along the top edge of your folded hem.
- Sew slowly and steadily, guiding the fabric to keep your stitch line straight and close to the folded edge. Make sure you are sewing through all layers: the new folded hem and the original jean fabric.
- When you reach the end, backstitch a few stitches to secure the thread. Repeat for the other pant leg.
For a truly authentic look, you can try to replicate the original stitching. Many jeans have a double stitch line. If you have a twin needle for your sewing machine, you could use that for a double stitch. Otherwise, sewing two parallel lines of stitching by hand or machine will mimic the look.
The Final Press and Check
Don’t skip this step! A good pressing makes all the difference.
Step 10: Press Your Finished Hem
Once sewn, turn the jeans right-side out. Press the hem and the leg area with your iron. This will lay the stitches flat, remove any remaining wrinkles, and give your hem a crisp, professional appearance.
Step 11: Try Them On!
Put on your jeans with your chosen shoes. Check that the length is perfect and the bootcut flare still looks natural. Admire your handiwork!
Restoring the Original Hem (Optional but Recommended for Authenticity)
If you want your new hem to look exactly like the original, consider saving and reattaching the original hem. This is often referred to as the “original hem” or “fray” method, and it’s how many tailors achieve that factory-fresh look.
How to Save and Reattach an Original Bootcut Jean Hem
This process involves carefully removing the original hem, shortening the leg, and then sewing the original hem back on.
Tools and Steps:
You’ll need a seam ripper in addition to your other hemming supplies. The process can be a bit more involved, making it a good candidate for a second attempt or if you’re feeling a bit more adventurous.
- Carefully Remove the Original Hem: Using a seam ripper, meticulously detach the original hem from the bottom of the pant leg. Work slowly to avoid damaging the fabric or the original stitching you want to preserve. Take care to only cut the threads holding the hem to the leg, not the hem itself.
- Save the Original Hem: Once detached, lay it flat. You now have the original finished edge of your bootcut jeans.
- Shorten the Jean Leg: Follow Steps 1-6 above to measure and cut the leg to your desired length, but remember to cut higher than your final desired length, as you will be adding the original hem back on. You’ll need to account for the width of your original hem in your cutting. For example, if your original hem was 1.5 inches wide, and you want your jeans to end at a certain point, you’ll cut 1.5 inches above that point.
- Prepare for Reattachment: Fold the newly cut raw edge inwards (towards the inside of the leg) using a simple single fold, just enough to create a clean edge to sew from. Press this fold. The width of this fold should match the width of your original hem minus any overlap you want for sewing.
- Pin the Original Hem Back: With the pant leg inside out, place the original hem strip around the bottom, aligning the raw edges. Pin it securely in place, ensuring it’s centered and the bootcut flare matches on both sides.
- Sew the Original Hem: Using a sewing machine with a denim/jeans needle and matching thread, carefully sew the original hem back onto the leg. Aim to stitch in the same line as the original stitching if possible, or just along the edge of the original hem where it meets the new folded-up fabric. Backstitch at the start and end.
For those sewing by hand, a strong backstitch is recommended here, as this area takes a lot of wear.
- Final Press: Turn the jeans right-side out and give the hem a good press.
This method is excellent for preserving the worn look and color variations that give your favorite jeans their character. For more detailed visuals on this technique, resources like those on major video platforms often provide excellent step-by-step demonstrations.
Common Bootcut Hemming Challenges and Solutions
Even with clear instructions, a few things can pop up. Here’s how to handle them:
| Challenge | Solution |
|---|---|
| Uneven Cutting Line | Don’t panic! If the cut is slightly wobbly, a wider double fold can help hide it. When sewing, try to keep your stitch line as straight as possible. A very slightly uneven hem can be less noticeable on bootcut jeans than on skinnier styles. |
| Hem Drags on One Side | This usually means the initial measurement or cutting was uneven. Try to re-measure and see if one leg is longer. You might need to trim a little more off the longer leg. For a quick fix on a single occasion, you can try adding a small, subtle cuff to the longer leg for an evening out. |
| Stitches Are Visible from Outside | If you used a running stitch and it shows too much, you can try a few things: 1) Use a thread color that is an even closer match to your jeans. 2) Try a blind stitch; it’s designed to be almost invisible. 3) For machine sewing, ensure you’re stitching close to the edge of the folded hem. |
| Fabric Doesn’t Lay Flat After Sewing | Ensure you pressed each fold thoroughly before sewing. After sewing, a good final press with steam (if your fabric allows) can help flatten everything out. Ensure your stitches aren’t pulling the fabric too tightly. |
| The Bootcut Flare Looks Odd After Hemming | This can happen if you cut too much fabric unevenly. The key is to measure and cut symmetrically. If it looks slightly off, try to add a subtle roll or cuff to one leg temporarily to see if that balances it out, or consider if you need to re-cut. |
Frequently Asked Questions About Hemming Bootcut Jeans
Q1: Do I need a sewing machine to hem bootcut jeans?
A1: No, you absolutely do not need a sewing machine. Hand-sewing with a simple stitch like a blind hem stitch or a small running stitch is effective and can create a durable, neat hem.
Q2: How much fabric should I leave for the hem allowance?
A2: A hem allowance of 1.5 to 2 inches is generally recommended for bootcut jeans. This allows for a double fold, which hides the raw edge neatly and creates a durable finish.
Q3: What’s the best way to ensure both legs are the same length?
A3: The most reliable method is to try on your jeans with your intended shoes, mark one leg, then carefully fold the jeans in half, aligning all seams, and measure and mark the second leg from the first.
Q4: Should I keep the original hem of my jeans?
A4: If you want your jeans to retain their original look, especially the faded or worn hemline, then yes, saving and reattaching the original hem is the best way to achieve this. It’s a more advanced technique but yields amazing results.
Q5: What kind of needle and thread should I use?
A5: For hand-sewing, a standard sewing needle and a thread color that closely matches your jeans are fine. For a stronger finish, use denim or jeans thread. If machine sewing, a jeans or denim needle is recommended, along with matching thread.
Q6: How do I prevent my bootcut jeans from looking too “straight” after hemming?
A6: The key is to measure and cut with the bootcut flare in mind. Ensure your marked line and cutting line follow the natural


