


Hemming bootcut jeans is simple with this genius method, ensuring a perfect drape and avoiding the dreaded drag. You’ll achieve a professional look at home with basic tools and clear steps.
Are your favorite bootcut jeans a little too long? It’s a common problem that can make your jeans look sloppy and even trip you up. But don’t worry! You don’t need to be a sewing expert to fix it. This guide will walk you through a genius method that’s easy to follow, even for absolute beginners. We’ll make sure your bootcut jeans have the perfect length and flare, just like they should.
Let’s get started on giving your jeans a flawless finish.
Why Hemming Bootcut Jeans Matters


Bootcut jeans have a specific shape designed to fall perfectly over your boots or shoes. When they’re too long, the extra fabric bunches up, creating an unflattering silhouette and often dragging on the ground. This can lead to wear and tear, especially on the hemline, making them look prematurely aged. A proper hem ensures they maintain their intended style and look polished.
The Genius Method: No-Sew Approach for Bootcut Jeans


This no-sew method uses fabric glue and a clever technique to create a clean, durable hem that looks like it was done professionally. It’s perfect for those days you need a quick fix or if you prefer to avoid sewing machines.
What You’ll Need:
- Your bootcut jeans that need hemming
- Fabric scissors
- Measuring tape
- Chalk or a fabric marker
- Strong fabric glue (like Aleene’s Fabric Fusion or a similar strong permanent fabric adhesive)
- Iron and ironing board
- Heavy books or weights
- Optional: Pins (for extra security while drying)
Step-by-Step Guide to Hemming Your Bootcut Jeans
Step 1: Try Them On and Mark the Length
Put on the jeans you want to hem. Wear the shoes you’ll most likely wear with these jeans. This is crucial because different shoe heights will change the required hem length. Stand in front of a mirror and adjust the jeans until the hemline is at the desired length. You want them to just graze the top of your shoes without puddling on the floor. Use your chalk or fabric marker to mark the denim where the new hem should fall. It’s often best to mark just below or at the bottom edge of the shoe for a clean look that doesn’t drag.
Step 2: Measure and Mark Accurately
Take the jeans off and lay them flat on a clean, smooth surface. Smooth out the wrinkles. Carefully measure from the marked line up to the original hem. You’ll want to add about 1 to 1.5 inches for the new hem allowance. This extra fabric will be folded up and glued. Use your chalk or fabric marker to draw a new cutting line 1 to 1.5 inches above your initial desired hem mark. Ensure this line is straight and goes all the way around the leg.
Step 3: Cut Off the Excess Fabric
Using sharp fabric scissors, carefully cut along the newly drawn cutting line. Cut straight across the inseam and outseam of each leg. Make sure to cut both legs evenly. Sharp scissors are key here to prevent fraying before you apply the glue.
Step 4: Prepare for Folding
Now, fold up the raw edge of the denim along the original marked hemline (where you first marked the desired length). You want to fold it up so the raw edge is hidden inside. Press this fold firmly with your iron. You are essentially creating a temporary hem to use as a guide for the glue.
Step 5: Apply the Fabric Glue
Open up the fold you just pressed. Apply a generous, even bead of strong fabric glue along the raw edge of the fabric you just folded up. You want enough glue to create a strong bond, but not so much that it soaks through to the outside of the jeans. A bead about ¼ inch wide should suffice. Many fabric glues, like Aleene’s Fabric Fusion, offer a strong, flexible hold suitable for denim. For a truly permanent bond that withstands washing, consider checking the manufacturer’s specifications for heat curing, as recommended by experts on fabric adhesives.
Step 6: Fold and Press for the Final Hem
Carefully fold the raw edge up again, this time pressing it firmly into the glue. Ensure the folded edge lines up precisely with the original hemline mark you made. Press down firmly along the entire length of the seam. You can use your iron to help set the glue – check the fabric glue’s instructions for specific heat settings and pressing times. Some glues require heat to cure properly for maximum strength.
Step 7: Secure and Let Dry
Once the fabric glue is applied and the hem is folded, you need to keep it in place while it dries and sets. Place heavy books or weights along the inside of the folded hem. If you’re worried about the hem shifting, you can also use pins to hold it in place from the inside, being careful not to let them pierce through to the outside. Let the jeans dry completely according to the fabric glue’s instructions. This can take anywhere from a few hours to 24 hours for a full cure. It’s best to let them rest undisturbed.
Step 8: Inspect and Wear!
Once completely dry, remove the weights and pins. Turn the jeans right side out. Check the hem for any gaps or areas that didn’t adhere properly. If needed, you can add a little more glue and re-press (if the glue is still workable). Now, try them on with your shoes. You should have a perfectly hemmed pair of bootcut jeans that drape beautifully!
Alternative: The Traditional Sewn Hem


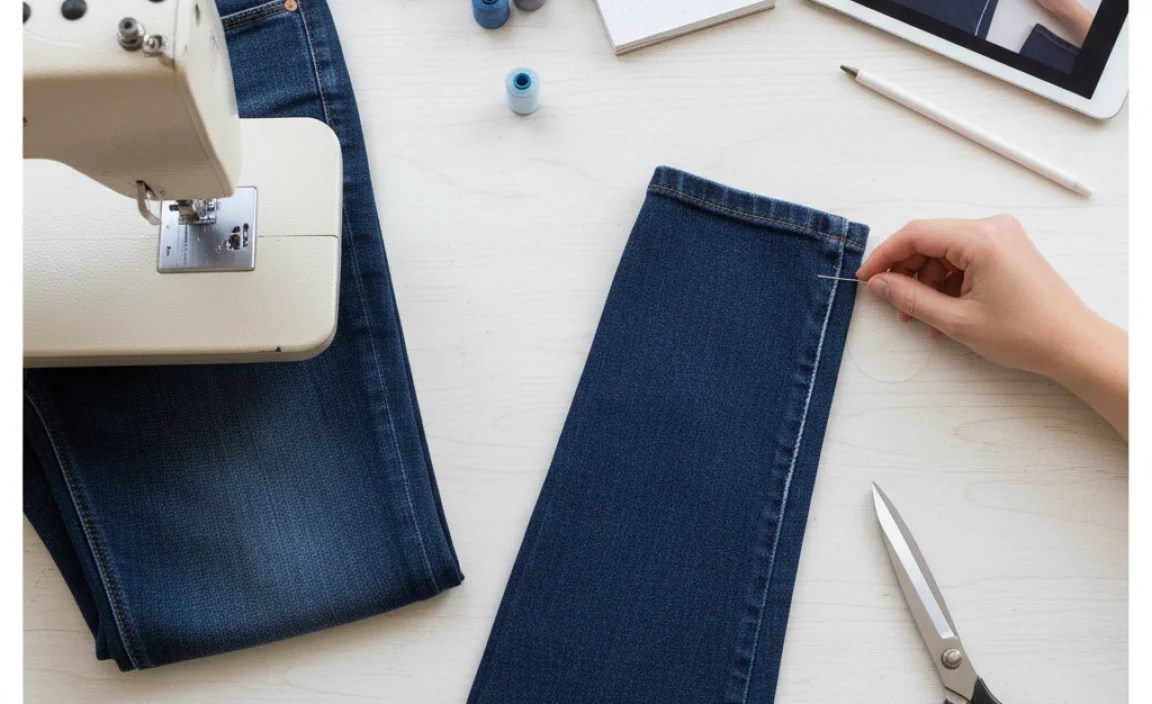
If you prefer a stitched hem or want an even more durable result, the traditional sewing method is excellent. While it requires a bit more skill, it’s still very achievable.
Tools for Sewing:
- Your bootcut jeans
- Sharp fabric scissors
- Measuring tape
- Chalk or fabric marker
- Sewing machine (or needle for hand-sewing)
- Matching thread
- Pins
- Iron and ironing board
Sewing Steps:
- Marking and Cutting: Follow Steps 1-3 from the no-sew method above to mark and cut your jeans to the desired length.
- Press the Hem: Fold up the raw edge 1/2 inch and press with an iron. Then, fold up another 1/2 to 1 inch (depending on your desired hem width) and press again, creating a double-folded hem. This encloses the raw edge and makes for a cleaner finish.
- Pin in Place: Secure the folded hem with pins, placing them along the inside of the fold.
- Sew the Hem: Using a sewing machine with a denim needle and matching thread, stitch along the top edge of the folded hem. Sew as close to the inner fold as possible. For a professional look, try to match the original stitching on your jeans. If hand-sewing, use a strong backstitch for durability.
- Finish: Remove pins, trim any loose threads, and press the hem with your iron.
Understanding Denim Weight and Hemming


The weight of your denim can affect how the hem falls. Heavier denim (often measured in ounces per square yard) tends to hold its shape more, which is usually great for bootcut styles. Lighter denim might be more prone to draping and appearing “floppy” if not hemmed correctly.
Here’s a quick look at common denim weights:
| Denim Weight (oz/sq yd) | Description | Best For |
|---|---|---|
| 4-7 oz | Lightweight | Summer jeans, lighter-wash styles. Can be prone to excessive drape. |
| 8-12 oz | Midweight | Most common weight, versatile for all seasons. Good balance of structure and comfort. |
| 13 oz+ | Heavyweight | Durable jeans, workwear, styles that need to hold a crisp shape. |
For bootcut jeans, midweight to heavyweight denim is ideal as it helps the flare maintain its shape. When hemming these, ensure your method allows the fabric to fall cleanly without adding bulk.
Tips for Perfect BootcutJean Length


- Consider Your Footwear: Always hem with the shoes you’ll wear most often. A bootcut hem might look perfect with heels but drag with flats, and vice versa.
- Account for Shrinkage: If your jeans are 100% cotton and unwashed, they might shrink. Consider washing them first or adding a little extra length initially, especially if using a sewn method. Fabric glue is less affected by this than sewing.
- Maintain the Flare: When hemming, be mindful of the bootcut shape. Ensure your cut and fold don’t distort the natural flare of the leg.
- Evenness is Key: Legs can look uneven if not hemmed identically. Measuring carefully and pinning securely helps.
- Test on an Old Pair: If you’re nervous, practice on an old pair of jeans first.
Cleaning and Maintaining Your Hemmed Jeans
To keep your newly hemmed jeans looking great, proper care is essential. Follow these guidelines:
- Wash Less Frequently: Overwashing can fade colors and wear down fabric. Spot clean minor stains when possible.
- Wash Inside Out: Turn your jeans inside out before washing to protect the outer fabric and minimize friction on the hem.
- Use Cold Water: Cold water helps preserve the color and the integrity of the fabric and stitching/glue.
- Gentle Cycle: Select the gentle or delicate cycle on your washing machine.
- Air Dry: This is the best method. Hang your jeans to air dry. If you must use a dryer, use a low heat setting and remove them while slightly damp to minimize creasing and shrinking. This is particularly important for fabric-glued hems to maintain their bond.
- Check Your Hem: Periodically inspect your hems, especially after washing, to ensure the glue or stitching remains secure.
When to Seek Professional Help
While hemming bootcut jeans is a manageable DIY project, there are times when a professional tailor is your best bet:
- Designer or Expensive Jeans: If your jeans are a significant investment, you might want a professional’s touch to ensure a flawless finish.
- Complex Fabrics: Some special denim washes, embellishments, or very delicate fabrics might be best handled by a tailor.
- Unusual Damage: If your jeans have rips, stains, or significant wear near the hem that needs repair beyond simple shortening.
- Perfect Fit is Paramount: If you’ve tried DIY hemming and aren’t satisfied, a tailor can often diagnose and fix issues you might be missing. A reputable tailor can ensure your hem fits the original style perfectly. For more on professional tailoring services, you can consult resources like the International Association of Professional Seamstresses for finding skilled professionals.
Frequently Asked Questions About Hemming Bootcut Jeans
1. How much fabric should I leave for hemming bootcut jeans?
For a no-sew or sewn hem, leave about 1 to 1.5 inches of extra fabric beyond your desired finished length. This provides enough material for folding and gluing or stitching without creating bulk.
2. Can I hem bootcut jeans with a sewing machine if I’ve never used one before?
Yes, a simple straight stitch on a sewing machine is quite beginner-friendly. Practice on scrap fabric first, and use a denim needle for best results. Ensure your fabric is securely pinned.
3. Will fabric glue hold up through washing?
High-quality fabric glues specifically designed for denim are generally quite durable. For best results, ensure proper application, allow for full curing time (often 24 hours) and follow the product’s care instructions, like washing in cold water on a delicate cycle.
4. How do I make sure my bootcut jean hems are even?
The easiest way is to wear the jeans with your intended shoes and mark the length while standing. Then, lay the jeans flat and measure the exact amount to be cut from that marked length, ensuring both legs are measured and marked identically. Using a measuring tape against the existing seam can also help maintain symmetry.
5. I cut my jeans too short! Can I fix it?
Unfortunately, if you cut too much off, there’s no easy way to add length back while maintaining the original look. This is why measuring twice and cutting once is so crucial. For drastically too-short jeans, you might consider adding a decorative cuff or patch, or hemming them into shorts.
6. Does the original hem need to be removed?
For the no-sew fabric glue method, you are folding under the raw edge inside the new hem. You don’t remove the original hem. For a sewn hem, you also typically fold the fabric under (double fold) and stitch, so the original hem is effectively replaced by your new folded hem, not removed separately.
Conclusion
Hemming bootcut jeans doesn’t have to be a daunting task. Whether you choose the quick and easy no-sew fabric glue method or the classic sewn approach, achieving a perfect length is well within your reach. By following these straightforward steps, you can revive your favorite jeans, ensuring they fit impeccably and maintain their stylish bootcut silhouette. Take your time, measure carefully, and enjoy your perfectly fitting denim. Happy hemming!
.lwrp.link-whisper-related-posts{
margin-top: 40px;
margin-bottom: 30px;
}
.lwrp .lwrp-title{
}.lwrp .lwrp-description{
}
.lwrp .lwrp-list-container{
}
.lwrp .lwrp-list-multi-container{
display: flex;
}
.lwrp .lwrp-list-double{
width: 48%;
}
.lwrp .lwrp-list-triple{
width: 32%;
}
.lwrp .lwrp-list-row-container{
display: flex;
justify-content: space-between;
}
.lwrp .lwrp-list-row-container .lwrp-list-item{
width: calc(25% – 20px);
}
.lwrp .lwrp-list-item:not(.lwrp-no-posts-message-item){
max-width: 150px;
}
.lwrp .lwrp-list-item img{
max-width: 100%;
height: auto;
object-fit: cover;
aspect-ratio: 1 / 1;
}
.lwrp .lwrp-list-item.lwrp-empty-list-item{
background: initial !important;
}
.lwrp .lwrp-list-item .lwrp-list-link .lwrp-list-link-title-text,
.lwrp .lwrp-list-item .lwrp-list-no-posts-message{
}@media screen and (max-width: 480px) {
.lwrp.link-whisper-related-posts{
}
.lwrp .lwrp-title{
}.lwrp .lwrp-description{
}
.lwrp .lwrp-list-multi-container{
flex-direction: column;
}
.lwrp .lwrp-list-multi-container ul.lwrp-list{
margin-top: 0px;
margin-bottom: 0px;
padding-top: 0px;
padding-bottom: 0px;
}
.lwrp .lwrp-list-double,
.lwrp .lwrp-list-triple{
width: 100%;
}
.lwrp .lwrp-list-row-container{
justify-content: initial;
flex-direction: column;
}
.lwrp .lwrp-list-row-container .lwrp-list-item{
width: 100%;
}
.lwrp .lwrp-list-item:not(.lwrp-no-posts-message-item){
max-width: initial;
}
.lwrp .lwrp-list-item .lwrp-list-link .lwrp-list-link-title-text,
.lwrp .lwrp-list-item .lwrp-list-no-posts-message{
};
}
Related Posts


.lwrp.link-whisper-related-posts{
margin-top: 40px;
margin-bottom: 30px;
}
.lwrp .lwrp-title{
}.lwrp .lwrp-description{
}
.lwrp .lwrp-list-container{
}
.lwrp .lwrp-list-multi-container{
display: flex;
}
.lwrp .lwrp-list-double{
width: 48%;
}
.lwrp .lwrp-list-triple{
width: 32%;
}
.lwrp .lwrp-list-row-container{
display: flex;
justify-content: space-between;
}
.lwrp .lwrp-list-row-container .lwrp-list-item{
width: calc(25% – 20px);
}
.lwrp .lwrp-list-item:not(.lwrp-no-posts-message-item){
max-width: 150px;
}
.lwrp .lwrp-list-item img{
max-width: 100%;
height: auto;
object-fit: cover;
aspect-ratio: 1 / 1;
}
.lwrp .lwrp-list-item.lwrp-empty-list-item{
background: initial !important;
}
.lwrp .lwrp-list-item .lwrp-list-link .lwrp-list-link-title-text,
.lwrp .lwrp-list-item .lwrp-list-no-posts-message{
}@media screen and (max-width: 480px) {
.lwrp.link-whisper-related-posts{
}
.lwrp .lwrp-title{
}.lwrp .lwrp-description{
}
.lwrp .lwrp-list-multi-container{
flex-direction: column;
}
.lwrp .lwrp-list-multi-container ul.lwrp-list{
margin-top: 0px;
margin-bottom: 0px;
padding-top: 0px;
padding-bottom: 0px;
}
.lwrp .lwrp-list-double,
.lwrp .lwrp-list-triple{
width: 100%;
}
.lwrp .lwrp-list-row-container{
justify-content: initial;
flex-direction: column;
}
.lwrp .lwrp-list-row-container .lwrp-list-item{
width: 100%;
}
.lwrp .lwrp-list-item:not(.lwrp-no-posts-message-item){
max-width: initial;
}
.lwrp .lwrp-list-item .lwrp-list-link .lwrp-list-link-title-text,
.lwrp .lwrp-list-item .lwrp-list-no-posts-message{
};
}
Related Posts

.lwrp.link-whisper-related-posts{
margin-top: 40px;
margin-bottom: 30px;
}
.lwrp .lwrp-title{
}.lwrp .lwrp-description{
}
.lwrp .lwrp-list-container{
}
.lwrp .lwrp-list-multi-container{
display: flex;
}
.lwrp .lwrp-list-double{
width: 48%;
}
.lwrp .lwrp-list-triple{
width: 32%;
}
.lwrp .lwrp-list-row-container{
display: flex;
justify-content: space-between;
}
.lwrp .lwrp-list-row-container .lwrp-list-item{
width: calc(25% – 20px);
}
.lwrp .lwrp-list-item:not(.lwrp-no-posts-message-item){
max-width: 150px;
}
.lwrp .lwrp-list-item img{
max-width: 100%;
height: auto;
object-fit: cover;
aspect-ratio: 1 / 1;
}
.lwrp .lwrp-list-item.lwrp-empty-list-item{
background: initial !important;
}
.lwrp .lwrp-list-item .lwrp-list-link .lwrp-list-link-title-text,
.lwrp .lwrp-list-item .lwrp-list-no-posts-message{
}@media screen and (max-width: 480px) {
.lwrp.link-whisper-related-posts{
}
.lwrp .lwrp-title{
}.lwrp .lwrp-description{
}
.lwrp .lwrp-list-multi-container{
flex-direction: column;
}
.lwrp .lwrp-list-multi-container ul.lwrp-list{
margin-top: 0px;
margin-bottom: 0px;
padding-top: 0px;
padding-bottom: 0px;
}
.lwrp .lwrp-list-double,
.lwrp .lwrp-list-triple{
width: 100%;
}
.lwrp .lwrp-list-row-container{
justify-content: initial;
flex-direction: column;
}
.lwrp .lwrp-list-row-container .lwrp-list-item{
width: 100%;
}
.lwrp .lwrp-list-item:not(.lwrp-no-posts-message-item){
max-width: initial;
}
.lwrp .lwrp-list-item .lwrp-list-link .lwrp-list-link-title-text,
.lwrp .lwrp-list-item .lwrp-list-no-posts-message{
};
}
Related Posts
.lwrp.link-whisper-related-posts{
margin-top: 40px;
margin-bottom: 30px;
}
.lwrp .lwrp-title{
}.lwrp .lwrp-description{
}
.lwrp .lwrp-list-container{
}
.lwrp .lwrp-list-multi-container{
display: flex;
}
.lwrp .lwrp-list-double{
width: 48%;
}
.lwrp .lwrp-list-triple{
width: 32%;
}
.lwrp .lwrp-list-row-container{
display: flex;
justify-content: space-between;
}
.lwrp .lwrp-list-row-container .lwrp-list-item{
width: calc(25% – 20px);
}
.lwrp .lwrp-list-item:not(.lwrp-no-posts-message-item){
max-width: 150px;
}
.lwrp .lwrp-list-item img{
max-width: 100%;
height: auto;
object-fit: cover;
aspect-ratio: 1 / 1;
}
.lwrp .lwrp-list-item.lwrp-empty-list-item{
background: initial !important;
}
.lwrp .lwrp-list-item .lwrp-list-link .lwrp-list-link-title-text,
.lwrp .lwrp-list-item .lwrp-list-no-posts-message{
}@media screen and (max-width: 480px) {
.lwrp.link-whisper-related-posts{
}
.lwrp .lwrp-title{
}.lwrp .lwrp-description{
}
.lwrp .lwrp-list-multi-container{
flex-direction: column;
}
.lwrp .lwrp-list-multi-container ul.lwrp-list{
margin-top: 0px;
margin-bottom: 0px;
padding-top: 0px;
padding-bottom: 0px;
}
.lwrp .lwrp-list-double,
.lwrp .lwrp-list-triple{
width: 100%;
}
.lwrp .lwrp-list-row-container{
justify-content: initial;
flex-direction: column;
}
.lwrp .lwrp-list-row-container .lwrp-list-item{
width: 100%;
}
.lwrp .lwrp-list-item:not(.lwrp-no-posts-message-item){
max-width: initial;
}
.lwrp .lwrp-list-item .lwrp-list-link .lwrp-list-link-title-text,
.lwrp .lwrp-list-item .lwrp-list-no-posts-message{
};
}
