


Quick Summary: Learn how to hem bootcut jeans by hand easily and precisely. This guide provides simple, step-by-step instructions and essential tips to achieve a perfect, professional-looking finish without a sewing machine, saving you time and money.
How to Hem Bootcut Jeans by Hand: An Effortless Guide
Jeans are a wardrobe staple, but finding the perfect length can be a challenge. Often, your favorite bootcut jeans are just a little too long, making them drag on the floor and wear out faster. Taking them to a tailor can be an expense you’d rather avoid, and wrestling with a sewing machine might feel intimidating. Don’t worry! Hemming bootcut jeans by hand is surprisingly straightforward. This guide will walk you through each step, ensuring a neat, durable, and perfectly fitting hem, even if you’ve never sewn before. Let’s get those jeans looking just right!
Why Hem Your Bootcut Jeans?

A proper hem isn’t just about aesthetics; it’s about preserving your jeans and ensuring they fit you perfectly. When jeans are too long, the extra fabric can fray, get caught on things, and create an untidy appearance. A well-executed hem maintains the original look of your bootcut jeans while ensuring they sit beautifully with your footwear. This simple alteration can transform the way your jeans look and feel, making them a go-to item once more.
Gather Your Essential Tools
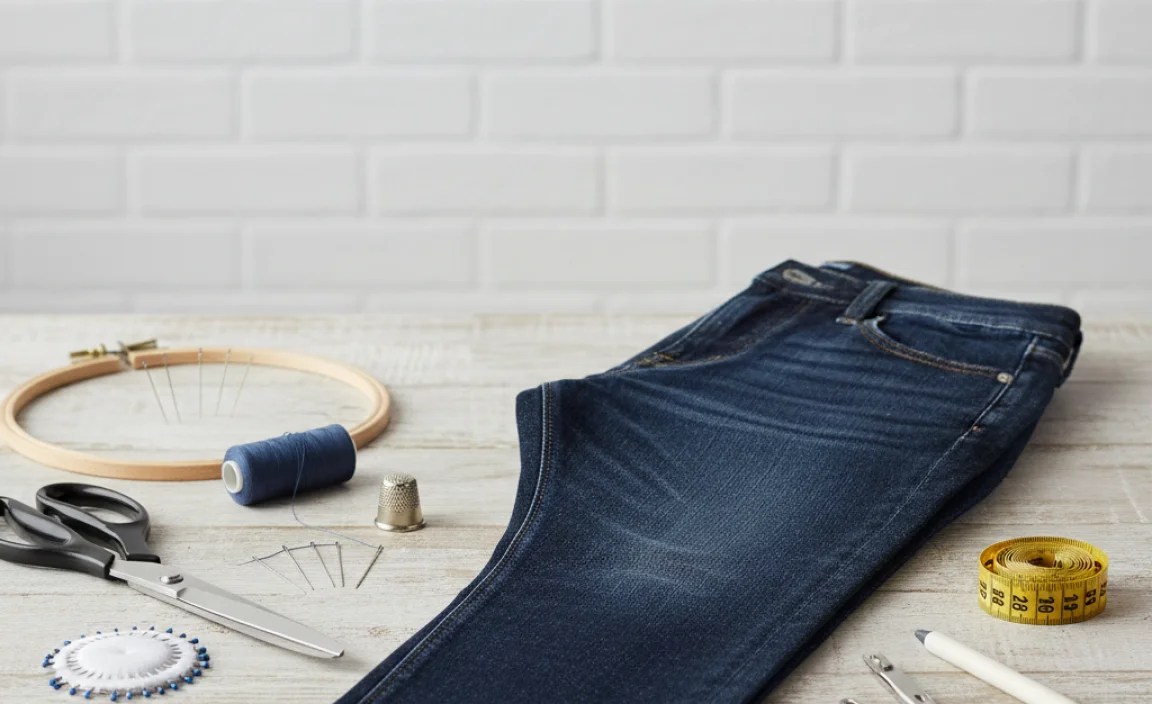
Before you begin, having the right tools makes the process smooth and effective. Here’s what you’ll need:
- Fabric Scissors: Sharp scissors dedicated to fabric will ensure clean cuts.
- Measuring Tape or Ruler: For accurate measurements.
- Fabric Chalk or a Disappearing Ink Pen: To mark your hemline.
- Pins: To hold the fabric in place while you sew.
- Matching Thread: Choose a thread color that closely matches your jeans.
- Sewing Needle: A standard sewing needle will work.
- Seam Ripper (Optional but helpful): For correcting mistakes or removing old hems.
- Iron and Ironing Board: To press creases and ensure neatness.
Step-by-Step Guide to Hemming Bootcut Jeans by Hand

Follow these simple steps to achieve a professional-looking hem.
Step 1: Prepare Your Jeans
Start by washing and drying your jeans. This is crucial because denim can shrink. Hemming pre-shrunk jeans ensures the final length will remain consistent. Wear the jeans you intend to hem, along with the shoes you’ll typically wear with them. This is the most accurate way to determine the correct length.
Step 2: Determine the Ideal Length
Stand in front of a mirror. Pin the hem of each leg to the desired length. For bootcut jeans, the hem typically should sweep the floor or just slightly hover above it, depending on your preference and shoe type. You want the hem to fall nicely over your shoe without dragging. Enlist a friend to help pin and check the length for evenness, or carefully use a flat surface and a ruler.
Pro Tip: Aim for the hem to kiss the top of your shoe. If you wear heels often, factor that height in. If you prefer flats, hem them shorter to avoid tripping.
Step 3: Mark the Hemline
Once you’re happy with the pinned length, remove the jeans and lay them flat on a clean surface. Use your fabric chalk or disappearing ink pen to mark a straight line across each leg where you want the new hem to be. Make sure the markings are visible.
Step 4: Create the Fold (First Fold)
Now, you’ll create the initial fold. From your marked line, fold the excess fabric upwards towards the inside of the leg, by about 1/2 inch to 3/4 inch (1.5 cm to 2 cm). Press this fold with a hot iron to create a crisp crease. This first fold helps to hide the raw edge and gives you a neat base for the second fold.
Step 5: Create the Second Fold
For a durable and professional hem, a double fold is recommended. Fold the fabric up again, this time bringing the creased edge up to meet your original marked hemline. You are essentially folding the raw edge inside the first fold you made. This creates a clean, finished edge that won’t fray. Press this second fold firmly with the iron. Pin the folded hem securely in place all the way around the leg.
Wear Guide Tip: Many ready-to-wear jeans have a double-folded hem for durability. Mimicking this will give your hand-hemming a professional look.
Step 6: Prepare for Sewing
Thread your sewing needle with a length of matching thread. Tie a knot at the end of the thread to secure it when you start sewing. For added strength, you can double your thread for a stronger stitch. Ensure your needle is sharp and suitable for denim.
Step 7: Sew the Hem
Begin sewing a few inches from where you started pinning, at the seam on the inside of the leg. Use a stitch that’s strong and durable, like a backstitch or a running stitch with reinforced sections. For hand-sewing, a simple running stitch is most accessible for beginners.
How to do a Running Stitch:
- Insert your needle from the inside of the fold, coming up through the fabric close to the edge of the folded hem.
- Stitch back down about 1/2 inch (1 cm) further along the hem, then bring the needle back up around 1/2 inch (1 cm) past where you went down.
- Continue this process, creating small, evenly spaced stitches.
For a more durable stitch: After every few stitches, make a small backstitch (stitch backwards over the last stitch or two) to reinforce the seam. This is especially useful on denim.
External Resource: For detailed visual guides on hand stitches, resources like Better Homes & Gardens’ guide to basic sewing stitches can be very helpful.
Work your way around the entire leg, keeping your stitches as consistent as possible. When you reach your starting point, tie a knot securely to finish the thread, and trim any excess.
Step 8: Press and Finish
Once both legs are hemmed, press the finished hems with your iron. This will flatten the stitches and give your jeans a clean, polished look. Double-check that the length is even on both legs. You’ve successfully hemmed your bootcut jeans by hand!
Choosing the Right Thread and Needle

For hemming denim, strength and durability are key. Here’s a quick guide:
| Tool | Recommendation | Why |
|---|---|---|
| Thread | Heavy-duty polyester thread or cotton-wrapped polyester thread. Matching color is ideal. | Provides strength to withstand the wear and tear of denim. Polyester resists shrinkage and stretching. |
| Needle | A sharp, medium-sized sewing needle (e.g., size 7 or 8). | Strong enough to penetrate denim layers without bending, but not so large it creates visible holes. |
Alternative Hemming Techniques for Bootcut Jeans

While the double-fold hand stitch is excellent, here are a couple of other methods you might consider:
- Blind Hem Stitch: This is a more advanced hand stitch that aims to make the stitches almost invisible from the outside. It requires more practice but offers a very clean, professional finish, especially if you want to preserve the original hem appearance.
- Sewing Machine (if you ever decide to try): For a faster and very strong hem, a sewing machine is the go-to. Most machines have a walking foot or denim needle that helps manage thicker fabrics.
Troubleshooting Common Hemming Issues
Even with the best intentions, you might encounter a few snags. Here’s how to handle them:
- Uneven Hem: If you notice the hem is uneven after sewing, you can carefully use a seam ripper to undo the stitches on the offending section and re-mark and re-sew it. Laying the jeans flat and using a long ruler can help ensure evenness as you mark.
- Loose Stitches: If stitches are too loose and look like they might unravel, you can go back with your needle and thread and add a few extra reinforcing stitches over the weak areas.
- Thread Snapping: If your thread keeps snapping, it might be too thin, too old, or your needle might be dull. Try a stronger thread or a new, sharper needle.
- Fabric Puckering: This can happen if stitches are too tight or the fabric is pulled too hard while sewing. Try to keep an even tension and avoid pulling the fabric taut as you sew.
Frequently Asked Questions (FAQ)
Q1: How much fabric should I leave for the hem?
It’s generally recommended to leave at least 1.5 to 2 inches (about 4-5 cm) of excess fabric when you cut your jeans. This allows for a double fold, which creates a durable and clean finish.
Q2: How do I make sure my bootcut jeans are hemmed evenly?
The best way is to wear them with your intended shoes and have someone else pin them, or lay them on a flat surface and use a ruler to measure from the crotch seam down to the floor. Mark carefully with chalk or a fabric pen.
Q3: Can I hem faded or distressed jeans by hand?
Yes, you can! For distressed jeans, you might want to be extra careful not to cut too much fabric, preserving the original fraying if desired. For faded jeans, try to match the thread color as closely as possible to the original threads in the leg.
Q4: What is the best stitch for hemming jeans by hand?
A reinforced running stitch or a simple backstitch is highly recommended for durability on denim. A blind hem stitch can create a more invisible look but is more challenging for beginners.
Q5: My jeans are already hemmed. How do I alter the length?
If your jeans have an existing hem, carefully use a seam ripper to undo the stitches. Then, press the fabric flat, re-measure, re-mark, and create your new double fold as per the steps in this guide.
Q6: How long does it take to hem a pair of jeans by hand?
For a beginner, it might take anywhere from 1 to 2 hours per pair, depending on your comfort level with sewing and the complexity of the jeans. With practice, you can significantly speed up the process.
Conclusion
Hemming your bootcut jeans by hand is an accessible skill that can save you money and ensure your favorite denim always fits perfectly. By following these straightforward steps, using the right tools, and taking your time, you can achieve a professional-looking hem that stands up to wear. No more tripping over too-long jeans or spending extra on tailoring! Embrace this simple DIY project and enjoy the satisfaction of perfectly fitting denim, tailored exactly how you like it.


