


Quick Summary
Learn how to hem bootcut jeans at home perfectly with this easy guide. Get professional-looking results by following simple steps. No sewing machine? No problem! We cover no-sew and traditional methods for a flawless fit that flatters your boots.
Too-long jeans can be a real frustration, especially when you’ve found the perfect pair of bootcut jeans. They’re meant to drape just right over your boots, but when they’re too long, they can puddle on the floor, look sloppy, and even get damaged. Getting them hemmed can seem daunting, but it’s a surprisingly simple task you can tackle right at home. With a few basic tools and this step-by-step guide, you’ll achieve a professional finish that makes your jeans look custom-made. Let’s get those bootcut jeans sitting perfectly.
Why Hemming Bootcut Jeans Matters


Bootcut jeans have a specific silhouette that’s designed to balance wider-legged shoes. The subtle flare at the ankle is key to their look. When they’re the wrong length, this balance is thrown off. They can drag on the ground, creating wear and tear and making your stride awkward. A proper hem ensures the jeans fall at the ideal point, just grazing the top of your footwear, maintaining the intended stylish drape and preventing damage. It’s a small adjustment that makes a big difference in how your jeans look and feel.
Assessing the Perfect Length


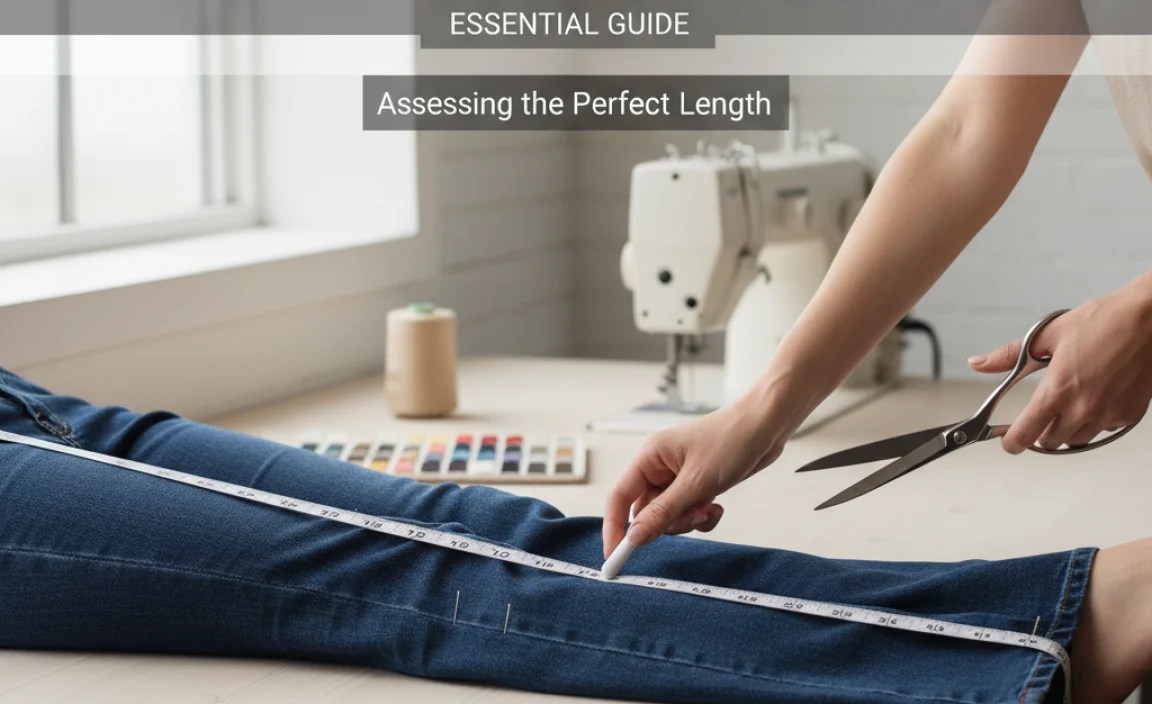
Before you even think about cutting, you need to know the ideal length. This is the most crucial step for a great outcome. Wear the shoes you typically wear with your bootcut jeans. Stand in front of a mirror and let the jeans fall naturally. You’re aiming for the hem to just touch the top of your shoe. Some people prefer the hem to be about half an inch off the floor when wearing their shoes, while others like it to just cover the sole. Here’s how to find your sweet spot:
- Wear Your Usual Shoes: This is non-negotiable. The hem length depends entirely on the footwear you’ll be pairing with the jeans.
- Stand Naturally: Don’t hike your jeans up or hold them in a certain way. Let them hang as they normally would.
- Check the Front and Back: The ideal length usually means the front of the hem just covers the top of your shoe, while the back might be slightly longer, about a quarter to half an inch from the floor. This accounts for the natural lift of your heel.
- Look for the “Puddle”: If the denim is pooling around your ankles, they are definitely too long.
- Consider the Fabric: Some fabrics might stretch slightly after hemming, so err on the side of slightly longer if you’re unsure.
Tools You’ll Need


Gathering the right tools makes the process smooth and ensures a clean finish. You don’t need a professional sewing setup; most of these items can be found around the house or at a local craft or fabric store.
| Tool | Purpose | Notes |
|---|---|---|
| Fabric Scissors | For precise cutting of denim. | Sharp scissors are essential for a clean cut that won’t fray excessively. Kitchen shears can work in a pinch. |
| Measuring Tape or Ruler | To measure the desired length accurately. | A flexible fabric tape measure is ideal, but a standard ruler will also work. |
| Fabric Chalk or Disappearing Ink Pen | To mark the cutting line. | Avoid regular pens or pencils, which can leave permanent marks. Test chalk on an inside seam first. |
| Pins | To hold the hem in place. | Straight pins are best for marking and holding fabric. |
| Iron and Ironing Board | To press seams and create crisp folds. | Heat helps set the fold and provides a guide for sewing or fabric glue. |
| Sewing Machine (Optional, for traditional hem) | To sew the hem. | If you don’t have one, a needle and thread or fabric adhesive are alternatives. |
| Needle and Thread (for hand-sewing) | An alternative to a sewing machine. | Match the thread color to your jeans for the most discreet finish. |
| Fabric Glue or Hem Tape (for no-sew) | A no-sew alternative to stitching. | Choose a high-quality fabric adhesive designed for denim, or iron-on hem tape. Check manufacturer instructions on Hemline for product usage. |
Method 1: The Traditional Sewn Hem (For Durability)


This method offers the most durable and professional finish, mimicking how jeans are originally hemmed. It’s best if you have a sewing machine, but can be done by hand if you’re patient.
Step-by-Step: Traditional Hem
- Prepare Your Area: Lay your jeans flat on a clean, hard surface. Ensure they are smooth and wrinkle-free.
- Mark the Cut Line: Put on the shoes you’ll wear with the jeans. Measure from the bottom of the leg hem upwards to your desired finished length. Use fabric chalk or a pen to make a small mark at the inseam and outseam areas. Repeat on the other leg, ensuring it matches perfectly. For bootcut jeans, it’s often best to mark the desired finished length first, then add your seam allowance below that mark.
- Determine the Seam Allowance: For a sturdy denim hem, a seam allowance of 1 to 1.5 inches is standard. This extra fabric creates a substantial hem that holds its shape well and resists fraying. Mark this allowance below your first measurement line. You’ll cut off the excess fabric below the seam allowance line.
- Cut the Excess Fabric: Using sharp fabric scissors, carefully cut along the lowest mark you made, removing the excess fabric below your intended seam allowance. Ensure a straight, even cut all the way around both legs.
- Fold and Press the First Hem: Take the bottom raw edge of the jean leg and fold it upwards to meet the first mark you made (your desired finished length). Press this fold firmly with an iron. This creates your initial hem crease.
- Fold and Press the Second Hem (Creating the Casing): Now, take the folded edge and fold it up again, this time to meet the original bottom hem of the jeans. The original hem line will now be hidden inside this fold. Press this second fold very crisply. This creates a substantial, double-folded hem that will look very similar to the original.
- Pin the Hem: Secure the folded hem in place with pins. Place pins perpendicular to the fold, about every 1-2 inches, ensuring they go through all layers of fabric.
- Sew the Hem:
By Machine: Thread your sewing machine with a sturdy thread that matches your jeans (or a contrasting color for a visible detail, if desired). Set your machine to a straight stitch. Stitch along the top edge of the folded hem, following the original jean stitching line if possible. Backstitch at the beginning and end to secure the stitches. Aim to keep your stitch line straight and close to the edge of the folded fabric.
By Hand: Use a strong needle and matching thread. A backstitch is recommended for durability. Start stitching from an inconspicuous spot (like the inside seam). Make small, even stitches, going through all layers of the folded denim. Ensure your stitches are tight and secure.
- Finish and Inspect: Trim any loose threads. Try the jeans on to check the fit and ensure the hem hangs evenly. For a truly factory finish, you can use a seam ripper to carefully remove the original hem, then re-sew the new hem in the same location for a perfect match. However, folding over the original hem creates a thicker, more durable finish that is also common for denim.
Method 2: The No-Sew Hem (Quick & Easy)


If sewing isn’t your forte, or you need a quick fix, the no-sew method using fabric glue or iron-on hemming tape is an excellent alternative. It’s fast, requires minimal supplies, and can look surprisingly neat.
Step-by-Step: No-Sew Hem Using Hemming Tape
- Prepare Your Area: Lay your jeans flat on a clean, hard surface. Smooth out any wrinkles.
- Mark the Cut Line: Put on your shoes. Measure from the bottom of the leg to your desired finished length and mark. Add your seam allowance (1 to 1.5 inches below the mark) and make your cutting line.
- Cut the Excess Fabric: Cut off the excess fabric below your seam allowance line with sharp fabric scissors.
- Fold and Press the First Hem: Fold the raw edge of the jean leg up to meet your desired finished length mark. Press firmly with an iron to create a crisp crease.
- Insert Hemming Tape: Cut a piece of iron-on hemming tape to fit the circumference of the folded edge. Place the tape inside the folded hem, ensuring it’s centered and covers the raw edge.
- Iron the Hem: Following the manufacturer’s instructions for your specific hemming tape, iron the hem. You will typically need to place a pressing cloth (a thin cotton fabric) over the tape and denim and press down with a hot iron for a set amount of time. Ensure the tape adheres firmly to both layers of fabric.
- Check Adhesion: Once cooled, gently tug on the hem to ensure the tape has bonded securely. If it feels loose in areas, re-apply heat.
- Try On and Adjust: Try on your jeans to check the length. The hem should feel secure and hang well.
Step-by-Step: No-Sew Hem Using Fabric Glue
- Prepare Your Area: Lay your jeans flat and smooth them out.
- Mark the Cut Line: Wear your shoes. Measure your desired finished length and mark. Add your 1 to 1.5-inch seam allowance below that mark and draw your cutting line.
- Cut the Excess Fabric: Trim the excess fabric below your seam allowance.
- Fold and Press: Fold the raw edge up to your desired finished length mark. Press firmly with an iron.
- Apply Fabric Glue: Lift the folded edge slightly. Apply a thin, even bead of fabric glue along the raw edge of the denim underneath the fold, or along the inside of the folded crease. Ensure you don’t use too much, as it can seep through the fabric.
- Press and Hold: Fold the hem up again, enclosing the raw edge, to meet the original bottom hem line. Press the folded hem firmly. If using a fabric glue that requires bonding, follow the manufacturer’s instructions for pressing time and temperature.
- Secure the Fold: You might need to clamp the hem with binder clips or heavy books while the glue dries completely. Allow adequate drying time, as specified by the fabric glue manufacturer.
- Inspect and Try On: Once dry, check that the hem is securely bonded. Try on your jeans to make sure the length is perfect.
Choosing the Right Method for Bootcut Jeans
The best hemming method for your bootcut jeans depends on your comfort level with sewing, the tools you have available, and the look you want to achieve. Here’s a quick comparison:
| Feature | Traditional Sewn Hem | No-Sew Hem (Tape/Glue) |
|---|---|---|
| Durability | Highest – most stable and long-lasting. | Good, but can weaken over time with washing and wear. |
| Appearance | Most professional, closest to original factory hem. | Can be neat if done carefully, but might show subtle lines from the tape/glue. |
| Time Required | Moderate to long, depending on machine vs. hand sewing. | Quickest, ideal for last-minute needs. |
| Skill Level | Beginner to intermediate (machine), intermediate (hand). | Beginner-friendly. |
| Tools Needed | Sewing machine/needle & thread, scissors, iron, chalk/pen, pins. | Fabric glue/tape, scissors, iron, chalk/pen, clips (optional). |
| Washability | Can withstand regular machine washing and drying. | May require gentle washing or air drying to maintain bond. Always check product instructions. |
Tips for Hemming Denim
Denim can be a bit tricky to work with because it’s thick. Here are some tips to make your hemming project easier and give you professional results:
- Cut in Good Light: Ensure you have plenty of light so you can see your markings and make precise cuts.
- Use Sharp Scissors: Dull scissors will snag and create a jagged edge, which is harder to work with and looks less professional. Invest in good fabric shears if you plan to hem often. For a great guide to fabric scissors, check out resources from tool manufacturers like Fiskars.
- Double Check Measurements: Always measure twice, cut once. It’s easy to make a mistake, especially when working with thicker fabric.
- Press Your Folds: The iron is your best friend here. Crisp folds make it much easier to sew or apply glue neatly.
- Use Sturdy Thread: For machine or hand sewing, opt for a strong thread, like a heavy-duty polyester thread, designed for denim.
- Matching Thread is Key: For a seamless look, match your thread color to the original denim color. If you want a visible, rugged detail, choose a contrasting color.
- Consider Original Hems: For the most authentic look, you can cut off the existing hem and then re-create the hem on the resulting raw edge. However, a simpler method for beginners is to fold over the existing hem and sew it down again, creating a thicker, durable hem.
- Wash and Dry First: Denim can shrink and stretch. It’s best to wash and dry your jeans according to their care instructions before hemming to account for any shrinkage.
FAQ: Hemming Bootcut Jeans
Q1: Can I hem bootcut jeans without a sewing machine?
Yes! You can easily hem bootcut jeans using a needle and thread for a hand-sewn hem, or with fabric glue or iron-on hemming tape for a quick no-sew option. These methods are beginner-friendly and can achieve great results.
Q2: How much extra fabric should I leave for hemming denim?
For bootcut jeans, a seam allowance of 1 to 1.5 inches is ideal. This provides enough fabric for a substantial hem that will hold its shape and durability. This is the amount of fabric you’ll fold up, so you cut below your desired final length by this amount.
Q3: What’s the best way to ensure my bootcut jeans are even after hemming?
Lay your jeans flat and smooth them out before marking. Measure from the bottom of the leg up to your desired length on both the inseam and outseam sides. Compare the lengths on both legs to ensure they match perfectly. If possible, have someone help you mark or check for evenness.
Q4: Will hemming affect the bootcut shape of my jeans?
No, hemming only affects the length of the jeans. It does not change the flare at the bottom. The key is to measure and cut correctly so the bootcut silhouette is preserved while the jeans achieve the desired length.
Q5: How do I hem my bootcut jeans if I want to keep the original “worn” hem?
To keep the original hem, you’ll need to carefully cut the new hem into place. This involves carefully removing the original hem stitch, then reattaching it at the new desired length. For a simpler approach that still looks good, you can fold up the jeans past the original hem and sew the new hem below the original, creating a thicker hem. Or, cut off the original hem, then re-fold and re-sew a new hem in its place.


