Quick Summary:
Learn an easy, genius method to hem bootcut jeans perfectly at home. This guide uses a sewing machine for a professional finish, ensuring your favorite jeans fit just right without costly alterations. Get ready for perfectly hemmed, stylish bootcut jeans with simple, clear steps.
How to Hem Bootcut Jeans: The Genius Method
Too-long jeans can make you feel a bit off, like you’re tripping over your own style. Bootcut jeans, with their classic flare, are especially tricky to hem because you need to maintain that subtle wider opening at the ankle. It’s a common frustration when your favorite pair has lost its perfect length. But don’t worry! With a few simple tools and this straightforward method, you can achieve a crisp, professional hem right in your own home. We’ll walk you through every step, making it easy to get that perfect fit and keep your bootcut jeans looking their best.
Why Bootcut Jeans Need Special Hemming
Bootcut jeans are designed to fit comfortably over boots. Their slightly flared leg opening is key to their silhouette. When hemming, the goal is to shorten the length without disrupting this essential flare. A poorly hemmed bootcut jean can look awkward, with an opening that’s too narrow or a hem that doesn’t lie flat. This method focuses on preserving that boot-friendly shape, ensuring your jeans maintain their intended style and function.
The Genius Method: What You’ll Need

Before we dive in, gather these essential items. Having everything ready means you can move through the process smoothly.
Essential Tools and Supplies:
- Your Bootcut Jeans: Make sure they are clean and dry.
- Sewing Machine: A standard home sewing machine will work perfectly.
- Matching Thread: It’s best to match the original thread color and weight if possible.
- Fabric Scissors: Sharp scissors are crucial for a clean cut.
- Measuring Tape or Ruler: For accurate measurements.
- Fabric Marking Tool: Tailor’s chalk, a washable fabric marker, or even a pencil.
- Straight Pins: To keep the fabric in place.
- Iron and Ironing Board: For pressing seams flat.
- Seam Ripper (Optional): If you need to remove an existing hem.
- A Helpful Friend (Optional but Recommended): To help with tricky measurements and pinning.
Step-by-Step Guide to Hemming Bootcut Jeans
Step 1: Determine Your Desired Length
Put on the shoes you typically wear with your bootcut jeans. Stand in front of a mirror. Pin the jeans to the desired length, making sure they just skim the top of your shoe or reach the floor as you prefer. Have a friend help you here to ensure the length is even and looks right from all angles. Be mindful of the natural drape of the fabric.
Step 2: Mark the Hem Line
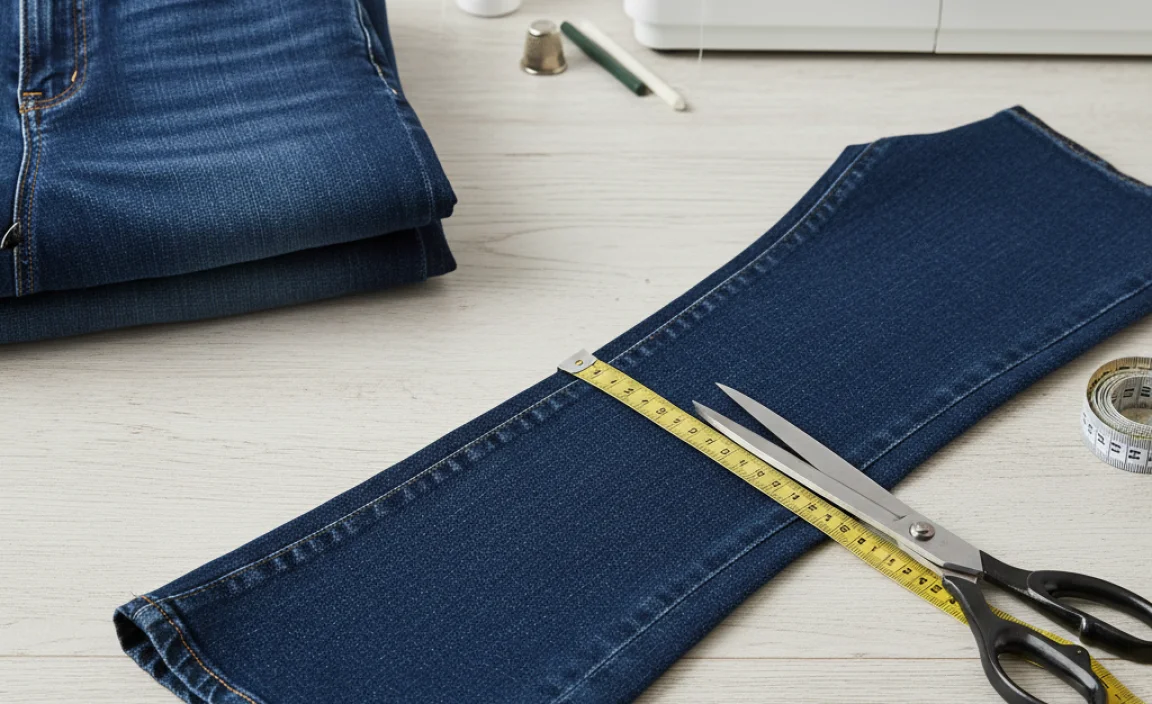
Once you’re happy with the pinned length, carefully take off the jeans. Lay them flat on a smooth surface, like a table or the floor. Use your fabric marking tool to draw a clear line around the circumference of the leg, ¼ inch below the pinned edge. This ¼ inch will be your seam allowance.
Step 3: Cut Off the Excess Fabric
Using your sharp fabric scissors, carefully cut along the marked line. It’s important to cut as straight as possible. For bootcut jeans, the cut will follow the slight outward flare of the leg. If your jeans have a thicker, factory-made hem, you might want to use a seam ripper to remove it first before cutting to the desired length, ensuring a neater finish. If you’re cutting off an existing hem, remember to account for that thickness in your measurement.
Writer’s Tip: Always cut slightly longer than you think you need. You can always trim more, but you can’t add it back!
Step 4: Prepare for Sewing – The Fold
Now, take the raw edge of the fabric and fold it up towards the inside of the jean leg, aligning it with the crease you made when pinning. Press this fold firmly with your iron. This creates a guide for your second fold.
Step 5: The Second Fold and Pinning
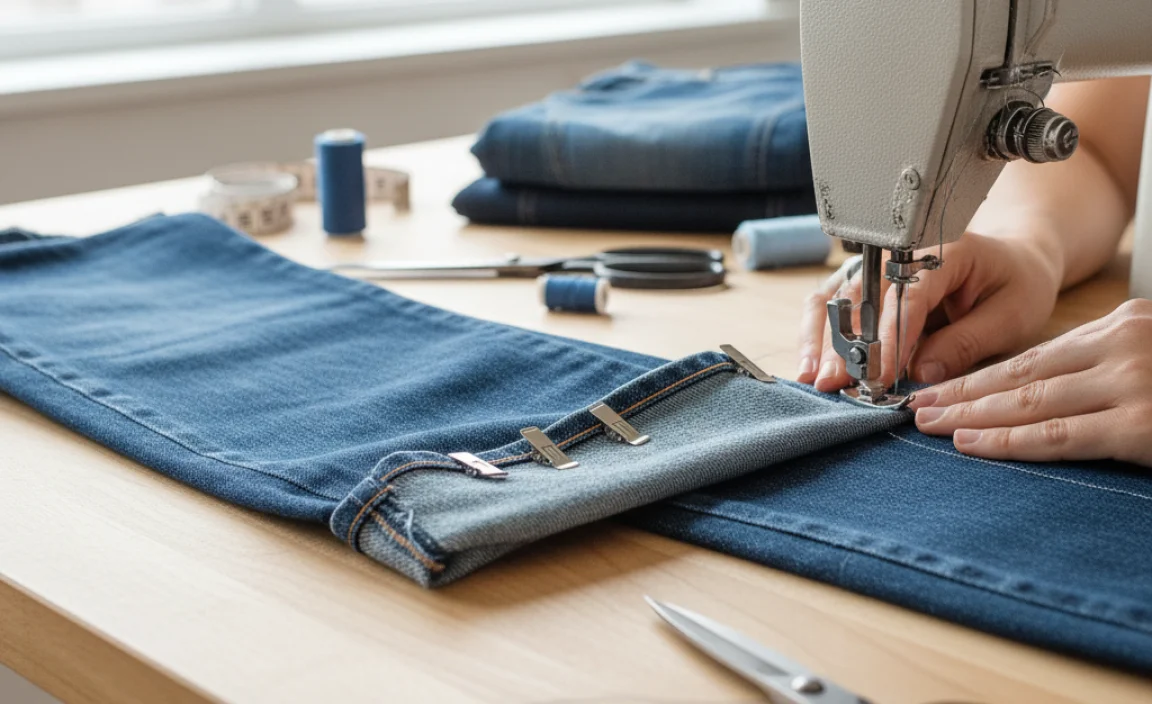
Next, fold the fabric up again. This time, fold it so the raw edge is completely enclosed within the fold. You want to create a hem that’s approximately ½ inch to ¾ inch wide, depending on the original hem width and your preference. Make sure this fold is also pressed firmly with your iron. Pin the folded hem in place all the way around the leg. The pins should go through all layers of the fabric, securing the hem.
Important Note on Original Hems: If you are trying to preserve the original look of the jean hem (e.g., a frayed or thicker factory-made hem), you can carefully remove the old hem with a seam ripper, trim the leg to length, then re-attach the original hem. This is a more advanced technique but yields the most authentic look. For beginners, folding and sewing a new hem is much simpler and still looks great.
Step 6: Set Up Your Sewing Machine
Thread your sewing machine with the matching thread. Set it to a straight stitch. A medium stitch length is usually suitable for denim. If your machine has a heavy-duty needle, use it, as denim can be thick. Test the stitch on a scrap piece of denim or an old garment to ensure it’s working correctly.
For sewing denim, a universal needle or a specific denim needle (size 14 or 16) is recommended. You can find more information on choosing the right needle at Singer Sewing Company’s guide.
Step 7: Sew the Hem
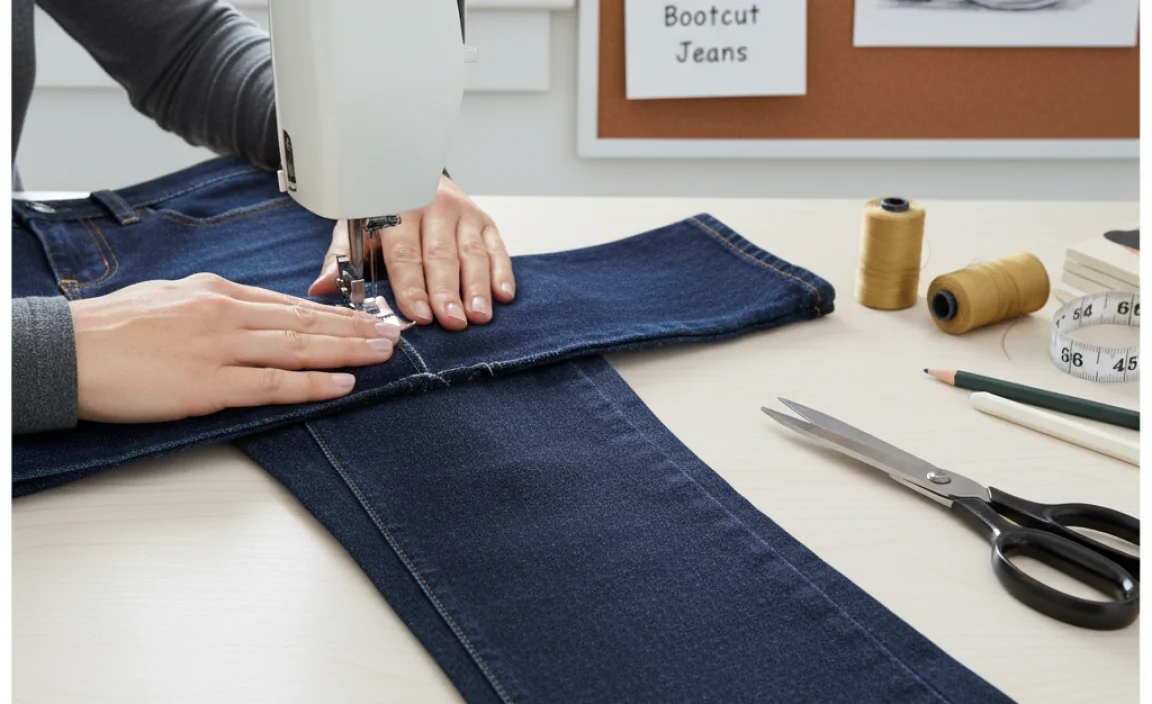
Start sewing at the inseam or outseam of the leg for a less visible stitch line. Position the folded hem under the sewing machine’s presser foot. Backstitch a few times at the beginning to secure the thread. Sew all the way around the leg, guiding the fabric so that the edge of the fold runs evenly under the needle. Aim to sew just above the folded edge, about ⅛ inch up from the bottom of the fold.
When you reach the point where you started, backstitch again to secure the end. For bootcut jeans, be mindful of the slight flare as you sew. You want to keep the fabric smooth and prevent puckering. The machine should naturally accommodate the widening leg.
Pro Tip: If you have a free-arm sewing machine, use it! This makes it much easier to maneuver the pant leg around the arm of the machine to get a smooth stitch.
Step 8: Finishing Touches
Once you’ve sewn all the way around, trim any excess threads. Remove the pins. Try on your perfectly hemmed jeans! If everything looks good, you’re done. If not, you can always unpick the stitches and try again. That’s the beauty of learning to hem yourself – you can always make adjustments.
Understanding Hem Types for Bootcut Jeans
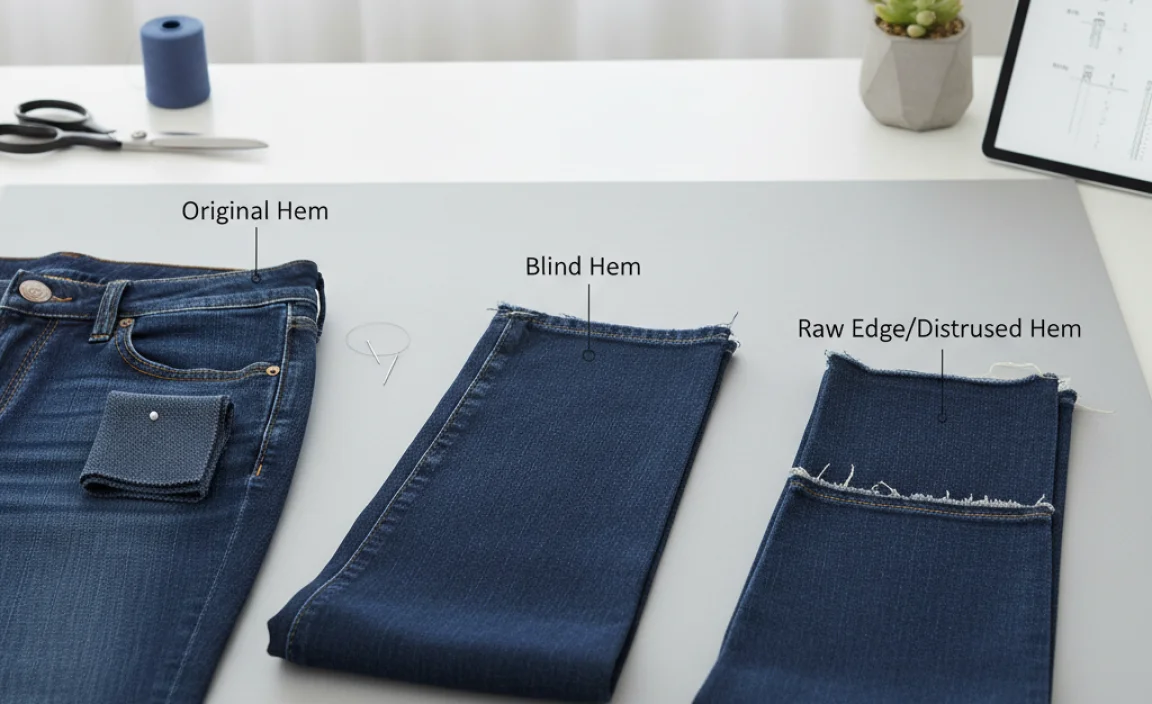
While this guide focuses on a simple folded hem, it’s good to know the options. The method described above is a double-fold hem, offering a clean and durable finish suitable for most bootcut jeans. Other options, like preserving the original hem, are more complex but can maintain a factory-fresh appearance.
| Hem Type | Description | Pros | Cons |
|---|---|---|---|
| Double-Fold Hem | Raw edge folded twice to enclose it, then stitched. | Clean finish, durable, easy for beginners. | Visually different from original factory hem. |
| Single-Fold Hem | Raw edge folded once, then stitched. | Quicker to sew. | Raw edge can fray over time; less common for denim. |
| Original Hem Preservation | Carefully remove and re-attach the existing factory hem. | Maintains original look and styling cues. | Difficult, requires precision, not suitable for all jeans. |
Tips for Perfectly Hemmed Bootcut Jeans
- Measure Twice, Cut Once: Precision is key. Always double-check your measurements before cutting.
- Use the Right Needle: Denim is tough. A sturdy needle prevents skipped stitches and broken threads.
- Ironing is Your Friend: Pressing each fold before pinning and before sewing makes a huge difference in the final look.
- Go Slow: Especially around curves or thicker seams, take your time to ensure an even stitch.
- Practice on Scraps: Before hemming your good jeans, practice the stitch on a similar fabric.
- Consider the Shoe: Always hem with the shoes you’ll be wearing. Different heel heights will change the required length.
Troubleshooting Common Hemming Issues
Even with the best intentions, you might encounter a snag. Here are solutions to common problems:
Uneven Hem
Cause: Fabric shifted during cutting or sewing, or measurements were inconsistent.
Solution: If it’s slightly off, you might be able to adjust the stitching. For a more significant difference, you may need to unpick the hem and re-mark and re-cut your desired length. Laying perfectly flat and using your chalk line is critical.
Puckered Stitches
Cause: Thread tension is too tight, or the needle isn’t sharp enough for the fabric.
Solution: Adjust your sewing machine’s tension settings. Consult your machine’s manual for specific advice on denim. Ensure you’re using the correct, sharp needle. Sometimes, using a walking foot on your machine can help feed the fabric more evenly.
Skipped Stitches
Cause: Dull needle, incorrect needle type, or thread issues.
Solution: Replace your sewing machine needle with a new, sharp one of the appropriate size for denim. Ensure the thread is wound correctly and you are using good quality thread. For more on sewing machine tensions and needles, the Threads Magazine offers excellent technical advice.
Hem Not Lying Flat
Cause: Fabric wasn’t pressed well enough, or the seam allowance is too bulky.
Solution: Press each fold firmly before sewing. After sewing, press the hemline again. If the bulk is the issue, ensure your folds are even and consider a slightly narrower hem if possible, or use a thinner thread.
Frequently Asked Questions (FAQ)
Q1: Can I hem bootcut jeans without a sewing machine?
A1: Yes, you can! For a quick fix or a no-sew option, use strong fabric glue or iron-on hemming tape. Ensure you follow the product instructions carefully and press well. However, a sewn hem is more durable and looks more professional.
Q2: How much fabric should I leave for the hem allowance?
A2: For bootcut jeans, a hem allowance of ½ inch to 1 inch is typical. A double-fold hem where the raw edge is folded up twice will use about 1 inch of fabric total (½ inch for the first fold, ½ inch for the second). This helps create a clean, finished edge.
Q3: How do I keep the bootcut flare when hemming?
A3: The key is to measure and cut evenly around the entire leg opening, following the existing curve of the flare. When sewing, maintain consistent pressure and guide the fabric smoothly to avoid distorting the shape.
Q4: What is the best thread to use for hemming jeans?
A4: Heavy-duty polyester thread or a specific denim thread is best. It’s stronger and more durable than standard all-purpose thread, which is important for denim that experiences a lot of wear. Matching the original color will give the cleanest look.
Q5: My jeans are really thick denim. Will my sewing machine handle it?
A5: Most modern sewing machines can handle denim if you use the correct needle (a size 14 or 16 denim needle) and go slowly. Avoid trying to sew over too many thick layers at once. If your machine struggles, you might need to use a seam ripper to remove the original hem or consider a professional service for very thick materials.
Q6: How do I ensure the hem is the same length on both legs?
A6: The easiest way is to have someone help you pin the first leg while wearing the correct shoes. Then, lay the first pant leg flat and use it as a guide to measure and mark the second leg. Measure from the waistband down on the inseam and outseam of both legs to confirm they match before cutting.
Conclusion
Hemming your bootcut jeans doesn’t have to be a daunting task. By following this methodical approach, you can achieve a precise, well-finished hem that respects the unique bootcut silhouette. Remember to take your time, use the right tools, and don’t be afraid to press your fabric well and iron out any wrinkles as you go. With these steps, you’ll gain the confidence to tackle hemming any pair of jeans, saving money and ensuring your favorite denim always fits perfectly. Enjoy your newly tailored bootcut jeans!


