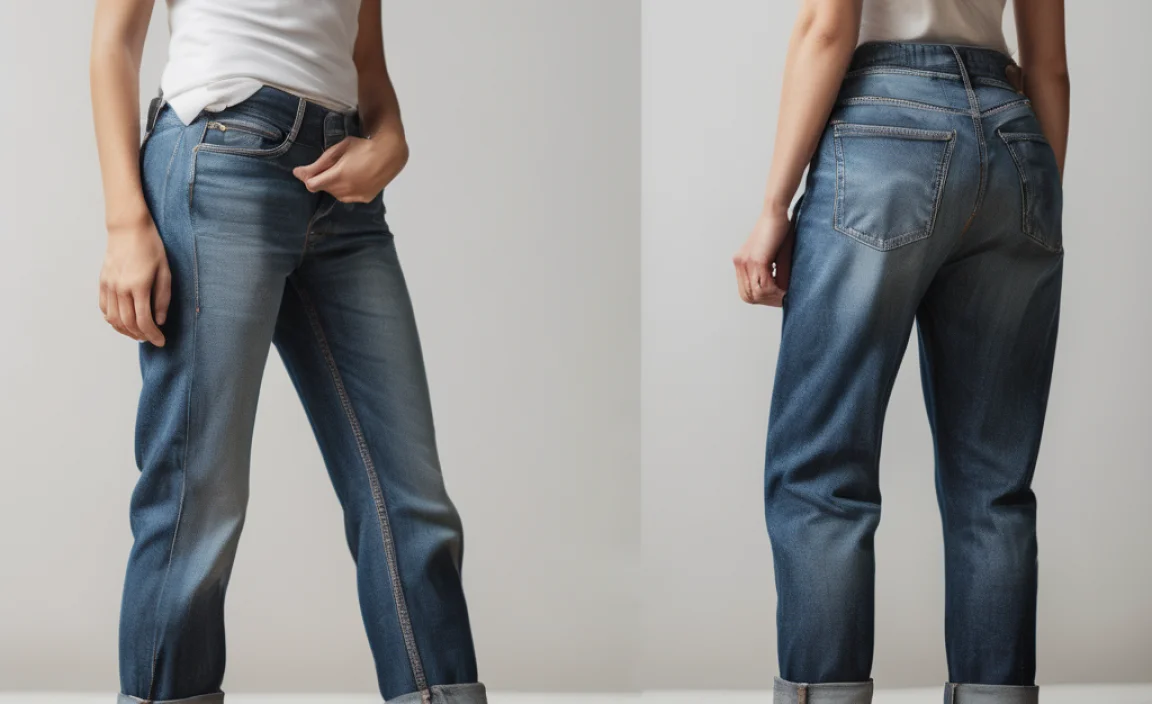
Struggling with too-long boyfriend jeans? Learn how to hem them yourself with this easy, beginner-friendly guide. You’ll get a custom fit and a polished look without needing fancy tools or skills. Follow these simple steps for perfectly tailored jeans.
Boyfriend jeans are a wardrobe staple for their relaxed fit and effortless cool. But when they’re a little too long, they can look sloppy instead of chic. The good news is, you don’t need to be a sewing expert to fix them. This guide will walk you through how to hem your boyfriend jeans so they fit perfectly, making them look like they were tailor-made just for you. We’ll cover everything you need, from simple tools to step-by-step instructions, ensuring you get a great result even if you’ve never sewn before.
Why Hemming Your Boyfriend Jeans is a Game-Changer

A proper hem can transform the way your jeans look and feel. For boyfriend jeans, which are often designed to hit at or just above the ankle bone, a hem that’s too long can make your legs appear shorter and your overall silhouette less defined. Getting the length right is key to achieving that intentionally nonchalant, stylish vibe. It’s a simple alteration that makes a huge difference in how your favorite pair of jeans presents itself, offering a personalized fit that’s often missing from off-the-rack clothing.
Gather Your Essential Tools

You don’t need a complex sewing machine or a tailor’s entire toolkit to hem jeans. Most of what you need is probably already in your home or easily accessible. Having the right tools makes the process smoother, more accurate, and ultimately, more enjoyable. Here’s a breakdown of what you’ll want to have on hand before you start:
- Fabric Scissors: Sharp, dedicated fabric scissors are crucial. Regular paper scissors can dull quicker and may not make a clean cut on denim, leading to ragged edges.
- Measuring Tape or Ruler: For accurate measurements to ensure an even hem.
- Fabric Chalk or a Washable Fabric Pen: To mark your cutting and sewing lines directly on the fabric.
- Pins: Straight pins to hold the fabric in place while you measure and where you plan to sew.
- Sewing Needle: A standard sewing needle for hand-sewing is sufficient for this project.
- Thread: Choose a thread color that matches your jeans as closely as possible for a seamless look, or opt for a contrasting color for a visible, intentional stitch if that’s your style.
- Iron and Ironing Board: To press creases and ensure your hems are crisp and neat.
- Seam Ripper (Optional but Recommended): Useful for removing the original hem if you want a clean slate, though for a raw hem, this isn’t strictly necessary.
- Your Boyfriend Jeans: The star of the show!
Understanding Different Hemming Options for Boyfriend Jeans

The best hemming method depends on the desired look and your comfort level with sewing. For boyfriend jeans, a few popular options stand out:
1. The Classic Folded Hem (The Most Common and Versatile)
This is your go-to for a tidy, finished edge that mimics a store-bought hem. It involves folding the raw edge up twice. It’s durable and looks professional.
2. The Raw Hem (Casual and Edgy)
This requires minimal sewing and offers a more distressed, casual look. It involves cutting off the excess fabric and often fraying the edge slightly. It’s super quick, but be aware it will continue to fray with washing.
3. The Rolled or Cuffed Hem (Effortless Style)
This isn’t a permanent hem but a way to style your jeans by rolling them up. You can do this with jeans that are already the right length or even slightly too long. We’ll focus on permanent hemming, but it’s good to know this option exists for quick adjustments.
Step-by-Step Guide: How to Hem Boyfriend Jeans

Let’s get started! This guide focuses on the classic folded hem, which is the most practical for beginners and offers a polished finish.
Step 1: Try On Your Jeans
Wear the shoes you typically wear with your boyfriend jeans. This is crucial for getting the length right. Stand in front of a mirror and figure out how much length you want to remove. Pin or hold the excess fabric at the bottom of each leg to see how the new length falls. Aim for the hem to hit at your ankle bone or just above it, which is generally the most flattering spot for boyfriend jeans.
Step 2: Measure and Mark
Once you’ve determined the desired length, it’s time to measure. Lay your jeans flat on a table or the floor. Measure from the crotch seam down to where you want the new hem to be. Mark this point on the inner seam of each leg. Now, to account for the hem fold, add about 1.5 to 2 inches (3.8 to 5 cm) below your mark. This is where you will cut. Use your fabric chalk or pen to draw a straight line across both legs at this cutting mark. Double-check your measurements to ensure both legs are even.
Pro Tip: Always mark your desired final hem length first, then add your seam allowance (the extra fabric for folding) below that mark for cutting. This prevents accidental over-cutting.
Step 3: Cut the Excess Fabric
Using your sharp fabric scissors, carefully cut along the marked lines on each leg. Try to make the cut as straight and even as possible. If your jeans have a thick seam at the original hem, you might want to use your seam ripper to carefully remove it first for a smoother finish. However, for a more casual look, you can sometimes leave the original hem and work around it, depending on the thickness.
Step 4: Create the First Fold (The Seam Allowance Fold)
Take the raw edge of one leg and fold it upwards by about 0.5 to 0.75 inches (1.3 to 1.9 cm). Press this fold firmly with your iron. This initial fold will hide the raw edge and create a clean base for your hem. Use pins to hold this fold in place as you work your way around the leg. Repeat this on the other leg, ensuring the fold is consistent.
Step 5: Create the Second Fold (The Hem Fold)
Now, fold the fabric up again. This second fold should be around 1 to 1.5 inches (2.5 to 3.8 cm), depending on how much length you added in Step 2. This fold should encompass the first fold you just made, hiding the raw edge completely. Press this second fold firmly with your iron. Pin it securely in place all the way around the leg. Again, ensure both legs are matched for a symmetrical look.
Table: Measuring for Your Hem
| Measurement Point | Description | Recommended Allowance for Hem |
|---|---|---|
| Desired Finished Length | From crotch seam to where you want the jeans to end. | N/A (This is your target) |
| Cutting Line | The line where you will cut off excess fabric. | Desired Finished Length + 1.5 to 2 inches (3.8 to 5 cm) |
| First Fold (Under) | First fold to tuck raw edge. | 0.5 to 0.75 inches (1.3 to 1.9 cm) |
| Second Fold (Top) | Second and final fold to create the hem. | 1 to 1.5 inches (2.5 to 3.8 cm) |
Step 6: Hand-Sew the Hem
This is where the sewing comes in. Using your needle and thread, start sewing the hem. A simple and effective stitch for this is the blind stitch or a whipstitch. If you’re new to sewing, the whipstitch is easy to learn and creates a secure seam.
How to do a whipstitch:
- Thread your needle, knot the end, and bring the needle up from the inside of the folded hem.
- Take a small stitch on the main part of the jean leg, just above the fold.
- Bring the needle across and take another small stitch through the folded hem.
- Continue this process, keeping your stitches small, even, and close together. Aim for about 1/8 to 1/4 inch (0.3 to 0.6 cm) between stitches.
- When you reach the end, tie off your thread securely on the inside of the hem.
For a more invisible hem, the blind stitch is excellent. It involves catching just a thread or two of the main jean fabric and then going across and through the folded hem. The goal is to make the stitching as inconspicuous as possible on the outside of the jeans.
External Link: For visual learners, resources like the Craftsy YouTube channel often have excellent tutorials demonstrating various sewing stitches clearly.
Step 7: Press and Finish
Once you’ve sewn all the way around, press the hem again with your iron. This will give it a crisp, finished look. Trim any loose threads. Congratulations, you’ve successfully hemmed your boyfriend jeans!
Alternative: The Quick & Easy Raw Hem

If sewing isn’t your thing and you prefer a more casual, undone look, a raw hem is a fantastic option. It’s incredibly fast.
Steps for a Raw Hem:
- Try On and Mark: Follow Step 1 from the folded hem guide to determine your desired length and mark it.
- Cut: Cut off the excess fabric at your marked line using sharp fabric scissors.
- Create Fray: To encourage fraying, you can use a seam ripper or tweezers to gently pull out some vertical threads along the cut edge. This will create that characteristic frayed look.
- Wash and Dry: Wash and dry your jeans as usual. The washing process will naturally encourage the threads to fray further, creating a perfect raw hem.
Pros and Cons of Raw Hems:
| Pros | Cons |
|---|---|
| Fastest method, requires minimal sewing skills. | Will continue to fray and lengthen with each wash. |
| Offers a trendy, casual, and distressed look. | Can sometimes look untidy if fraying becomes excessive. |
| No risk of visible stitches unless you choose to add decorative ones. | Not suitable for formal occasions or a polished look. |
| Can be easily re-cut if you want a different length later. | May require occasional trimming to manage fraying. |
Tips for Perfect Boyfriend Jean Hemming
Here are some expert insights to ensure your hemming project is a success:
- Denim Weight Matters: Thicker denim will require a sturdier needle and possibly a stronger thread. Lighter denim is more forgiving.
- Match Your Thread: For a professional appearance, match your thread color as closely as possible to the original stitching or the denim color.
- Ironing is Key: Don’t skip ironing! Pressing each fold firmly makes it easier to sew and ensures a much neater, more durable hem.
- Measure Twice, Cut Once: This old adage is especially true for sewing. Incorrect measurements are hard to fix once fabric is cut.
- Practice Your Stitch: If you’re new to sewing, practice the stitch on a scrap piece of denim before working on your jeans.
- Consider the Original Hem: If your jeans have a distinctive original hem (like a thicker selvedge or a unique color), you might want to deconstruct it carefully with a seam ripper and reattach it to the shortened legs for an authentic look. This is more advanced but yields great results.
- Hemming Tape Alternative: For a no-sew option that’s more permanent than just rolling, you can use fabric hemming tape (like Hem Ware or similar fusible web products). Follow the product instructions carefully for application. This creates a strong bond without stitching.
Frequently Asked Questions (FAQ)
Q1: How do I know where to cut my boyfriend jeans?
A1: Try your jeans on with the shoes you’ll wear them with. Decide on your desired final length (usually around the ankle bone). Then, add about 1.5 to 2 inches (3.8 to 5 cm) for your hem allowance. Mark this total length from the crotch seam and cut there.
Q2: Can I use a sewing machine for hemming jeans?
A2: Yes, a sewing machine can make the process faster, especially for the folded hem. Ensure your machine can handle the thickness of denim and use a denim needle. You can use a straight stitch or set it to a zig-zag stitch for durability.
Q3: What kind of needle and thread should I use for denim?
A3: For hand-sewing, use a strong, sharp needle. For machine sewing, use a dedicated denim or jeans needle. Polyester or heavy-duty cotton thread is recommended, as it’s stronger and less likely to break than regular all-purpose thread.
Q4: My jeans are already frayed at the bottom. Can I still hem them?
A4: Absolutely! If the fraying is too much, you can use a seam ripper to carefully remove excess frayed threads until you reach a cleaner edge. Then, you can proceed with either a folded hem or create a new raw hem by cutting and fraying intentionally.
Q5: How do I ensure the new hem looks the same on both legs?
A5: Lay your jeans flat and measure from the crotch seam to the desired hemline on both legs. Use a measuring tape or ruler and transfer your marks accurately. Pinning the folded hem carefully and pressing it with an iron before sewing also helps maintain symmetry.
Q6: What is the difference between a sew-in hem and a no-sew hem?
A6: A sew-in hem uses actual stitches, either by hand or machine, to secure the folded fabric. A no-sew hem typically uses fusible hemming tape or strong fabric adhesive to bond the fabric layers together. Sew-in hems are generally more durable, while no-sew options are quicker and don’t require sewing skills.
Conclusion
Hemming boyfriend jeans doesn’t have to be intimidating. By following these straightforward steps, you can achieve a custom fit that enhances your style and boosts your confidence. Whether you opt for a neat folded hem or a casual raw edge, the power to perfectly tailor your favorite denim is now in your hands. Remember to measure carefully, press with precision, and choose the hemming method that best suits your desired look. With just a few basic tools and a little patience, you can rescue those slightly-too-long jeans and give them a new lease on life, ensuring they always look their stylish best.


