


Quick Summary: Learn how to hem boyfriend jeans using fabric glue for a quick, no-sew fix. This method permanently alters the hem without sewing machines or needles, giving you perfectly shortened jeans in minutes with a strong, flexible hold.
Boyfriend jeans are a wardrobe staple, offering comfort and a relaxed style. But when they’re just a little too long, they can end up looking sloppy rather than chic. The frustration of perfectly good jeans pooling at your ankles is real! Traditional hemming can feel daunting if you don’t sew, and even if you do, sometimes you just need a quick fix. What if you could get a clean, permanent hem in minutes, without a single stitch? This guide uses a genius fabric glue method that’s surprisingly effective and incredibly easy, even for absolute beginners. Get ready to transform your too-long jeans into your new favorite pair.
Why Choose the Fabric Glue Method for Hemming?

When it comes to altering your favorite pair of boyfriend jeans, the fabric glue method stands out for several key reasons. It’s not just about convenience; it’s about achieving a professional-looking result with minimal effort and specialized tools. Let’s break down why this approach is a game-changer for your denim:
Speed and Simplicity
The most obvious advantage is the sheer speed. Sewing takes time, precision, and often a sewing machine. Measuring, pinning, sewing a straight line, and finishing the raw edge can easily take an hour or more. With fabric glue, once you’ve measured and prepared, the actual hemming process can be done in under 30 minutes. It’s ideal for last-minute outfit adjustments or for anyone who simply wants to get their jeans hemmed without a lengthy DIY project.
No Sewing Skills Required
This is perhaps the biggest barrier for many people wanting to hem their clothes. Fear of uneven stitches, tangled thread, or the general complexity of sewing can be intimidating. The fabric glue method bypasses all of that. If you can measure and use a glue stick, you can hem your jeans. You don’t need a sewing machine, needles, or any prior experience. This makes it the perfect solution for beginners or those who prefer a no-sew approach to clothing alterations.
Permanent and Durable Hold
Don’t let the “glue” aspect fool you into thinking this is a temporary fix. High-quality fabric glues are designed to create a permanent bond that can withstand washing and wearing. They remain flexible, meaning the hem won’t feel stiff or unnatural. The bond created by these specialized glues is surprisingly strong, designed to hold fabric fibers together securely through the rigors of everyday life. For a detailed understanding of fabric adhesives, you can explore resources on textile bonding, which often discusses the chemical properties that make these glues work effectively on various fabrics.
Cost-Effective Solution
Taking your jeans to a tailor can cost anywhere from $10 to $30 or more, depending on your location and the complexity of the hem. A tube of good fabric glue costs a fraction of that, often under $10, and can be used for multiple projects. This makes it an incredibly budget-friendly option for keeping your wardrobe looking its best without breaking the bank. The initial investment in the glue yields significant savings over time compared to professional alteration services.
Customizable Finish
The fabric glue method allows for a clean, crisp hem that can mimic the look of a traditional sewn hem. You have complete control over the length and the type of fold you create, ensuring the final result perfectly suits your style and the exact fit you desire. Whether you want a subtle, barely-there hem or a slightly thicker band, you can achieve it with careful application.
Materials You’ll Need
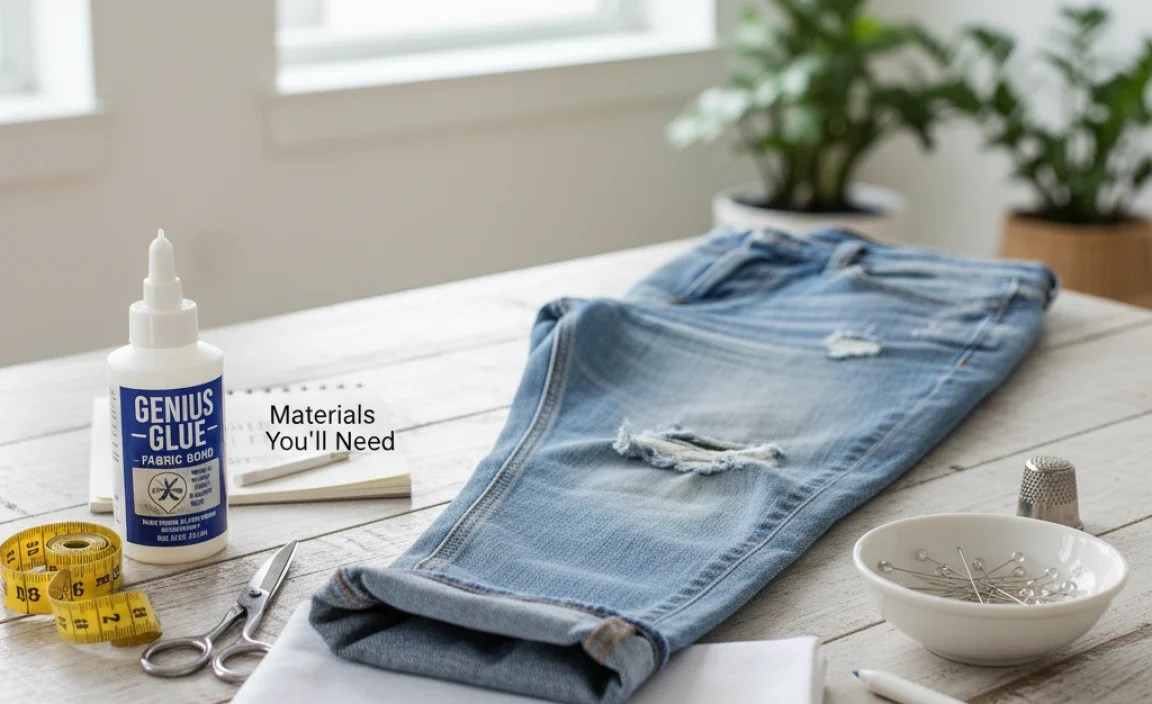
Gathering the right supplies is the first step to a successful no-sew hem. You only need a few simple items:
- Boyfriend Jeans: Your pair that needs hemming!
- Fabric Glue: A high-quality, permanent fabric glue specifically designed for textiles. Look for brands known for their flexibility and washability. Examples include Aleene’s Permanent Fabric Glue, Dritz Duy-Hem, or Gorilla Fabric Glue.
- Sharp Fabric Scissors: While we’re not cutting off excess fabric in the traditional sense, you might need them for trimming stray threads.
- Measuring Tape or Ruler: For precise measurements and ensuring an even hem all around.
- Fabric Marker or Chalk: To mark your desired hemline. A water-soluble or erasable marker is best.
- Iron and Ironing Board: For pressing the hem into place before gluing and for activating some glues (check your glue’s instructions).
- Cardboard or Plastic Sheet: To place inside the jean leg to prevent glue from seeping through to the other side.
- Optional: Hemming Tape: Some people like to use temporary hemming tape to hold the fold in place before applying glue for extra security. While not strictly necessary with fabric glue, it can be helpful for beginners.
Step-by-Step: How to Hem Boyfriend Jeans with Fabric Glue

Follow these straightforward steps to achieve a perfect hem on your boyfriend jeans using just fabric glue. It’s easier than you think!
Step 1: Prepare Your Workspace and Jeans
Start by ensuring you have a clean, well-lit space to work in. Lay down some old newspaper or a protective cloth to catch any accidental glue drips. Make sure your boyfriend jeans are clean and dry. Any dirt or residue can prevent the glue from bonding properly. If your jeans are brand new and have a stiff finish, it’s a good idea to wash and dry them first according to their care instructions. This will also pre-shrink them, giving you a more accurate final length.
Step 2: Determine Your Desired Length
Put on your boyfriend jeans and decide exactly where you want the new hem to fall. Stand in front of a mirror. You can pin or hold the excess fabric at the bottom to get a visual. Remember, boyfriend jeans typically have a relaxed, cropped, or slightly cuffed look. You might want them to just skim the top of your shoes or sit a bit higher on your ankle. Keep in mind that you’ll be folding the fabric up, so mark the length after you’ve decided on your fold size. For instance, if you want your jeans to end up at 24 inches and you plan to fold up 1 inch, you’ll mark the 24-inch point, then fold up 2 inches of fabric before gluing.
Step 3: Mark the Hemline
Once you’ve determined the final length, it’s time to mark it. Take off the jeans. Lay one leg flat on a clean surface. Using your measuring tape and fabric marker or chalk, measure up from the original hem and mark a line at your desired final length. For example, if you want the jeans to be 26 inches long, measure 26 inches from the bottom edge and draw a line all the way around the leg. It’s crucial to get this measurement accurate. Repeat this process for the other leg, ensuring it matches perfectly. It’s often easiest to do this by measuring from the inseam or the waistband down to ensure symmetry, rather than relying solely on the original hem, which can sometimes be uneven.
Pro Tip: For the most accurate marking, especially on thicker denim, try using a quilting ruler. It’s often easier to get a straight line around a leg with one.
Step 4: Prepare for the Fold
Now, decide how much fabric you want to fold up to create the new hem. A typical fold for a fabric glue hem is between 1 to 2 inches. This amount will need to be folded upward above the line you just marked. This folded section will become the new hem. Place a piece of cardboard or a plastic sheet inside the jean leg, positioned between the layers of fabric. This is critical to prevent the fabric glue from seeping through to the other side of the pant leg, which would seal them together.
Step 5: Create the Fold and Secure (Optional)
Fold the excess fabric up along the line you marked. You’ll be folding the fabric towards the inside of the jean leg. Press this fold firmly with your fingers or a ruler to create a crisp crease. If you’re using hemming tape, apply it along the edge of the fold now, pressing it down firmly. This is a temporary hold that helps keep the fabric perfectly in place while you apply the glue. Ironing over the crease can make it sharper and more stable, especially if your glue’s instructions recommend heat activation later.
Step 6: Apply the Fabric Glue
Carefully remove the cardboard or plastic sheet momentarily. Apply a thin, even bead of fabric glue along the top edge of the folded fabric, right on the crease. You want enough glue to create a strong bond, but not so much that it oozes out. Aim for a bead about 1/8 to 1/4 inch wide, directly where the folded fabric meets the main body of the jean leg. Work in small sections if it helps you maintain control. Make sure the glue is applied to the fabric that will be on the inside of the new hem. Ensure the glue is applied to the fabric that was originally the bottom edge of the jean.
Important Note: Different fabric glues have different application methods. Some require you to press the fabric together immediately, while others recommend letting the glue become tacky first. Always read and follow the specific instructions on your chosen fabric glue for the best results. For instance, some glues, like certain Gorilla Fabric Glue products, are activated by heat, meaning you’ll iron them after application.
Step 7: Press the Fold and Seal the Hem
Once the glue is applied, carefully reposition the cardboard or plastic sheet inside the leg. Press the folded hem down firmly onto the glued area. Smooth out any wrinkles. If your fabric glue requires heat activation, now is the time to use your iron. Set your iron to the appropriate temperature for denim (usually medium-high with steam, but check your glue’s instructions). While the cardboard is still inside, carefully iron over the glued seam. Apply firm pressure for the time recommended by the glue manufacturer. This heat helps to cure the glue, creating a strong, permanent bond. If your glue doesn’t require heat, simply press down very firmly for a few minutes, smoothing the fabric.
Step 8: Allow for Curing Time
This is a crucial step for ensuring a strong, long-lasting hem. Most fabric glues need time to cure completely before the jeans can be worn or washed. While they might feel dry to the touch relatively quickly, the full strength of the bond develops over 24 to 72 hours. Resist the temptation to try on your newly hemmed jeans immediately or put them in the wash. Check the fabric glue packaging for the recommended curing time. Patience here will lead to a hem that lasts.
Step 9: Repeat for the Other Leg
Once one leg is complete, and while you’re waiting for the glue to cure, repeat steps 1 through 8 for the other jean leg. Ensure you match the length and fold precisely, so your jeans have a symmetrical and polished appearance. Double-checking measurements at each step is key to professional-looking results.
Tips for a Flawless Fabric Glue Hem

Achieving a professional-looking hem with fabric glue is all about attention to detail. Here are some extra tips to help you get the best results:
- Work on a Flat Surface: Always ensure your jeans are laid out flat when measuring, marking, and applying glue. This prevents puckering and ensures an even hem.
- Measure Twice, Glue Once: This old adage is especially important here. Accuracy in measurement prevents mistakes that are hard to undo once the glue has bonded.
- Test on Scrap Fabric (if possible): If you have a piece of scrap denim or an inconspicuous area of the jeans (like an inside seam allowance), test your glue and ironing technique. This helps you understand how the glue behaves and how long to iron.
- Don’t Skimp on Quality Glue: While cheaper glues might seem appealing, investing in a reputable brand designed for fabric will pay off in durability and flexibility. Look for glues approved by well-known craft or sewing brands.
- Gentle Washing: Even with a permanent glue bond, it’s wise to treat garments with fabric glue gently in the wash. Use a delicate cycle, cool water, and mild detergent. Avoid harsh scrubbing directly on the hem.
- Air Dry or Low Heat: For maximum longevity of the glue bond, air drying your jeans is often best. If you must use a dryer, opt for a low-heat or air-fluff setting.
- Trim Stray Threads: After the glue has fully cured, inspect the hem. If there are any stray threads, carefully trim them with sharp fabric scissors for a neat finish.
Fabric Glue vs. Traditional Hemming

To help you decide if the fabric glue method is right for you, let’s compare it with traditional sewing methods.
| Feature | Fabric Glue Method | Traditional Sewing (Machine) | Traditional Sewing (Hand) |
|---|---|---|---|
| Skill Level Required | Beginner | Intermediate to Advanced | Beginner to Intermediate |
| Time Commitment | 15-30 minutes active time (plus curing) | 30-60 minutes active time | 1-2 hours active time |
| Tools Needed | Fabric glue, ruler, marker, iron, cardboard/plastic | Sewing machine, thread, pins, scissors, ruler | Needle, thread, pins, scissors, ruler |
| Cost of Materials | Low ($5-$10 for glue) | Moderate (machine cost, thread) | Very Low (needle, thread costs minimal) |
| Durability & Flexibility | Good to Excellent (depending on glue quality) | Excellent | Good |
| Appearance | Can mimic sewn look, slight thickness possible | Professional, clean finish | Can be very neat, but visible stitching |
| Potential Issues | Glue bleed-through, stiff hem if too much glue, curing time | Uneven stitching, machine tension issues, raw edge finishing | Uneven stitches, thread breakage, time-consuming |
| Ease of Repair/Alteration | Difficult to undo once bonded | Relatively easy to unstitch | Easy to unstitch |
As you can see from the table, each method has its pros and cons. The fabric glue method excels in speed, simplicity, and accessibility for those without sewing experience. Traditional sewing offers ultimate control and a classic finish, but requires more skill and time. For a quick, effective, and no-fuss hem on boyfriend jeans, fabric glue is often the superior choice.
Frequently Asked Questions (FAQ)
Q1: Will the fabric glue hold up in the washing machine?
A1: Yes, when high-quality fabric glue specifically designed for textiles is used correctly and allowed to cure fully, it will hold up in the washing machine. Always follow the glue manufacturer’s instructions for care and washing.
Q2: Can I use any type of glue, like craft glue or hot glue?
A2: No, it is best to use fabric glue specifically designed for textiles. Craft glues may not be flexible enough, and hot glue can be too stiff, melt, or not hold permanently on fabric. Specialized fabric glues are formulated to provide a flexible, durable, and washable bond.
Q3: What happens if I use too much glue?
A3: If you use too much glue, it can seep through the fabric layers, creating a stiff, visible line, or even gluing the pant leg shut. It can also make the hem feel stiff and uncomfortable. Apply glue in a thin, even bead.
Q4: How long does the fabric glue hem typically last?
A4: A properly applied and cured fabric glue hem can last for the lifetime of the jeans, provided they are cared for according to the glue manufacturer’s recommendations. Washing and wear will test its durability, but good fabric glues are made for this.
Q5: Can I undo the hem if I change my mind?
A5: It is very difficult to undo a permanent fabric glue bond without damaging the fabric. For this reason, it’s essential to be absolutely certain about your desired length before applying the glue. Always measure carefully and consider trying on the jeans with the fold pinned or taped before committing to glue.
Q6: My jeans have a raw hem already. Can I still use fabric glue to shorten them?
A6: Yes! If your boyfriend jeans have a raw hem that you want to shorten and make permanent, you can still use the fabric glue method. You’ll simply need to trim off the existing frayed edge to your desired length, then fold the fabric up to create a new, clean hem and apply the glue as


