


Quick Summary: Learn a simple, effective way to hem boyfriend jeans to your perfect length, even for beginners. This guide offers a no-fuss method that avoids complicated sewing, ensuring a stylish, custom fit for your favorite denim.
How to Hem Boyfriend Jeans: Proven, Effortless Method
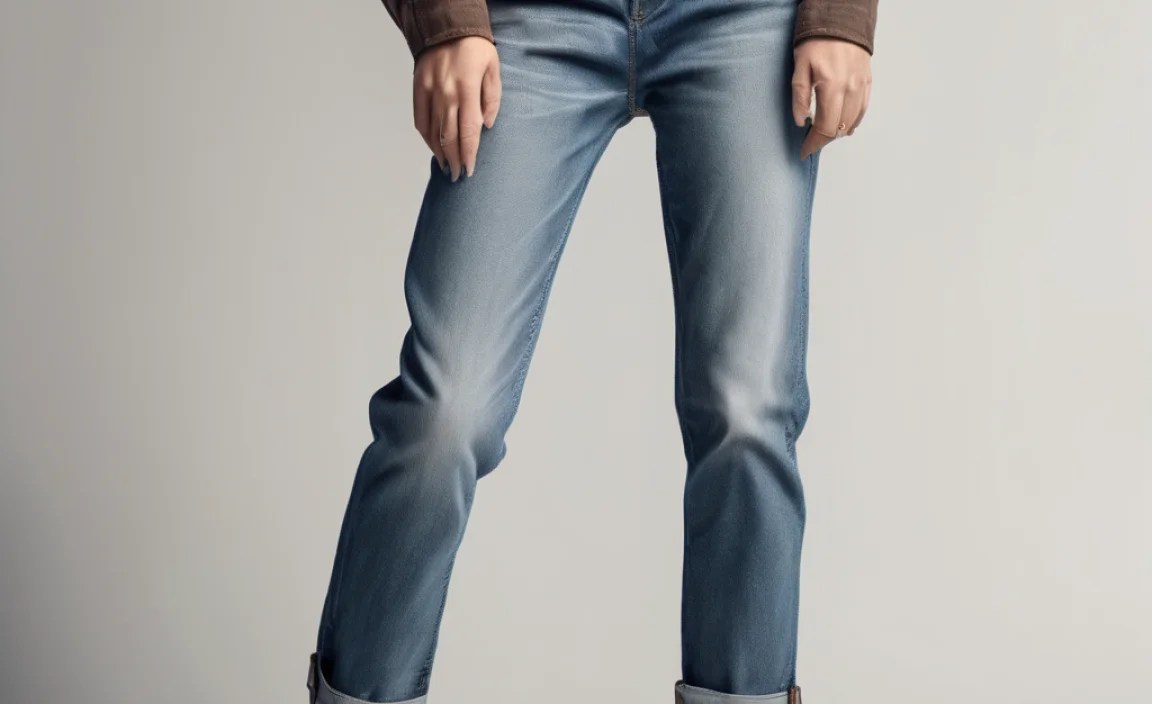
Does the perfect pair of boyfriend jeans always end up a little too long? You’re not alone. That relaxed, cool-girl vibe can sometimes get lost in a sea of excess fabric pooling around your ankles. Many people think hemming requires special skills or a sewing machine, but it doesn’t have to be that way. With a few simple tools and this straightforward guide, you can achieve a professional-looking hem that perfectly suits your style. Let’s transform those slightly-too-long jeans into your new favorite wardrobe staple.
Why Boyfriend Jeans Need a Specific Hemming Approach

Boyfriend jeans are loved for their laid-back, slightly loose fit. Unlike skinny jeans, which often require a more precise, form-fitting hem, boyfriend jeans can handle a bit more flexibility. The key is to shorten them to a length that complements your frame without looking sloppy. Common hemming issues include:
- Jeans looking too baggy or shapeless after hemming.
- An uneven hemline that draws unwanted attention.
- Shrinking jeans unevenly or by accident.
- Creating a hem that looks too “finished” and loses the casual appeal.
This guide focuses on a method that preserves the casual character of boyfriend jeans while giving you control over the length. We’ll walk through it step-by-step, making it easy for anyone to follow, no matter their sewing experience.
The Proven, Effortless Method for Hemming Boyfriend Jeans

This method is designed for speed, simplicity, and fantastic results. It requires minimal sewing and focuses on quick, clean adjustments. We’ll be using fabric glue or hemming tape for a no-sew approach, and providing tips for a minimal-sew option as well.
Gather Your Supplies
Before you start, ensure you have everything you need. This will make the process much smoother.
- Your boyfriend jeans
- Fabric scissors (sharp ones are key!)
- Fabric glue or iron-on hemming tape (available at most craft or fabric stores)
- Optional: Sewing machine or needle and thread (for a more permanent, minimal-sew option)
- Measuring tape or ruler
- Fabric chalk or a washable marker
- A flat surface to work on (an ironing board or clean table)
- Iron and ironing board (if using iron-on tape or for pressing seams)
- Straight pins
Step 1: Try On and Mark Your Desired Length
This is the most crucial step for getting it right. Wear the shoes you typically pair with your boyfriend jeans to get the most accurate length. Stand in front of a mirror and determine where you want the hem to fall.
Consider these points:
- Ankle Bone: A common and flattering spot.
- Slightly Above Ankle Bone: For a more cropped look.
- Just Above the Shoe Top: To avoid bunching.
Once you’ve decided, use your fabric chalk or washable marker to make a small dot on the outside seam of one leg where you want the new hemline to be. Then, carefully fold the excess fabric upwards, smoothing it out. Mark the fold line across the inseam and the outseam. Now, take off the jeans.
Step 2: Measure and Cut the Excess Fabric
Lay one jean leg flat on your work surface. Using your ruler or measuring tape, measure from the marked hemline downwards to where you want the fabric to end. A good rule of thumb is to leave about 1 to 1.5 inches of extra fabric below your marked hemline for the fold-over. This extra bit will be folded up to create the new hem. Cut off the excess fabric with your sharp fabric scissors. Aim for a straight, even cut. Repeat this process for the other leg, ensuring both legs are the same length.
Step 3: Prepare for the Hemming Tape or Glue
Now, you’ll create the fold.
For No-Sew (Hemming Tape or Fabric Glue):
- Turn the jeans inside out.
- Along the cut edge of one leg, fold up the fabric by about 0.5 to 0.75 inches.
- Press this fold firmly with an iron to create a crisp crease. This does not have to be perfectly neat as it will be hidden.
- Unfold the crease slightly.
- Apply your hemming tape or fabric glue along the inside of this crease. If using tape, follow the manufacturer’s instructions for placement and adhesion. For glue, apply a thin, even bead.
- Fold the fabric back up, pressing it against the tape or glue.
- Now, you’ll create the second fold. Fold the fabric up again, so the original cut edge now meets your first fold line. Press this second fold firmly. Again, aiming for a clean crease is helpful.
- This second fold creates your finished hem depth. Ensure it’s the desired width.
For Minimal-Sew (Needle and Thread or Sewing Machine):
- Turn the jeans inside out.
- Fold up the fabric by about 1 inch from the cut edge and press with an iron.
- Fold it up again by another 1 inch, creating your hem. Press this second fold. This creates a double-folded hem, which is sturdy and neat.
- Secure the hem in place using straight pins. Pin all the way around the leg.
Step 4: Secure the Hem
For No-Sew (Hemming Tape or Fabric Glue):
- If using iron-on hemming tape: Place the iron on the recommended heat setting (check the tape packaging). Press firmly on the folded hem for the time specified by the manufacturer. You might want to iron from the inside of the jean leg, pressing the folded hem onto the main fabric. Often, people also recommend ironing from the outside for extra adhesion, but be careful not to iron the tape directly onto the outside of the jeans.
- If using fabric glue: Follow the glue manufacturer’s instructions for drying time. Many glues require clamping or weighting the fabric while they dry. You can use heavy books or clips to hold the hem in place. Allow ample drying time before proceeding.
For Minimal-Sew (Needle and Thread or Sewing Machine):
- Using a sewing machine: Stitch along the very bottom edge of the folded hem. You can use a straight stitch or a zigzag stitch for added durability. Stitch close to the raw edge of the fabric that’s now tucked inside the hem. Sew around the entire circumference of the leg. Make sure to backstitch at the beginning and end to secure the stitches.
- Using a needle and thread: A blind hem stitch is ideal for a nearly invisible finish. You can also use a simple running stitch or whipstitch for a more visible but still secure hem. Work your way around the leg, keeping your stitches small and even.
Step 5: Finishing Touches
Once your hem is secured (either glued, taped, or sewn), turn the jeans right side out. Try them on again to check the length and how the hem looks. Ensure the hem lies flat and evenly. If you used fabric glue, give it a bit more time to fully cure before any strenuous activity. For a more “worn-in” look, you can gently fray the very bottom edge of the hem if you desire, but this is optional.
Choosing the Right Hem for Boyfriend Jeans

Boyfriend jeans offer a versatile canvas for different hemming styles. The “proven, effortless method” described above primarily uses a folded hem, which is clean and practical. However, other options might appeal to different styles:
Hemming Techniques Comparison for Boyfriend Jeans
| Technique | Pros | Cons | Ideal For |
|---|---|---|---|
| No-Sew (Fabric Glue/Tape) | Fast, no sewing machine required, beginner-friendly, retains casual look. | May not be as durable as sewing, can sometimes create a slight stiffness. | Quick fixes, beginners, temporary alterations. |
| Minimal-Sew (Double Fold Hem) | Durable, neat finish, good balance of ease and longevity. | Requires basic sewing skills or a machine, slightly more time-consuming. | Everyday wear, achieving a polished but casual look. |
| Raw/Cut-Off Hem | Very casual, stylish, no hemming required, unique look. | Can fray excessively over time, needs careful cutting to avoid looking messy. | Achieving a deliberately undone, street-style vibe. |
| Cuffed Hem | Adjustable length, adds visual interest, can change silhouette. | Can sometimes look bulky with thick denim. | Versatility, creating different looks with the same jeans. |
The “Hydrogen Peroxide” Hem Myth
You might have come across advice suggesting the use of hydrogen peroxide to alter the hem of jeans. It’s important to clarify that hydrogen peroxide is a bleaching agent and is not a method for hemming jeans. While it can be used to lighten or distress denim fabric, it will not create a clean or functional hem. Trying to “hem” with peroxide would likely result in uneven discoloration and damage to the fabric, not a neatly shortened garment. Always rely on sewing, fabric glue, or hemming tape for actual hemming. For a guide on distressing denim, you can consult resources like this one from the University of Vermont Extension, which details fabric care and common treatments like bleaching, but emphasizes proper techniques.
Tips for Perfect Boyfriend Jean Hemming

Beyond the basic steps, a few insider tips can elevate your hemming game:
- Sharp Scissors Matter: Dull scissors can snag fabric and create an uneven cut, which is harder to fix. Invest in a good pair of fabric scissors.
- Pre-Wash Your Jeans: Always wash and dry your jeans as you normally would before hemming. Denim can shrink, and you want to hem them to their final, intended size.
- Work on Both Legs Simultaneously: After measuring and marking one leg, pin the second leg to the same length, then cut both. This helps ensure consistency.
- Consider the Overall Proportion: How long your boyfriend jeans are can affect the rest of your outfit. A slightly cropped hem can make legs appear longer and works well with various shoe types.
- Test Your Glue/Tape: If you’re unsure about the hold of your fabric glue or hemming tape, test it on a scrap piece of fabric first to understand how it adheres and how long it takes to dry/set.
- Embrace Imperfection (Slightly): Boyfriend jeans are inherently casual. A perfectly crisp, tailored hem might look out of place. A slightly more relaxed hem, even with sewing, can enhance the style.
Troubleshooting Common Hemming Issues
Even with the best intentions, a few snags can happen. Here’s how to fix them:
- Uneven Hem: If you notice an uneven hem after securing it, you might be able to carefully unpick the glue or stitches, re-press, and re-secure. For a no-sew method where this is difficult, a slightly longer cuff can sometimes hide minor unevenness.
- Hem Unraveling: If using glue or tape, ensure you applied enough and that it fully bonded to the fabric. For sewn hems, check if your stitches are secure or if they need reinforcing.
- Stiff Hem: Sometimes fabric glue or thick tape can make the hem feel a bit stiff. Gently flex the hem and wash the jeans (following care instructions) – this often softens it.
- Hem Too Short/Long: If the hem is significantly off, the easiest fix is to unpick and re-hem. If it’s just a little off, you might be able to adjust the fold slightly.
Frequently Asked Questions About Hemming Boyfriend Jeans
Q1: How much fabric should I leave for the hem?
For a clean, double-folded hem (sewn or no-sew), leave about 1 to 1.5 inches of fabric below your desired finished length. This allows for two folds, creating a sturdy and neat edge.
Q2: Can I really hem jeans without sewing?
Absolutely! Fabric glue and iron-on hemming tape are excellent, user-friendly alternatives for achieving a professional-looking hem without any sewing skills.
Q3: How do I make the hem look casual, like the original?
Boyfriend jeans often have a relaxed cuff or a softly finished hem. Avoid overly sharp creases if you want a very casual look. For a no-sew approach, ensure your second fold isn’t too stiff. For a sewn hem, a simple straight stitch or a slightly less precise blind hem can work well.
Q4: What if my boyfriend jeans have a special detail or seam at the hem?
If your jeans have a decorative hem or an unusual seam, try to replicate that style with your new hem. You may need to carefully unpick the original hem to see exactly how it was constructed. If it’s too complex, consider if a raw hem or a simple cuff would work better for your desired look.
Q5: How do I prevent fraying on a raw hem?
A raw hem will naturally fray. To control it, you can stitch a line of sewing about 0.5 to 1 inch above your cut edge. This acts as a stopper, preventing the fraying from going higher up the leg. You can also use fray-stopping liquid products, available at craft stores.
Q6: Can I hem my boyfriend jeans with hydrogen peroxide?
No. Hydrogen peroxide is a bleaching agent used for altering denim color, not for hemming. It will not create a clean hem and can damage the fabric. Stick to fabric glue, hemming tape, or sewing for hemming.
Conclusion
Mastering the art of hemming your boyfriend jeans is a simple yet impactful skill that instantly upgrades your wardrobe. With this proven, effortless method, you can say goodbye to ill-fitting denim and hello to your perfectly tailored go-to pair. Whether you choose a no-sew approach with fabric glue or hemming tape, or opt for a quick minimal-sew stitch, the result is confidence and style. Remember to measure carefully, cut precisely, and secure your hem with care. Now you have the knowledge to make any pair of boyfriend jeans fit you flawlessly, enhancing your look and ensuring comfort with every wear.


