


Hemming your flare jeans without drying in a machine is simple and effective. This guide shows you the easy steps to get a clean, custom fit that air dries perfectly.
You love your flare jeans, but they’re just a little too long, right? It’s a common problem, and waiting for a perfect hem shouldn’t be a hassle. Many people worry about washing and drying machine-dried jeans after hemming, but there’s a foolproof way to handle it. This guide will walk you through hemming your favorite flare jeans so they look great and are ready to wear, all while keeping them away from the dryer. Let’s get your jeans fitting just right, the easy way.
Prep Your Materials and Space
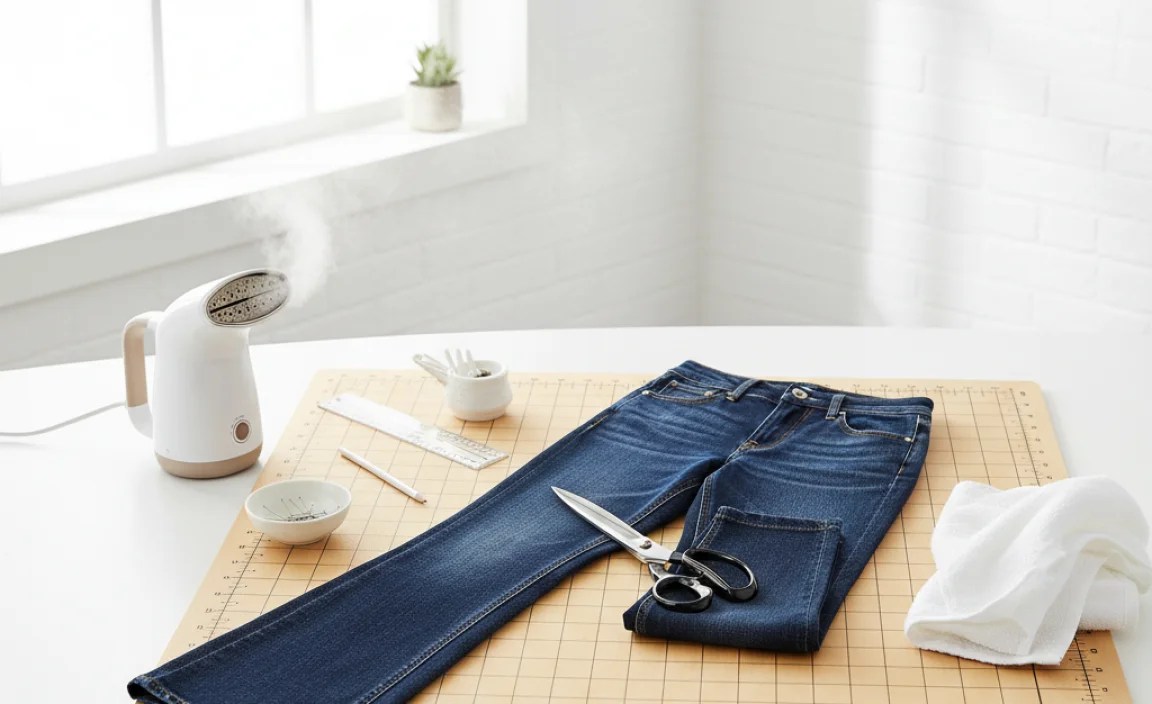
Before you start, gather everything you need. Having all your supplies ready makes the hemming process smooth and stress-free. Think of this as setting up your personal tailoring station.
Essential Tools for Hemming
Having the right tools makes all the difference. These are the basics that will help you achieve a professional-looking hem.
- Flare Jeans: The star of the show!
- Fabric Scissors: Sharp scissors designed for fabric will ensure a clean cut. Dull scissors can snag or fray the material.
- Fabric Measuring Tape: A flexible tape measure is crucial for accurate length measurements.
- Fabric Marker or Chalk: To mark your hemline clearly. A disappearing ink pen or chalk works well.
- Straight Pins: To hold the fabric in place while you work.
- Iron and Ironing Board: For pressing seams to make them neat.
- Sewing Machine (Optional but Recommended): For a durable and professional-looking stitch. If you don’t have one, a sturdy hand-sewing needle and matching thread will do.
- Matching Thread: Choose a thread color that closely matches your jeans.
- Seam Ripper: To carefully remove the original hem if you want a seamless look.
Setting Up Your Workspace
Find a well-lit area with enough space to lay your jeans out flat. A clean, flat surface like a large table or even a sturdy floor is ideal. Good lighting helps you see your markings and stitches clearly, reducing the chance of errors.
Determine the Correct Hem Length
Getting the length right is key. You want your jeans to hit at the perfect spot on your shoe without dragging on the floor.
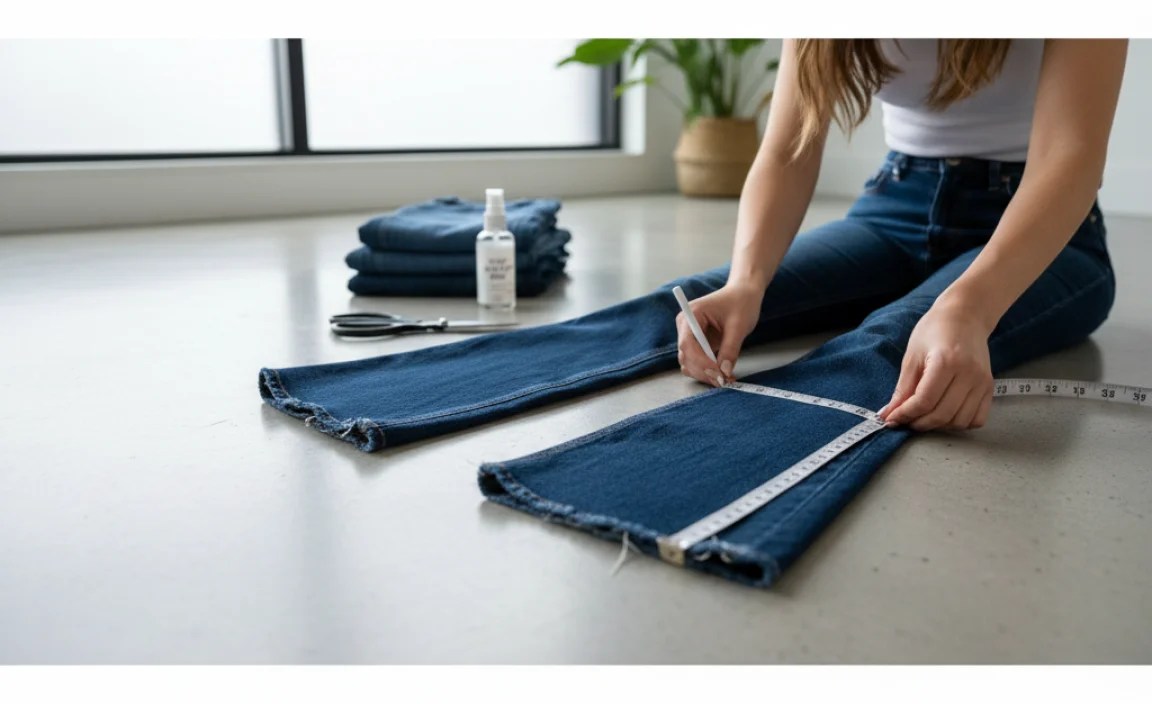
Try On and Mark the Length
1. Wear Your Shoes: Put on the shoes you typically wear with your flare jeans. This is non-negotiable for accurate hemming, especially with flared styles.
2. Put On the Jeans: Wear the jeans and stand up straight in front of a mirror.
3. Find the Ideal Spot: Decide where you want the bottom of your jeans to fall. For flare jeans, the hem usually sits just kissing the top of your shoe or slightly overlapping it. Avoid hemming them too short, as this can break the silhouette of the flare.
4. Mark the First Jean: Using your fabric marker or chalk, make a small dot on the outside of one leg where you want the hem to end. Do this on the outer seam where it’s easiest to see.
5. Measure and Mark the Second Jean: Lay the jeans flat. Measure the distance from the marked spot to the original hem. Use this measurement to mark the exact same spot on the other leg of the jeans, ensuring symmetry. You can also fold the jeans in half lengthwise, matching the inseams and outseams, and then transfer the mark directly to the second leg.
Consider the Weight of the Fabric
Different denim weights can behave differently. Heavier denim might support a slightly longer hem, while lighter denim may lie flatter. For an “air dry only” approach, you’re less concerned about shrinkage from washing, but always keep in mind how the fabric drapes.
Preparing the Jeans for Hemming

Once you know your desired length, you need to prepare the jeans. This usually involves removing the old hem and preparing the fabric for your new one.
Removing the Original Hem
This step is optional but recommended if you want a clean, factory-like finish.
1. Lay Jeans Flat: Lay one leg of the jeans flat on your workspace.
2. Locate the Hem Stitch: Identify the stitching that creates the original hem.
3. Use a Seam Ripper: Carefully insert the tip of your seam ripper under one stitch and lift. Gently pull to break the thread. Continue ripping stitch by stitch all the way around the leg. Be patient to avoid damaging the denim fabric.
4. Unfold the Hem: Once all the stitches are removed, unfold the original hem. You’ll now have a longer leg with a raw edge.
5. Press the Old Hem: Use your iron to press the fabric flat. This will remove any creases from the old hem and make it easier to measure and cut.
Measuring and Cutting the Excess Fabric
Now, you’ll cut the jeans to your final desired length.
1. Add Hem Allowance: For a standard hem, you’ll typically need about 1 to 1.5 inches of fabric for the new hem allowance. This is the extra fabric you’ll fold up.
2. Measure and Mark: Measure down from your original marked line (the one where the jeans should end) by the amount of your hem allowance (e.g., 1.5 inches). Mark this new line all the way around the leg of the jeans. Ensure the line is straight and perpendicular to the side seams.
3. Cut the Fabric: Using your sharp fabric scissors, carefully cut along this new marked line. Cut through both layers of the denim leg. Repeat for the other leg of the jeans, ensuring consistency.
Creating and Sewing the New Hem

This is where your jeans start to take their new shape. You have a couple of options for constructing the new hem, depending on the look you prefer. For an “air dry only” approach, precision here is key to avoid issues after washing.
Option 1: Double Fold Hem (Recommended for Clean Finish)
This method creates a neat, durable hem with no raw edges showing.
1. Fold and Press (First Fold): Take the raw edge of the cut fabric and fold it up towards the inside of the jeans by about 0.5 inches. Press this fold with your iron.
2. Fold and Press (Second Fold): Now, fold this pressed edge up again, this time to meet your original marked hemline (where the jeans should end). The amount you fold up will be your hem allowance minus the first 0.5-inch fold. For example, if you allowed 1.5 inches, you’d fold up 1 inch now. Press this second fold firmly. You should now have a clean, double-folded hem with no raw edges visible on the outside or inside of the leg.
3. Pin in Place: Secure the folded hem with straight pins, placing them about every 1-2 inches all the way around the leg to keep it from shifting while you sew.
4. Sew the Hem:
By Machine: Set your sewing machine to a strong stitch, like a straight stitch or a denim stitch. Sew as close to the inner folded edge of the hem as possible. Go slowly, especially as you approach seams or thicker areas of denim. Backstitch at the beginning and end of your stitching to secure the thread.
By Hand: Use a backstitch or a sturdy running stitch for durability. Stitch as close to the inner folded edge as possible. Aim for consistent, small stitches.
Option 2: Single Fold Hem with Serged Edge (Advanced)
This is a very durable option often seen on ready-to-wear jeans, but it requires a serger.
1. Serge the Raw Edge: Fold the raw edge up by about 0.5 inches and press. Then, fold it up again to meet your original marked hemline (the same as Method 1, step 2). Instead of folding the raw edge under, you’ll use a serger to finish this raw edge by trimming and overcasting the fabric.
2. Press and Pin: Press the single-folded hem in place and pin it securely.
3. Sew the Hem: Use your sewing machine to stitch along the top folded edge of the hem. This provides extra security.
Re-creating the Original Look (Optional)
If you removed the original hem and want to mimic its finished appearance, you can:
If you removed the original hem, try to salvage it. You can then attach this original hem to your newly cut leg. This maintains the original stitching detail and wear.
When sewing your new hem, try to match the stitch color and width of the original hem as closely as possible.
Finishing Touches and Air-Drying

Once the sewing is complete, a final press and the correct drying method are crucial for a professional finish.
Final Press
1. Ironing: Once again, use your iron and ironing board to press the new hemline from the inside and outside. This will flatten everything, remove any wrinkles, and give your jeans a crisp, finished look.
The Air-Dry Method Only
This is the critical step to ensure your hemmed jeans maintain their new length and shape without distortion from machine drying.
1. Hang or Lay Flat: Hang your jeans on a sturdy hanger, or lay them flat on a clean, dry surface. If hanging, ensure the hem is not being pulled down by the weight of the jeans. A pants hanger that clips the waistband often works best.
2. Avoid Heat: Crucially, do NOT put your freshly hemmed jeans in a clothes dryer. Machine dryers can cause fabric to shrink, warp, and set stitches unevenly, potentially altering your carefully measured hem length.
3. Drying Time: Allow the jeans to air dry completely. This might take 24-48 hours, depending on humidity and air circulation. Ensure they are fully dry before wearing them for the first time.
Troubleshooting Common Hemming Issues
Even with the best intentions, minor issues can arise. Here’s how to tackle them.
Uneven Hemming
Cause: Inconsistent marking or cutting, or the fabric shifting during sewing.
Solution: If the unevenness is minor, a careful final press might help disguise it. For significant unevenness, you may need to unpick and re-hem the leg. Always use the mirror-marking technique or fold the jeans precisely in half to ensure both legs are even.
Wavy or Stretched Hem
Cause: Pulling the fabric too hard while sewing, or using the wrong stitch setting on a machine.
Solution: For machine sewing, try a slightly shorter stitch length. If hand-sewing, use even, gentle tension. If the hem is already wavy, try steam-pressing it to encourage it to lay flat. In some cases, a bit of stretching during the cutting or sewing phase can occur. Try to be gentle and consistent. If it’s quite bad, unpicking and re-sewing with a lighter touch might be necessary.
Thread Snapping
Cause: Dull needle, wrong needle type, too much tension, or stitching through thick seams.
Solution: Ensure you’re using a good quality denim needle for your sewing machine. Check your machine’s tension settings. If sewing by hand, use a strong thread and replace your needle if it feels blunt.
Benefits of Air-Drying After Hemming
Choosing to air dry your newly hemmed flare jeans exclusively offers several advantages, ensuring your hard work pays off.
Preserving the Hem Length
Machine dryers are notorious for causing shrinkage. By air-drying, you ensure that the length you so carefully measured and cut remains exactly as you intended. This is the primary reason for the “air dry only” instruction – it locks in your perfect length.
Maintaining Fabric Integrity
The high heat and tumbling action of a dryer can stress denim fibers, potentially leading to premature wear and tear. Air-drying is gentler, helping to maintain the integrity and longevity of your jeans.
Reducing the Risk of Warping
Uneven drying in a machine can cause seams to warp or the fabric to become distorted. Air-drying allows the fabric to settle naturally into its shape, preserving the denim’s structure and the crispness of your new hem.
Energy Conservation
Opting for air-drying is an eco-friendly choice. It reduces electricity consumption compared to using a dryer, contributing to a smaller carbon footprint and lower utility bills.
Fact Sheet: Hemming Flare Jeans (Air Dry Only)
Here’s a quick overview of key information for hemming your flare jeans correctly, emphasizing the air-dry method.
| Aspect | Details |
|---|---|
| Goal | Achieve a custom hem length for flare jeans without machine drying. |
| Key Challenge | Ensuring the hem maintains its precise length and shape after hemming. |
| Critical Step | Exclusively air-dry jeans after hemming; NO machine drying. |
| Measurement Tip | Always wear the intended shoes when marking hem length. |
| Hem Allowance | Typically 1 to 1.5 inches for a double fold hem. |
| Hem Finishing | Double fold hem is recommended for a clean, no-raw-edge finish. |
| Fabric Care After Hemming | Gentle washing (if needed) and air-drying are crucial. |
| Why Air Dry? | Prevents shrinkage, warping, and preserves the new hem length. |
Tips for Different Denim Types
While this guide focuses on a general approach, different types of denim might require slight adjustments.
Lightweight Denim
Draping: Lightweight denim can be more prone to stretching while you work. Be extra gentle when pinning and sewing.
Hem Finish: A narrower hem allowance might work well with lighter fabrics to avoid bulk.
Heavyweight Denim
Needles: Ensure you are using a denim-specific needle for your sewing machine to handle the thickness.
Stitching: You might need to reinforce stitches on thicker seams with a longer stitch length or a second row of stitching.
Stretch Denim
Try-On Fit: Stretch denim can stretch out on its own. Ensure your jeans are fitted correctly to your body before hemming, and always try them on with shoes.
Sewing: A zigzag stitch or a stretch stitch on your machine can provide better flexibility for stretch denim hems.
FAQs About Hemming and Air-Drying
Q1: Can I hem my flare jeans without a sewing machine?
Absolutely! While a machine makes it faster and often more durable, you can achieve a great hem by hand. Use strong thread and a sturdy stitch like a backstitch. Just be patient for neat results.
Q2: How much fabric should I leave for the hem allowance?
A standard hem allowance for jeans is usually between 1 inch and 1.5 inches. This provides enough fabric to create a double fold without making the hem too bulky.
Q3: Will air-drying prevent my jeans from shrinking after hemming?
.lwrp.link-whisper-related-posts{
margin-top: 40px;
margin-bottom: 30px;
}
.lwrp .lwrp-title{
}.lwrp .lwrp-description{
}
.lwrp .lwrp-list-container{
}
.lwrp .lwrp-list-multi-container{
display: flex;
}
.lwrp .lwrp-list-double{
width: 48%;
}
.lwrp .lwrp-list-triple{
width: 32%;
}
.lwrp .lwrp-list-row-container{
display: flex;
justify-content: space-between;
}
.lwrp .lwrp-list-row-container .lwrp-list-item{
width: calc(25% – 20px);
}
.lwrp .lwrp-list-item:not(.lwrp-no-posts-message-item){
max-width: 150px;
}
.lwrp .lwrp-list-item img{
max-width: 100%;
height: auto;
object-fit: cover;
aspect-ratio: 1 / 1;
}
.lwrp .lwrp-list-item.lwrp-empty-list-item{
background: initial !important;
}
.lwrp .lwrp-list-item .lwrp-list-link .lwrp-list-link-title-text,
.lwrp .lwrp-list-item .lwrp-list-no-posts-message{
}@media screen and (max-width: 480px) {
.lwrp.link-whisper-related-posts{
}
.lwrp .lwrp-title{
}.lwrp .lwrp-description{
}
.lwrp .lwrp-list-multi-container{
flex-direction: column;
}
.lwrp .lwrp-list-multi-container ul.lwrp-list{
margin-top: 0px;
margin-bottom: 0px;
padding-top: 0px;
padding-bottom: 0px;
}
.lwrp .lwrp-list-double,
.lwrp .lwrp-list-triple{
width: 100%;
}
.lwrp .lwrp-list-row-container{
justify-content: initial;
flex-direction: column;
}
.lwrp .lwrp-list-row-container .lwrp-list-item{
width: 100%;
}
.lwrp .lwrp-list-item:not(.lwrp-no-posts-message-item){
max-width: initial;
}
.lwrp .lwrp-list-item .lwrp-list-link .lwrp-list-link-title-text,
.lwrp .lwrp-list-item .lwrp-list-no-posts-message{
};
}


