


How to Hem Flare Jeans: Genius Beginner Tips
Learn how to perfectly hem your flare jeans as a beginner with these simple, step-by-step instructions. Get a professional look at home without the hassle, ensuring your favorite pants fit just right. It’s easier than you think to achieve a flawless finish!
Is there anything more frustrating than finding the perfect pair of flare jeans, only to realize they’re inches too long? That awkward drag on the floor isn’t just a tripping hazard; it can ruin the hemline and make your stylish shoes disappear. Taking them to a tailor can be costly, and many “quick fixes” end up looking amateurish. But don’t worry! Hemming flare jeans yourself is entirely achievable, even if you’ve never picked up a needle before. With the right guidance and a few easy tricks, you can achieve a clean, professional hem that makes your jeans look like they were custom-made for you. Let’s get started and transform those too-long flares into your new favorite pair!
Why Hemming Flare Jeans Can Be Tricky (And How We’ll Solve It)

Flare jeans have a unique silhouette that adds a bit of challenge to hemming. The wider leg opening means the fabric tends to hang differently than it would on a straight-leg or skinny jean. This can make it harder to get an accurate measurement and a smooth finish. The “flare” itself can also distort the perceived length when you’re standing flat. Instead of focusing on the very bottom, you need to consider how the fabric drapes at the ankle and just above it.
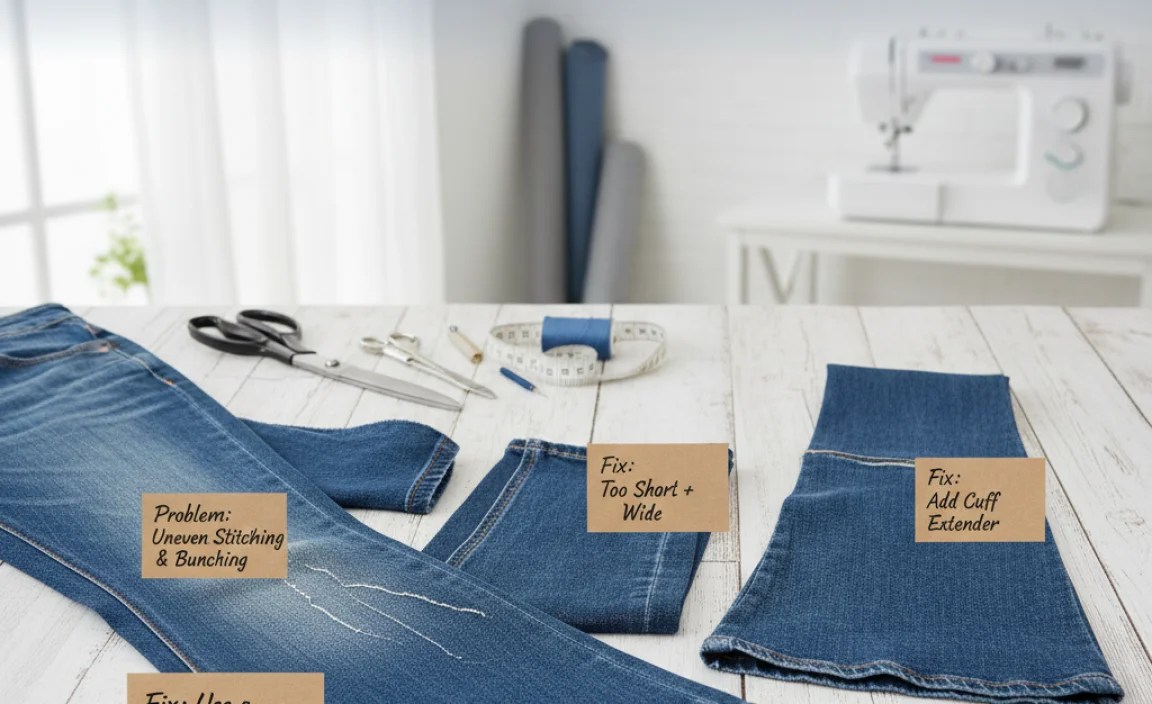
Many beginners run into common problems:
- Uneven hems that look crooked.
- Hems that are too short or too long, despite careful measuring.
- The original hem’s thickness and texture are lost, making the new hem look out of place.
- Seams that are too bulky or don’t lie flat.
The “genius” tips ahead are designed to tackle these issues head-on. We’ll focus on techniques that preserve the original look of your jeans and ensure a flattering fall, no matter your skill level.
Gather Your Essential Tools

Before you start, make sure you have these items ready. Having everything at hand will make the process smooth and less stressful.
Must-Have Supplies:
- Flare Jeans: The star of the show!
- Fabric Scissors: Sharp scissors specifically for fabric will give you a clean cut.
- Measuring Tape: A flexible sewing tape measure is ideal.
- Fabric Marker or Chalk: For marking your cut line. Washable is best.
- Pins: Straight pins to hold the hem in place.
- Thread: Matching the color of your jeans’ original stitching. Denim thread is sturdier.
- Sewing Machine: While hand-sewing is possible, a machine makes it much faster and more durable.
- Iron and Ironing Board: Essential for pressing seams and creating crisp folds.
- Seam Ripper (Optional but Recommended): If you plan to reattach the original hem.
- A Friend or Full-Length Mirror: To help with measuring and checking the fit.
Step-by-Step: How to Hem Flare Jeans for Beginners

This method focuses on preserving the original look of your jeans, which is often the most desired outcome for flare styles. We’ll be essentially “cutting and re-hemming,” aiming to replicate the original finish.
Step 1: Prepare Your Jeans and Decide on Length
First, put on the jeans you want to hem. Wear the shoes you intend to wear with these jeans most often. This is crucial for flare jeans, as the correct length is determined by how the pant leg breaks on your footwear. Stand up straight and look in a full-length mirror.
To determine your desired finished length:
- Adjust the jeans so the hem just skims the top of your shoes. You ideally want them to touch the shoe without pooling excessively on the floor or looking too short.
- A slight drag is acceptable for flare jeans, as it contributes to the silhouette, but avoid excessive fabric bunching.
- If you don’t have the exact shoes, choose the ones with the highest heel you’d wear with them, or err on the side of leaving a little extra length.
Once you’re happy with the length, have a friend mark the spot with a pin or chalk, or carefully mark it yourself in the mirror.
Step 2: Mark Your Cut Line
Take off the jeans. Lay them flat on a clean surface. You need to decide where to cut. A good rule of thumb is to cut about 1 to 1.5 inches below your marked desired finished length. This extra fabric will become your new hem allowance.
For flare jeans, it’s best to mark this line all the way around the leg. Make sure you are marking on the inside of the leg hem if possible, especially if your jeans have a distinct outer seam texture you want to preserve.
Pro Tip: Use a fabric marker or chalk that can be easily removed later. A washable marker is your best friend here.
Step 3: Cut the Excess Fabric
It’s time to cut! Using your sharp fabric scissors, carefully cut along the line you just marked. Cut through both layers of the leg opening. Try to make the cut as straight and even as possible. If you’re worried about cutting straight, you can use a ruler as a guide for a short section, but be careful not to create a rigid line that looks unnatural.
Important Note: If your jeans have a distinctive selvedge or thick seam at the original hem that you want to keep for a more authentic look, you’ll need to carefully remove this first using a seam ripper. We’ll cover this in an advanced tip later, but for beginners, simply cutting the excess fabric to create a new hem is the easiest route.
Step 4: Prepare the New Hem
Now, fold up the cut edge of the denim to create your new hem. The ideal amount to fold up depends on the original hem width and the look you want. A common and easy-to-manage hem allowance is about 0.5 to 1 inch.
Fold the raw edge of the fabric upwards towards the inside of the jean leg, towards the thigh. Press this fold firmly with your iron. This creates a crisp, straight guideline and helps the fabric lie flat while you sew.
Why Pressing is Key: A well-pressed fold makes sewing significantly easier and results in a much neater final hem. It ensures your stitches will go through a consistent amount of fabric.
Step 5: Secure the Hem with Pins
Before sewing, you need to secure the folded hem. Use your straight pins to hold the folded fabric in place. Place pins about every 1 to 2 inches apart, perpendicular to the folded edge. Make sure the pins go through the folded fabric and the main body of the jean leg.
Ensure the hem lies flat and even all the way around the leg. Check that you haven’t accidentally caught extra fabric or created any pleats. If you’re using a sewing machine, you might want to place a few pins slightly further apart to make sure the machine can pass over them easily. Alternatively, you can use clips if you prefer.
Step 6: Sew the Hem
This is where your sewing machine (or needle and thread) comes into play. If using a sewing machine:
- Thread your machine with a thread color that matches your jeans. Denim thread is recommended for durability, but a strong all-purpose thread will also work.
- Use a straight stitch. A slightly longer stitch length (around 2.5-3 on your machine’s dial) can be good for denim to prevent it from bunching.
- Start sewing at an inseam or side seam for a less visible starting point.
- Sew slowly and steadily along the folded edge of the hem. Guide the fabric with your hands, but don’t force it.
- Backstitch at the beginning and end of your seam to secure the stitches and prevent them from unraveling.
If hand-sewing, use a backstitch for strength. This stitch resembles a machine stitch and is very secure. Sew as close to the raw edge of the fold as possible.
Step 7: Finishing Touches
Once you’ve sewn all the way around the leg, trim any excess thread. If you used a washable marker, check that it’s no longer visible. Give the hem a final press with your iron to ensure it lies perfectly flat.
Turn your jeans right-side out. Try them on with your intended shoes. They should now have that perfect, flattering length!
Preserving the Original Hem: A Slightly More Advanced Technique

For a truly authentic look, you can try to re-attach the original hem. This is a bit more involved and works best if the original hem isn’t excessively bulky, like on many modern jeans.
Steps:
- Carefully Rip the Original Hem: Using a seam ripper, very gently detach the original hem from the leg of the jeans. Work slowly to avoid damaging the fabric. You’ll be removing the thick, folded edge.
- Measure and Cut: Once the original hem is removed, you’ll have a raw, wider leg opening. Measure up from the bottom edge of the original hem band to your desired finished length. Cut off the excess fabric from the bottom of the jean leg.
- Prepare the Jean Leg: Fold the raw edge of the jean leg upwards towards the inside, to the desired finished length. Press this fold.
- Re-attach the Original Hem: Align the now-folded raw edge of the legging inside the original hem band you removed. Pin it securely.
- Sew: You will need to sew the original hem band back onto the leg. This can be tricky to do evenly. Aim to stitch as close to the original stitching line on the hem band as possible, catching both the band and the folded leg fabric. A sewing machine is highly recommended here.
This method requires more patience and a steadier hand but yields the most “factory-fresh” result.
Common Problems and How to Fix Them
Even with the best intentions, you might encounter a few hiccups. Here’s how to address them.
Problem: My new hem looks wobbly or uneven.
Solution: This usually happens if the fabric shifted during cutting or sewing. For a quick fix, you can try to trim the uneven edge very carefully. If it’s significantly noticeable, you might need to unpick the seam and re-sew, paying extra attention to keeping the folded edge straight and consistent. Use plenty of pins and press with an iron.
Problem: The hem is too short/too long.
Solution: If it’s too short, you’ll need to unpick the hem, release the fabric, and re-hem, leaving more length this time. If it’s too long, you can unpick, fold the fabric up higher, re-press, and re-sew. Always try them on with shoes before cutting!
Problem: My sewing machine is skipping stitches or threading is bunching.
Solution: This is common with denim. Ensure you are using a new, sharp needle appropriate for denim (a “jeans” needle or “denim” needle). Check that your thread is correctly loaded and that the tension settings are appropriate for denim. Sometimes, the bobbin thread can bunch; ensure the bobbin is inserted correctly and the thread is wound smoothly.
Problem: The new hem looks too thick and stiff.
Solution: This can happen if you folded up too much fabric or are using very thick denim. Try to make your secondary fold (the one you sew) between 0.5 to 0.75 inches. For very thick denim, consider a single fold hem if the fabric won’t fray excessively, or try a lighter-weight thread. Washing and drying the jeans after hemming can also soften the hem.
Table: Comparing Hemming Options
Choosing the right hemming method depends on your time, skill, and desired look.
| Method | Pros | Cons | Best For |
|---|---|---|---|
| Simple Fold & Sew | Easiest for beginners, fast, requires minimal special tools. | Can look less authentic if not done carefully, might be thicker. | Beginners, quick fixes, casual looks. |
| Re-attach Original Hem | Most authentic look, preserves original stitching and texture. | More difficult, requires a seam ripper, takes more time and precision. | Those aiming for a factory finish, vintage jeans, denim enthusiasts. |
| Fray Hem (DIY Cut-off) | Trendy, casual look, very easy to achieve. | Can unravel excessively, not suitable for all occasions, difficult to control fraying. | Fashion-forward looks, creative styling, when the original hem is damaged. |
Tips for Achieving a Perfect Flare Jean Hem
Beyond the basic steps, here are a few extra tips to elevate your hemming game and ensure your flare jeans look fantastic.
- Know Your Denim: Different denims behave differently. Stretchy denim might require a bit more care to avoid distortion while sewing. Rigid denim is easier to press and sew but can be tougher on your machine.
- Work on a Flat Surface: Always lay your jeans flat to mark, cut, and fold. This ensures consistency around the leg.
- Consider the Shoe Break: As mentioned, the shoe you wear is paramount. If you wear multiple types of shoes with your flares, consider hemming for the shoe with the highest heel or the widest sole, or accept that they might not be perfect for every single shoe.
- Test Stitch Settings: Before sewing on your jeans, test your stitch settings on a scrap piece of denim. This helps you find the best tension, stitch length, and needle combination.
- Wash Before Cutting (Sometimes): If your jeans are new and might shrink, it’s often wise to wash and dry them once before you measure and hem. This ensures your hem length will remain consistent after future washes.
- Don’t Rush: Hemming, especially for the first time, takes patience. Allow yourself enough time to do it carefully. The result will be worth it.
External Resources for Denim Care
Understanding your fabric goes a long way. For more on denim and its care, the Denim Care Guide offers comprehensive insights into washing, drying, and maintaining your jeans to prolong their life and keep them looking their best.
Frequently Asked Questions About Hemming Flare Jeans
Q1: How much length should I leave for hemming flare jeans?
A: For a standard hem, leave about 1 to 1.5 inches from your desired finished length. This provides enough fabric for a clean fold and seam. For preserving the original hem, you’d cut the excess leg fabric, then attach the original hem band back onto the leg.
Q2: Can I hem flare jeans by hand?
A: Yes, you can hem flare jeans by hand, but it will take longer and require a strong, secure stitch like the backstitch. Ensure you press the hem fold firmly and pin generously for a neat result.
Q3: How do I make sure the hem is even on flare jeans?
A: The best way is to have someone help you pin the length while wearing the jeans with your desired shoes. Otherwise, lay the jeans flat and measure carefully, using a measuring tape around the entire leg opening to ensure consistency. Pressing the fold before pinning also helps maintain an even line.
Q4: What’s the best needle and thread for hemming jeans?
A: Use a denim or jeans needle (size 14/90 or 16/100) for your sewing machine to handle the thick fabric. For thread, a heavy-duty polyester thread or a specific denim thread in a matching color will provide the best durability and appearance.
Q5: How to hem flare jeans without losing the original hem look?
A: The most effective way is to carefully detach the original hem with a seam ripper, then cut the excess leg fabric to your desired length (above where the original hem was attached), fold and sew a new hem allowance onto the exposed leg, and then re-attach the original hem band. This preserves the original stitching and texture.
Q6: Should I hem flare jeans before or after washing?
A: If your jeans are new, it’s usually best to wash and dry them once before hemming. This allows


