


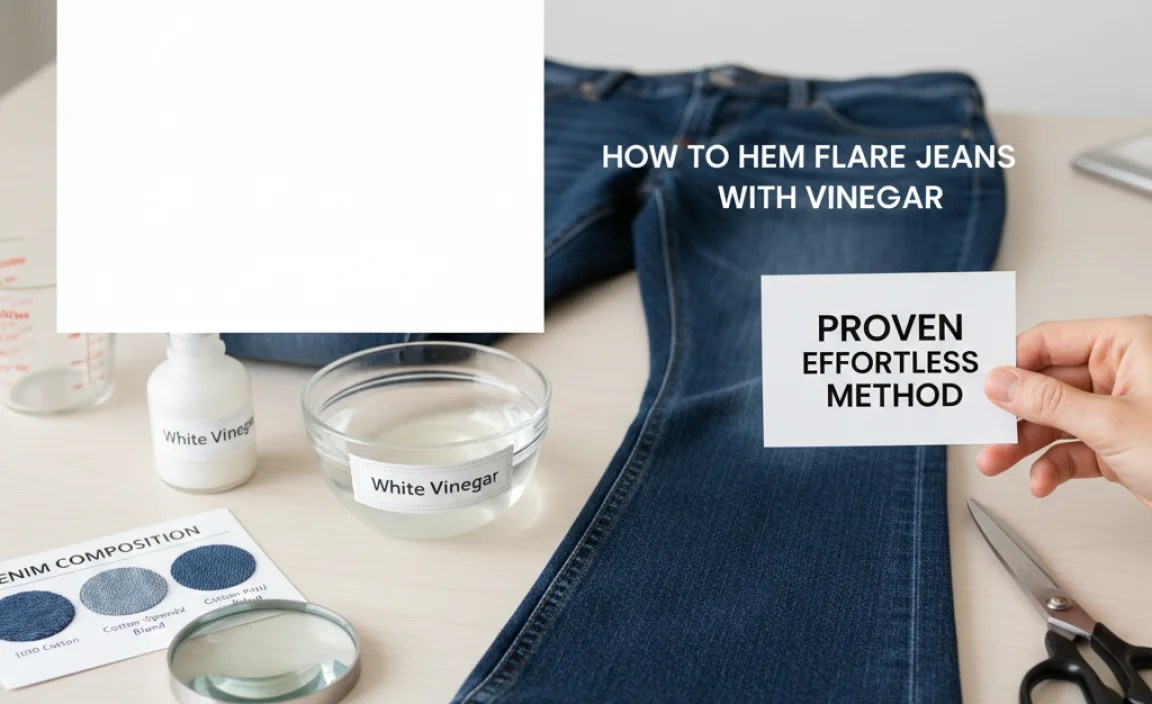
Effortlessly hem your flare jeans using a simple vinegar trick that requires no sewing and avoids shrinkage. This proven method helps you achieve a perfect length for your favorite denim in minutes, ensuring a stylish and comfortable fit every time.
Are your favorite flare jeans a little too long, dragging on the ground and accumulating dirt? It’s a common frustration, especially when you love the style and comfort of your denim. Traditional hemming can seem daunting if you’re not a sewer, and even store-bought solutions can be costly or not quite right. But what if you could achieve a perfectly hemmed pair of flare jeans using a simple, everyday household item? You can! This guide will walk you through a surprisingly effective and virtually effortless method using vinegar to get your jeans to the ideal length, all without a needle and thread in sight.
We’ll cover everything from gathering your supplies to the final, satisfying wear. Get ready to transform your denim and step out with confidence!
The Vinegar Hemming Myth: Fact or Fiction?

The idea of using vinegar to alter clothing might sound a bit strange, but there’s a practical reason behind this method. Vinegar, particularly white distilled vinegar, is a mild acid. When diluted and used correctly, it can relax fabric fibers. For natural fibers like cotton, which most denim is made from, this relaxation can sometimes lead to a very slight, controlled shortening of the fabric. It doesn’t “shrink” the jeans in the traditional sense, which can make them tight or warped. Instead, it helps to gently settle the threads, making them lie a little flatter and thus, slightly shorter.
It’s important to manage expectations. This method won’t dramatically shorten your jeans by several inches. It’s best suited for minor adjustments – perhaps half an inch to an inch – or for those times when your jeans are just a little too long and you want to avoid that trip to the tailor or the hassle of cutting and sewing. The key is achieving a subtle, managed change.
Why Choose Vinegar for Hemming?

Let’s break down the advantages of this unique approach:
- No Sewing Required: This is the biggest draw. If you don’t own a sewing machine or manual needle and thread, or simply dislike sewing, this method is a lifesaver.
- Minimal Shrinkage: Unlike throwing jeans in a hot wash to shrink them, the vinegar method aims for controlled relaxation rather than aggressive shrinkage. You’re less likely to end up with stiff, ill-fitting denim.
- Cost-Effective: A bottle of white distilled vinegar is inexpensive and likely already in your pantry.
- Quick and Convenient: The process is relatively fast, meaning you can potentially hem your jeans in under an hour.
- Preserves Original Hem: For certain styles, the original hem is part of the look. This method doesn’t alter the existing finished hemline.
- Eco-Friendly (in a way): Repurposing everyday items for DIY solutions aligns with sustainable practices.
While the effectiveness can vary based on denim composition and wash, for many, it provides a satisfactory solution for minor hem adjustments.
What You’ll Need: Your Essential Toolkit

Gathering your materials is the first step to a successful hemming project. Here’s what you’ll need:
- Your Flare Jeans: The stars of the show! Ensure they are clean.
- White Distilled Vinegar: This is crucial. Avoid other types of vinegar, as they might stain or have different chemical properties.
- Water: For diluting the vinegar.
- A Basin or Sink: Large enough to submerge the bottom of your jeans.
- Measuring Tape or Ruler: To determine how much you need to shorten them.
- Fabric Marker or Chalk (Optional): To mark your desired hemline.
- A Towel: For drying the treated area.
- A Dryer or Clothesline: To dry the jeans completely.
- A Straight Edge or Large Book: To help get a perfectly straight line if you decide to trim excess fabric (optional, but recommended if you trim).
Step-by-Step: How to Hem Flare Jeans With Vinegar

Follow these simple steps for a clean, effective hem:
Step 1: Measure and Mark Your Desired Length
Put on your flare jeans and the shoes you typically wear with them. Stand in front of a mirror. Check where the current hemline falls. You want the hem to fall just above or at the top of your shoes, depending on your preference. Use your measuring tape or ruler to see how many inches you need to shorten them. If you plan to trim excess fabric, use a fabric marker or chalk to make a light mark at your desired new hemline on the inside of the pant leg.
Tip: Remember that denim can behave unpredictably. If you’re unsure, it’s always better to aim for slightly longer. You can always trim more later, but you can’t add fabric back!
Step 2: Prepare the Vinegar Solution
This is where the magic happens. You’ll need a mixture of white distilled vinegar and water. A good starting ratio is 1 part vinegar to 3 parts water. For example, if you use 1 cup of vinegar, add 3 cups of water.
- Fill your basin or sink with this diluted vinegar solution.
- Gently stir to combine.
Why this ratio? A strong vinegar concentration might be too harsh, while a very weak one might not be effective. This balance helps to relax the fibers without causing damage or stains.
It’s useful to know the pH of vinegar. White distilled vinegar typically has a pH between 2 and 3, making it acidic. Diluting it significantly brings its pH closer to neutral, making it safer for fabrics. For more details on the science of household acids, resources like those from educational institutions can provide insights into fabric and chemical interactions.
Step 3: Treat the Hem Area
Carefully submerge only the bottom portion of your flare jeans – the part you want to shorten – into the vinegar-water solution. Make sure the fabric is thoroughly saturated from the current hemline down to where you want the new hem to be. You don’t need to soak the entire pair of jeans.
How long to soak: Leave the hem portion in the solution for about 15-20 minutes. This allows the vinegar to work on relaxing the fabric fibers.
Alternative for large basins: If you have a large enough basin, you can try to keep the jeans upright and just dip the bottom. If not, you can gently lay them so only the leg bottoms are submerged.
Step 4: Rinse (Optional but Recommended)
After soaking, you can give the treated area a quick rinse with plain water. This is optional, but it helps to remove any residual vinegar smell. Gently squeeze out excess water without wringing too aggressively. You want the fabric to remain damp, not soaking wet.
Step 5: Dry the Jeans
Now, it’s time to let gravity and your drying method do their work. The key here is to let the jeans dry in a way that encourages the slight shortening you’re aiming for.
- Option A: Air Drying (Recommended for best control): Hang your jeans on a clothesline or a drying rack, allowing the damp hem area to hang freely. This allows the weight of the damp fabric to naturally pull downwards, potentially causing a subtle shortening as it dries.
- Option B: Tumble Drying (Use with caution): A low-heat tumble dry can also work. Ensure the jeans are not completely dry before removing them. Some people find that a brief cycle in the dryer helps to further set the slight change.
Crucial Drying Tip: Do NOT try to force the jeans to a shorter length while they are drying. Let the dampness and gravity do the work. The goal is a subtle relaxation, not a dramatic shrinkage.
Step 6: Check the Length and Repeat (If Necessary)
Once the jeans are completely dry, try them on again with your chosen shoes. Measure from the waistband down to the new hemline to see if you’ve achieved the desired length. If they are still a little too long, you can repeat the process (Steps 2-5) with a slightly more concentrated vinegar solution (e.g., 1 part vinegar to 2 parts water) or soak for a little longer. However, proceed with caution; repeated treatments can sometimes make denim stiff.
Step 7: Trim Excess Fabric (Optional but Recommended for a Clean Finish)
If your jeans are now the perfect length but the original hem looks a bit uneven or you simply prefer a cleaner finish, it’s time to trim. If you marked your desired hemline accurately in Step 1, this is straightforward.
- Lay the jeans flat on a table.
- Use your ruler or a straight edge and fabric marker to ensure a perfectly straight line.
- Cut off the excess fabric with sharp fabric scissors. Leave about a half-inch to an inch of fabric below your new hemline if you want to create a simple folded hem for a cleaner look, or cut right at the mark for a raw hem effect.
How to create a simple folded hem after trimming:
- Fold the raw edge up by about half an inch towards the inside of the pant leg.
- Press this fold flat with your hand or an iron.
- Fold it up again by about half an inch, enclosing the raw edge.
- Press this second fold firmly.
- If you have a sewing machine, this is where you’d sew it down. If not, you can secure it invisibly with fabric glue or small, discreet stitches by hand in a few spots.
For a truly effortless, no-sew finish after trimming, consider using a strong fabric glue designed for denim. Apply a thin, even layer to the inside of the folded hem and press firmly. Allow it to cure fully according to the product’s instructions.
Pro Tip for Raw Hems: If you opt for a raw hem (no fold), wash and dry your jeans after cutting. This will fray the edges naturally and prevent excessive unraveling.
Understanding Denim Composition: A Quick Guide
The effectiveness of the vinegar method can depend on what your jeans are made of. Most denim is cotton, but blends are common. Here’s a quick breakdown:
| Denim Type | Composition | Vinegar Method Effectiveness | Notes |
|---|---|---|---|
| 100% Cotton Denim | 100% Cotton | High | Most responsive to the fiber relaxation technique. |
| Stretch Denim | Cotton with Elastane/Spandex (e.g., 98% Cotton, 2% Elastane) | Moderate | Elastane can resist significant changes. Best for minor adjustments. |
| Blended Denim | Cotton with Polyester, Rayon, etc. | Low to Moderate | Synthetic fibers may not react as much as natural cotton. |
How to check your composition: Always refer to the care label inside your jeans. It will tell you the exact fabric breakdown.
Pros and Cons of the Vinegar Hemming Method
Like any DIY technique, there are advantages and disadvantages to consider:
| Pros | Cons |
|---|---|
| No sewing skills needed. | May not work for significant length changes. |
| Inexpensive and uses household items. | Effectiveness can vary based on denim composition. |
| Low risk of damaging the fabric if done correctly. | A faint vinegar smell might linger if not rinsed thoroughly. |
| Preserves the original look of the hem. | Might require a touch-up trim for a perfectly clean finish. |
| Quick and convenient for minor adjustments. | Denim might feel slightly stiffer if treated too aggressively. |
Frequently Asked Questions About Hemming Flare Jeans with Vinegar
Q1: Will this method shrink my jeans significantly?
No, this method is designed for minor adjustments, aiming to relax fabric fibers rather than drastically shrink them. It’s best for shortening jeans by about half an inch to an inch.
Q2: What kind of vinegar should I use?
Always use plain, white distilled vinegar. Other types, like apple cider or balsamic, can stain your denim.
Q3: How long should I leave the jeans in the vinegar solution?
A soaking time of 15-20 minutes is usually sufficient. Test a small, inconspicuous area if you’re unsure.
Q4: Can I just cut my jeans without using vinegar?
Yes, you can cut them directly. However, using the vinegar method first can help the fabric relax and settle, potentially leading to a more controlled and less prone-to-fraying result, especially if you plan to create a raw hem.
Q5: What if my jeans are made with stretch fabric?
Stretch denim (with elastane or spandex) might be less responsive to this method as the elastic fibers resist shortening. It’s still worth trying for minor adjustments, but don’t expect dramatic results.
Q6: How do I get rid of the vinegar smell?
A thorough rinse with plain water after soaking, followed by air drying or a regular wash cycle, should remove any lingering vinegar odor.
Q7: Is this method safe for all denim colors?
White distilled vinegar is generally safe for most colors. However, always test on an inconspicuous area first if you are working with very dark or vibrant colored denim to be absolutely certain no lightening occurs.
Conclusion: Effortless Style, Perfectly Hemmed
Transforming your slightly-too-long flare jeans into perfectly fitting favorites is absolutely achievable, even without advanced sewing skills. The vinegar hemming method offers a practical, budget-friendly, and surprisingly effective solution for minor length adjustments. By understanding the process, using the right materials, and following the steps carefully, you can enjoy a polished look and a comfortable fit.
Remember to always measure twice, treat once, and allow the fabric to do its thing during the drying process. Whether you choose to trim for a clean hem or embrace a raw edge, your newly adjusted flare jeans are ready to make a statement. Step out with confidence, knowing you’ve mastered a simple yet powerful clothing hack that puts style and comfort back in your hands.
.lwrp.link-whisper-related-posts{
margin-top: 40px;
margin-bottom: 30px;
}
.lwrp .lwrp-title{
}.lwrp .lwrp-description{
}
.lwrp .lwrp-list-container{
}
.lwrp .lwrp-list-multi-container{
display: flex;
}
.lwrp .lwrp-list-double{
width: 48%;
}
.lwrp .lwrp-list-triple{
width: 32%;
}
.lwrp .lwrp-list-row-container{
display: flex;
justify-content: space-between;
}
.lwrp .lwrp-list-row-container .lwrp-list-item{
width: calc(25% – 20px);
}
.lwrp .lwrp-list-item:not(.lwrp-no-posts-message-item){
max-width: 150px;
}
.lwrp .lwrp-list-item img{
max-width: 100%;
height: auto;
object-fit: cover;
aspect-ratio: 1 / 1;
}
.lwrp .lwrp-list-item.lwrp-empty-list-item{
background: initial !important;
}
.lwrp .lwrp-list-item .lwrp-list-link .lwrp-list-link-title-text,
.lwrp .lwrp-list-item .lwrp-list-no-posts-message{
}@media screen and (max-width: 480px) {
.lwrp.link-whisper-related-posts{
}
.lwrp .lwrp-title{
}.lwrp .lwrp-description{
}
.lwrp .lwrp-list-multi-container{
flex-direction: column;
}
.lwrp .lwrp-list-multi-container ul.lwrp-list{
margin-top: 0px;
margin-bottom: 0px;
padding-top: 0px;
padding-bottom: 0px;
}
.lwrp .lwrp-list-double,
.lwrp .lwrp-list-triple{
width: 100%;
}
.lwrp .lwrp-list-row-container{
justify-content: initial;
flex-direction: column;
}
.lwrp .lwrp-list-row-container .lwrp-list-item{
width: 100%;
}
.lwrp .lwrp-list-item:not(.lwrp-no-posts-message-item){
max-width: initial;
}
.lwrp .lwrp-list-item .lwrp-list-link .lwrp-list-link-title-text,
.lwrp .lwrp-list-item .lwrp-list-no-posts-message{
};
}


