


Quick Summary: Easily hem your flare jeans without bleach using simple sewing or no-sew methods. Achieve a perfect fit and maintain style with this straightforward guide, ideal for beginners.
How to Hem Flare Jeans Without Bleach: An Effortless Guide
Your favorite pair of flare jeans are just a bit too long, and the thought of hemming them seems daunting. You want to shorten them, but the idea of using bleach to achieve a faded hem is far from your aesthetic. Don’t worry! It’s entirely possible to get that perfect, custom length on your flare jeans without any harsh chemicals or complicated techniques. We’ll walk you through simple, effective methods that will have your jeans fitting like they were made for you, keeping their original charm. Get ready to say goodbye to tripping over excess fabric and hello to perfectly hemmed flares!
Why Hemming Flare Jeans Matters

Flare jeans, with their distinctive widening leg, are a style staple. However, their length is critical to their overall look. Jeans that are too long can drag on the ground, fray prematurely, and make your silhouette appear shorter and less polished. A properly hemmed pair, on the other hand, elongates your legs, perfectly skims your footwear, and presents a much cleaner, more intentional style. This guide focuses on achieving that polished look without altering the base color or wash with bleach, allowing your jeans to retain their original character and appeal.
Understanding Flare Jean Hemming Challenges

Hemming flare jeans presents a few unique challenges compared to straight-leg or skinny jeans:
- The Flare Itself: The widening leg means the hem circumference is larger than the top of the leg. This requires careful measuring and folding to ensure an even line.
- Original Hem Appearance: Many people want to keep the original “factory” or “distressed” hem of their jeans. This is often a double-stitched, sometimes slightly frayed look that’s tricky to replicate perfectly.
- Fabric Weight: Denim can be thick and challenging to sew through, especially for beginners or those using standard sewing machines.
- Maintaining the Flare: The hem needs to support the flare without making it stiff or unnaturally weighted.
Essential Tools for Hemming
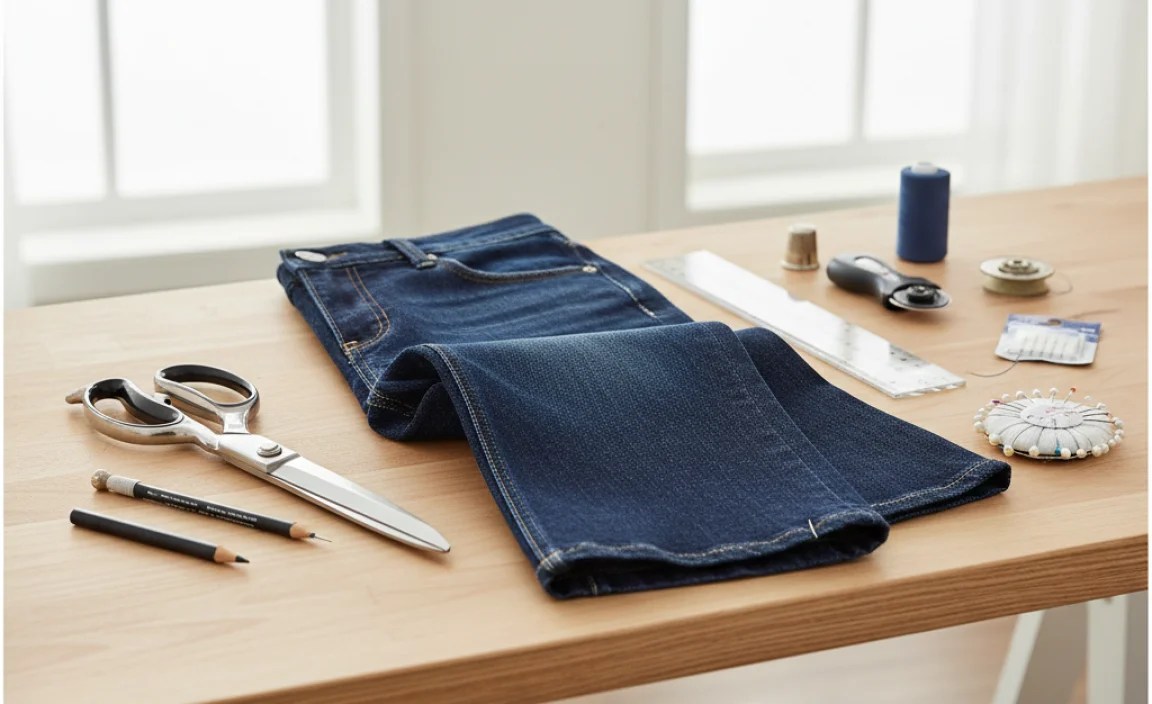
Before you begin, gather these supplies. Having everything ready will make the process much smoother.
| Tool | Description | Why it’s Important |
|---|---|---|
| Measuring Tape | Flexible tape measure (fabric or tailor’s tape) | Accurate length measurement is key for a professional hem. |
| Fabric Scissors | Sharp, dedicated scissors for fabric | Clean cuts ensure a neat hem and prevent fraying. |
| Fabric Marker/Chalk | Temporary marking tool | To draw your cutting line accurately. |
| Straight Pins | Small, sharp pins | To hold the hem in place before sewing or gluing. |
| Iron and Ironing Board | Standard household iron and board | To press creases and secure folded hems. |
| Seam Ripper (Optional) | Small tool with a hooked blade | Useful for carefully removing the original hem if you plan to reattach it. |
| Sewing Machine (Optional) | Domestic sewing machine with a denim needle | For a durable and professional-looking sewn hem. A universal needle can work for lighter denim. |
| Heavy-Duty Thread (if sewing) | Strong polyester or cotton-wrapped polyester thread | Matches the strength of denim and prevents seam breaks. Choose a color that matches or complements your jeans (e.g., gold or brown for classic denim). |
| Fabric Glue (for no-sew) | Strong fabric adhesive | A reliable alternative to sewing for a quick, no-fuss hem. Ensure it’s washable and durable. |
| Jeans/Denim Needle (if sewing) | Specifically designed for thick fabrics | Prevents needle breakage and makes for easier sewing through multiple layers of denim. You can find these at most fabric stores. |
Method 1: The “Keep the Original Hem” Technique

This method is popular because it preserves the authentic look of your jeans. It involves carefully removing the original hem, shortening the leg, and then reattaching the original hem. It takes a bit more patience but offers the most factory-finish result.
Step-by-Step: Keeping the Original Hem
-
Try On and Mark:
Put on your flare jeans with the shoes you typically wear them with. Have a friend help you, or stand in front of a mirror. Pin the jeans to the desired length. Ensure the hem is even all the way around and that the flare hangs naturally. Mark the intended hemline with a fabric marker or chalk. It’s often best to mark slightly below where you want the final hem to be, accounting for seam allowances or the thickness of the original hem.
-
Remove the Original Hem:
Lay the jeans flat. Using a seam ripper, carefully detach the original hem from the leg. Go slowly to avoid cutting the jean fabric. You want to preserve the entire original hem piece, including any distressing or fading already present.
-
Measure and Cut:
Once the original hem is removed, you’ll have a raw edge of denim. Measure down from your marked line from step 1 to determine how much fabric needs to be removed. It’s crucial to add about 1 to 1.5 inches (2.5 to 3.8 cm) for the new seam allowance, plus the width of the original hem you removed. For example, if you want your jeans 1 inch shorter, and the original hem was 1 inch wide, you’ll need to cut off approximately 2 inches from the bottom of the leg. Measure carefully at several points around the flare to ensure an even cut. Use your fabric scissors to make a clean, straight cut.
-
Prepare the New Hem:
Turn the jean leg inside out. Fold up the raw edge by about 1/2 inch (1.3 cm) and press it flat with your iron. Then, fold it up again by the width of your original hem (or the amount you want your new hem to be, typically 1 to 1.5 inches or 2.5 to 3.8 cm). Press this second fold firmly. This creates a clean, thick hem that mimics the original.
-
Reattach the Original Hem:
Now for the trickiest part: reattaching the original hem. Place the original hem piece around the folded-up edge of the jean leg, right sides together (the inside of the hem facing the inside of the folded leg). Pin it securely in place, ensuring the seam aligns perfectly with the fold you created. The original stitching line of the hem should now be the guide for your new stitching. Start sewing with your sewing machine, using a denim needle and heavy-duty thread. Stitch as close as possible to the original seam line of the removed hem. Go slowly, especially around the curve of the flare. Some people find it helpful to remove the original hem in two pieces (front and back leg) and reattach them separately.
-
Finishing Touches:
Once sewn, turn the jeans right side out. The original hem should now be neatly attached to the shortened leg. Gently press the hem with your iron. You might need to adjust the outer stitching slightly to make it look as seamless as possible.
Method 2: The Simple Fold and Sew Hem

This is a straightforward method for a clean, modern hem where the original hem isn’t necessarily the priority. It’s quicker than reattaching the original hem and requires less precision with seam ripping.
Step-by-Step: Simple Fold and Sew
-
Measure and Mark:
Wear your jeans with your chosen shoes and mark the desired hem length.
See the explanation in Method 1, Step 1 for details on marking correctly. -
Trim Excess Fabric:
Lay the jeans flat. Measure from your marked line and add about 1.5 inches (3.8 cm) for the hem allowance. Cut off the excess fabric with fabric scissors. Ensure the cut is even all the way around the flare. You can use your previous hem as a guide for how much to keep, but typically 1 to 1.5 inches is sufficient for a new hem.
-
Create the Hem Fold:
Turn the jeans inside out. Fold up the raw edge by about 1/2 inch (1.3 cm) and press firmly with your iron. This creates a clean edge. Then, fold up the fabric again by about 1 inch (2.5 cm) – this will be your new finished hem depth. Press this fold very well. Pin the hem in place securely.
-
Sew the Hem:
Using your sewing machine with a denim needle and heavy-duty thread, stitch along the top folded edge of the hem. Aim for a stitch length of about 2.5 to 3.0 mm for durability. Sew as close to the folded edge as possible. Stitch in a straight line all the way around the flare. For extra durability, you can sew a second parallel stitch about 1/8 inch (3 mm) inside the first one, mimicking a classic jean hem.
-
Finish and Press:
Turn the jeans right side out. Press the hem flat with your iron. You can also add a topstitch line on the outside of the leg, about 1/8 inch from the folded edge, for a classic jeans look.
Method 3: The Fabric Glue (No-Sew) Hem
For those who don’t sew or need a quick fix, fabric glue is an excellent alternative. It’s fast, easy, and can be surprisingly durable if done correctly.
Step-by-Step: Fabric Glue Hem
-
Measure and Mark:
Follow Step 1 from Method 1 to determine and mark your desired hem length.
-
Trim Excess Fabric:
Lay the jeans flat. Measure down from your marked line and add about 1.5 inches (3.8 cm) for the hem allowance. Trim the excess fabric evenly around the flare.
-
Prepare for Gluing:
Turn the jeans inside out. Fold up the raw edge by about 1/2 inch (1.3 cm) and press firmly. Then, fold up the edge again by about 1 inch (2.5 cm) to create your finished hem height. Pin the hem securely in place around the entire leg.
-
Apply Fabric Glue:
Carefully unpin sections of the hem at a time. Apply a consistent bead of strong fabric glue along the raw edge of the inner fold. Ensure you apply enough glue to create a strong bond, but not so much that it seeps through to the outside. A good rule of thumb is to apply it about 1/4 inch from the raw edge you are folding up.
-
Press and Secure:
Once the glue is applied, press the folded hem down firmly. Repin the hem in place to hold it while the glue dries. Some fabric glues recommend ironing to set them. Check the glue manufacturer’s instructions for specific curing times and whether heat application is needed. Ensure the jeans remain flat and undisturbed during the drying process, usually 24 hours for a full cure.
-
Check Bond and Wear:
After the glue has fully cured, remove the pins. Turn the jeans right side out. Check that the hem is secure and the glue line isn’t visible from the outside. If the bond feels weak anywhere, you can carefully add a bit more glue or even some small stitches for reinforcement.
Tips for Success with Flare Jeans
Hemming flare jeans can be a little trickier than other styles. Here are some expert tips to ensure a great result:
- Wear the Right Shoes: Always hem your jeans with the exact footwear you plan to wear them with. This is especially crucial for flares, as shoes can significantly change the required length due to heel height and sole thickness.
- Account for the Flare: When marking your hem, ensure the fabric is hanging naturally. The hemline should be a consistent distance from the floor all around.
- Consider the Original Hem Width: If you’re keeping the original hem, measure its width. This is the amount you’ll need to factor in when reattaching it. A wider hem requires more fabric to be cut away initially.
- Use a Straight Stitch: For sewing, a straight stitch is generally best for denim. A slight zig-zag stitch can be used at the very edge of the hem for raw-edge finishing, but this isn’t common for jean hemming.
- Reinforce Critical Areas: The side seams of jeans often have thicker stitching. Make sure your sewing machine can handle this, or consider a slightly slower pace.
- Pre-Wash (Optional but Recommended): If you’re doing a sewn hem where you are creating a new double fold, consider washing and drying the jeans after hemming. Denim can shrink slightly, and this will reveal any shrinkage before you commit to the final length.
- Practice on Scrap Fabric: If you’re new to sewing denim, practice stitching on a scrap piece of denim to get a feel for your sewing machine’s tension and needle strength.
Pros and Cons of Each Method
Choosing the right hemming method depends on your priorities, skill level, and desired outcome.
| Attribute | Method 1: Original Hem | Method 2: Simple Sew | Method 3: Fabric Glue |
|---|---|---|---|
| Appearance | Most authentic, factory-like finish. Retains original distressing. | Clean, modern hem. Can be topstitched for a classic look. | Clean, modern hem. Hiding the glue line is key. |
| Durability | Very durable, especially if sewn with strong thread and a good machine. | Durable for regular wear and washing. | Depends heavily on glue quality and application. Can weaken over time or with aggressive washing. |
| Skill Level | Intermediate to advanced. Requires careful seam ripping and precise reattachment. | Beginner to intermediate. Straightforward sewing. | Beginner. Minimal skill required, but care is needed. |
| Time Commitment | Highest. Most time-consuming due to deconstruction and reconstruction. | Moderate. Faster than Method 1, but still involves sewing. | Lowest. Quickest method, especially if no sewing machine is available. |
| Tools Needed | Seam ripper, scissors, pins, iron, sewing machine, strong thread, denim needle. | Scissors, pins, iron, sewing machine, strong thread, denim needle. | Scissors, pins, iron, fabric glue, marker. |
| Cost | Low if you own tools; moderate if purchasing thread/needles. | Low if tools are owned; moderate if purchasing thread/needles. | Low to moderate, depending on the quality of fabric glue. |
| Difficulty with Flare | Can be tricky to align the original hem evenly on the flare. | Easier to manage the fold and sew due to lack of original hem complications. | Easing the curve and ensuring even application of glue requires attention. |
When to Consider Professional Hemming
While these DIY methods are effective, sometimes it’s best to leave it to the pros. Consider professional hemming if:
- Your jeans are very expensive or have delicate detailing (like intricate embroidery or expensive washes).
- You’ve tried DIY hemming and aren’t happy with the results.
- You have a very complex flare or stretch denim that might behave unpredictably.
- You simply don’t have the time or patience for DIY.
A good tailor or denim specialist can offer expert advice and ensure a perfect finish. You can find local tailors through a quick search or ask for recommendations from friends. Many dry cleaners also offer alteration services. Professional hemming typically
.lwrp.link-whisper-related-posts{
margin-top: 40px;
margin-bottom: 30px;
}
.lwrp .lwrp-title{
}.lwrp .lwrp-description{
}
.lwrp .lwrp-list-container{
}
.lwrp .lwrp-list-multi-container{
display: flex;
}
.lwrp .lwrp-list-double{
width: 48%;
}
.lwrp .lwrp-list-triple{
width: 32%;
}
.lwrp .lwrp-list-row-container{
display: flex;
justify-content: space-between;
}
.lwrp .lwrp-list-row-container .lwrp-list-item{
width: calc(25% – 20px);
}
.lwrp .lwrp-list-item:not(.lwrp-no-posts-message-item){
max-width: 150px;
}
.lwrp .lwrp-list-item img{
max-width: 100%;
height: auto;
object-fit: cover;
aspect-ratio: 1 / 1;
}
.lwrp .lwrp-list-item.lwrp-empty-list-item{
background: initial !important;
}
.lwrp .lwrp-list-item .lwrp-list-link .lwrp-list-link-title-text,
.lwrp .lwrp-list-item .lwrp-list-no-posts-message{
}@media screen and (max-width: 480px) {
.lwrp.link-whisper-related-posts{
}
.lwrp .lwrp-title{
}.lwrp .lwrp-description{
}
.lwrp .lwrp-list-multi-container{
flex-direction: column;
}
.lwrp .lwrp-list-multi-container ul.lwrp-list{
margin-top: 0px;
margin-bottom: 0px;
padding-top: 0px;
padding-bottom: 0px;
}
.lwrp .lwrp-list-double,
.lwrp .lwrp-list-triple{
width: 100%;
}
.lwrp .lwrp-list-row-container{
justify-content: initial;
flex-direction: column;
}
.lwrp .lwrp-list-row-container .lwrp-list-item{
width: 100%;
}
.lwrp .lwrp-list-item:not(.lwrp-no-posts-message-item){
max-width: initial;
}
.lwrp .lwrp-list-item .lwrp-list-link .lwrp-list-link-title-text,
.lwrp .lwrp-list-item .lwrp-list-no-posts-message{
};
}


