


Quick Summary: Learn how to hem flare jeans easily at home to achieve the perfect length. This guide breaks down the process into simple steps using basic tools, ensuring your favorite jeans fit flawlessly without a trip to the tailor or a sewing machine.
How to Hem Flare Jeans: An Effortless Guide
Are your favorite flare jeans a little too long, dragging on the floor and looking less chic and more like a tripping hazard? It’s a common problem, especially when you find that perfect pair with that perfect silhouette but the length is just… off. Don’t fret! You don’t need to be a sewing whiz or spend money on a tailor. With a few simple tools and this easy-to-follow guide, you can perfectly hem your flare jeans right at home, restoring their stylish look and your confidence.
This article will walk you through everything you need to know to get that ideal hem length, whether you want a clean finish or a more casual frayed look. We’ll cover the essential tools, different hemming methods, and offer tips to ensure your DIY hemming project is a complete success. Get ready to give your denim wardrobe a flawless fit!
Why Hemming Flare Jeans Matters

Flare jeans, with their iconic widening leg from the knee down, are a fantastic fashion statement. However, their distinctive shape also makes them particularly sensitive to length issues. Jeans that are too long can:
- Look messy and unkempt.
- Get damaged from dragging on the ground (fraying, rips, premature wear).
- Cause you to trip, which is both inconvenient and unsafe.
- Alter the intended hang and flare of the jean, diminishing their style.
Properly hemming ensures your flare jeans maintain their intended dramatic silhouette while fitting your frame perfectly. It’s about making your clothes work for you, not the other way around.
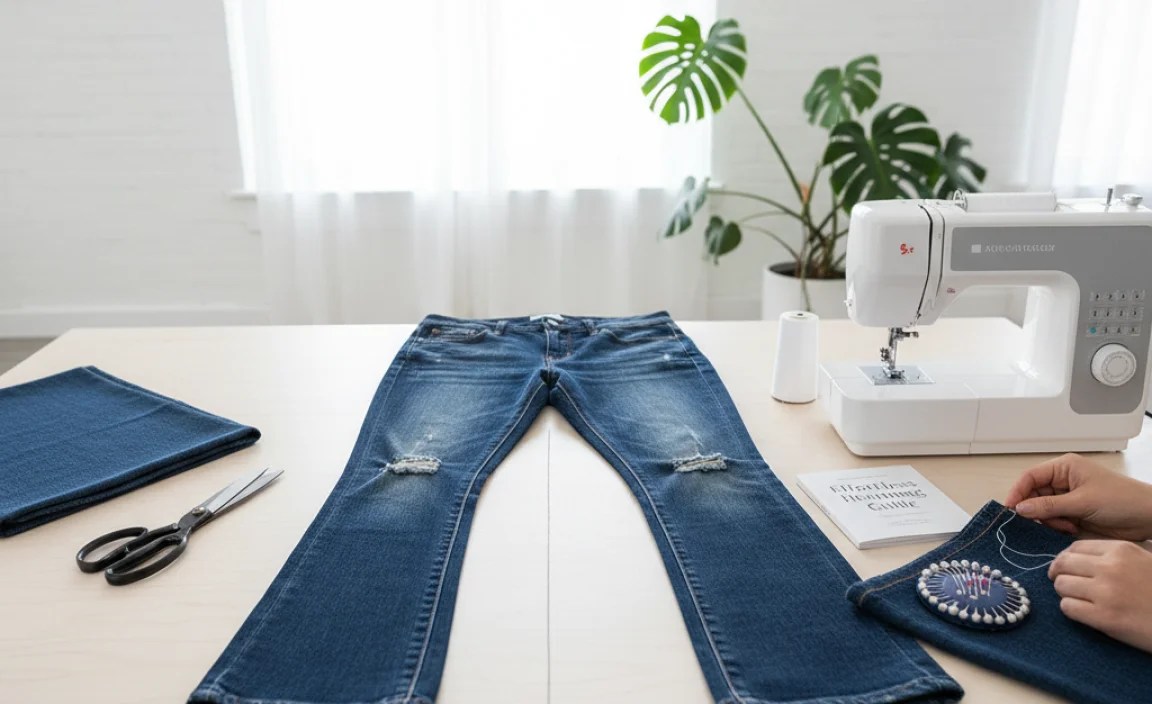
Gathering Your Hemming Essentials

Before you start, having the right tools makes all the difference. Thankfully, you likely have most of what you need already. Here’s a checklist:
Must-Have Tools:
- Your Flare Jeans: The star of the show!
- Fabric Scissors: Sharp scissors specifically for fabric will ensure clean cuts. Dull scissors can snag and fray the material unevenly.
- Measuring Tape or Ruler: For precise measurements to ensure an even hem.
- Fabric Chalk or Erasable Fabric Marker: To mark your cutting and folding lines.
- Pins: To secure folds and hems in place before sewing or adhering.
- Iron and Ironing Board: Crucial for creating crisp folds and setting hems.
Optional (Depending on Method):
- Sewing Machine: For a durable, traditional finish.
- Needle and Thread: For hand-sewing a hem.
- Fabric Glue or Hem Tape: For a no-sew, quicker solution.
- Seam Ripper: If you need to detach the original hem to preserve the wash or to reattach it.
Choosing Your Hemming Method
There are several ways to hem flare jeans, each offering a different look and requiring varying levels of effort. We’ll cover the most popular and effective methods for beginners.
Method 1: The Classic Sewn Hem (With or Without a Machine)
This method provides the most durable and professional-looking finish. You can do it by hand or with a sewing machine.
Steps for a Classic Sewn Hem:
- Try On and Mark: Wear the shoes you’ll most often wear with your flare jeans. Stand in front of a mirror and have a friend mark the desired length with a pin, or carefully mark it yourself with chalk while ensuring the jeans are lying flat and not stretched. Measure from the crotch down to where you want the hem to fall.
- Determine Hem Allowance: Decide how much fabric you want to fold up. A standard hem allowance for jeans is about 1 to 1.5 inches. This accounts for a double fold for a clean finish. Mark this additional length below your desired finished hemline with chalk.
- Cut the Excess Fabric: Lay the jeans flat. Using your fabric scissors and the chalk line for the hem allowance as your guide, cut off the excess fabric. Cut as straight and evenly as possible. Remember, `measure twice, cut once!`
- Create the First Fold: Take the raw edge of the cut fabric and fold it up towards the inside of the jean leg by about 0.5 to 0.75 inches. Press this fold firmly with your iron.
- Create the Second Fold: Fold the raw edge up again, enclosing the raw edge within the fold. This second fold should be the same width as the first, creating a clean, double-folded hem. Press this fold very well with your iron.
- Secure with Pins: Pin the double-folded hem in place all the way around the leg opening. Ensure the pins are snug but not distorting the fabric.
- Sew the Hem:
- By Hand: Use a strong thread that matches your jeans. A blind hem stitch or a simple running stitch is effective. Work slowly and aim for small, even stitches for a neat appearance.
- By Machine: Thread your sewing machine with matching thread. Use a sturdy needle designed for denim (like a size 100/16 or 110/18). Stitch as close to the inner folded edge as possible, following the pinned line. Go slowly, especially around the flared part, to maintain an even stitch. Reinforce the beginning and end of your stitch by backstitching.
- Final Press: Once sewn, give the hem one last press with your iron to set the stitches and ensure a crisp finish.
Method 2: The No-Sew Hem with Fabric Glue or Hem Tape
This is the quickest and easiest method, perfect for an immediate fix or if you don’t have a sewing machine or the desire to hand-stitch.
Steps for a No-Sew Hem:
- Try On and Mark: Similar to the sewn method, wear your jeans with your chosen shoes and mark the desired length with chalk or a pin.
- Determine Hem Allowance and Cut: Decide on your hem allowance (usually 1 to 1.5 inches) and cut off the excess fabric, just as in steps 2 and 3 of the sewn method.
- Apply Fabric Glue or Hem Tape:
- Fabric Glue: Apply a thin, even line of fabric glue along the raw edge of the cut fabric.
- Hem Tape: Cut a strip of hemming tape to the circumference of the leg opening.
- Create the First Fold: Fold the raw edge up by about 0.5 to 0.75 inches and press with your iron. If using hem tape, place the tape on the raw edge now, then proceed to the next fold.
- Apply Glue/Tape to Second Fold:
- Fabric Glue: Spread the glue evenly on the inside of the first fold.
- Hem Tape: Place the hem tape on the inside of the first fold. Ensure it lies flat without wrinkles.
- Create the Second Fold and Secure: Fold the fabric up again to create the double-folded hem. Press firmly with your iron. The heat will activate the hem tape’s adhesive, and the ironing will help set the fabric glue. Hold for the recommended time for the glue or tape to set.
- Pin and Final Press: Pin the hem in place while it cools or sets completely. Once secure and cooled, give it a final press with your iron.
Tip: Ensure you use a high-quality fabric glue or hem tape designed for permanent adhesion on denim for best results, like those found at reputable fabric stores. For best results and longevity with no-sew methods, follow the manufacturer’s instructions carefully. For heavily worn or frequently washed items, a sewn hem is generally more durable.
Method 3: The Frayed Hem
This popular method gives your jeans a more casual, lived-in look. It involves cutting the jeans to the desired length and then intentionally fraying the edge.
Steps for a Frayed Hem:
- Try On and Mark: Wear your flare jeans with the shoes you intend to wear them with. Decide how much length you want to remove. Mark this line with chalk or pins. Remember, you can always cut more off, but you can’t add it back.
- Cut the Excess Fabric: Lay the jeans flat and carefully cut the excess fabric off along your marked line using sharp fabric scissors. Aim for a straight cut.
- Create Initial Fray: Using tweezers, a seam ripper, or even just your fingernails, pick at the cut edge of the denim. Pull out individual threads to start the fraying process. Work your way around the entire leg opening.
- Encourage More Fraying: To speed up the process and create a more substantial fray, you can:
- Wash and Dry: Throw the jeans in the washing machine and dryer. The agitation will naturally fray the cut edge further. Be sure to put them in a gentle cycle if you want to control the fraying.
- Rubbing: Gently rub the cut edge against a rough surface like concrete or a brick. Be cautious not to damage the main part of the jean.
- Stop the Fraying (Optional): If you want to stop the fraying at a certain point (so it doesn’t unravel too much), you can stitch a line a small distance above the frayed edge. This acts as a stopper. You can also apply a small amount of fabric glue or fray check product to the back of the fray line.
Note: The frayed hem will continue to fray a little with each wash. Embrace the evolving look!
Preserving the Original Hem (Advanced Technique)

For some flare jeans, the original hem has a unique stitch or wash that you might want to preserve for an authentic look. This technique requires a bit more patience and careful work.
Steps to Preserve Original Hem:
- Measure and Mark Cut Point: Decide where you want the new hem to fall. Mark this point on the inside of the jean leg.
- Carefully Detach Original Hem: Using a seam ripper, very carefully pick out the stitches holding the original hem. Work slowly and meticulously to avoid damaging the jean fabric. Try to keep the original hem intact as one continuous piece.
- Trim Excess Fabric: Measure and cut off the excess fabric below your marked line, leaving about 1.5 to 2 inches (enough to create a new hem allowance).
- Re-attach Original Hem: Fold the raw edge of the jean leg up to meet your marked finished length, creating a clean edge on the inside. Then, the tricky part: you’ll want to hand-stitch or carefully machine-stitch the original detached hem band back onto this new edge, ensuring the original stitching aligns as closely as possible. This often requires precise pinning and careful maneuvering of the fabric. A blind hem stitch or a very neat topstitch can be effective here.
- Press and Finish: Once attached, press the new hem firmly with an iron.
This method is time-consuming but offers the most authentic finished look if your original hem is particularly desirable.
Common Pitfalls and How to Avoid Them
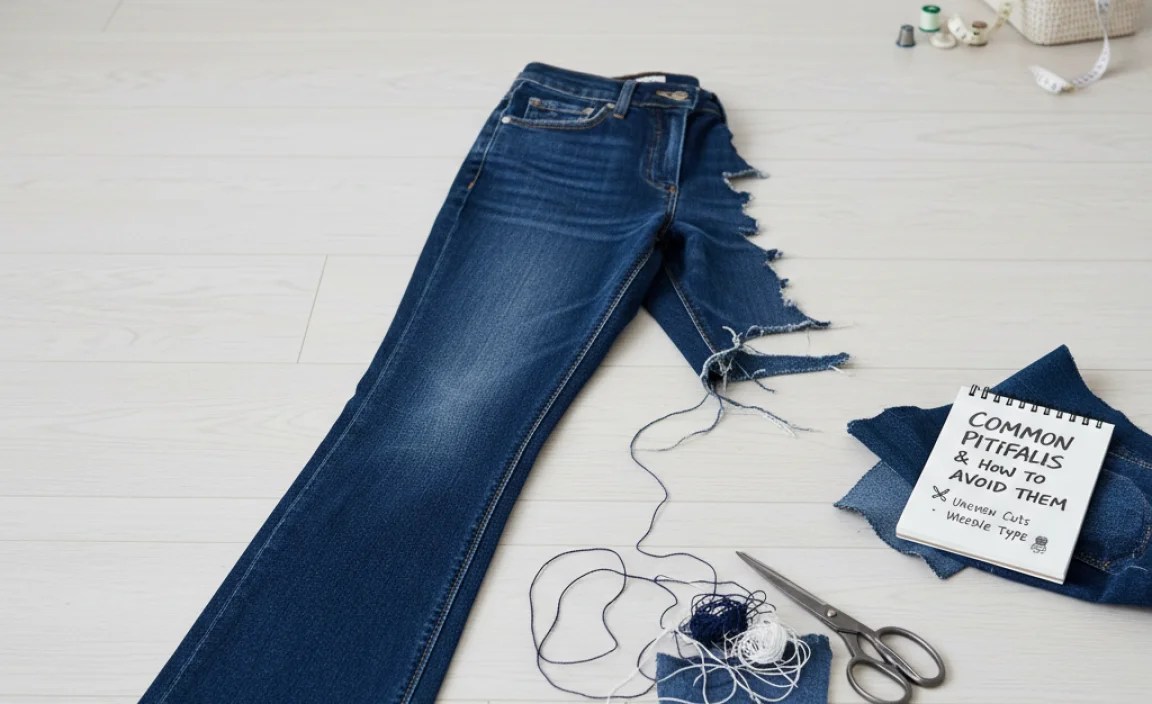
Even with the best intentions, hemming can sometimes go awry. Here are common mistakes and how to navigate them:
Uneven Hemline
Cause: Inconsistent measuring, cutting, or folding. Flare jeans can be tricky because the fabric circumference changes.
Solution:
- Always measure and mark with the jeans laid flat and unwrinkled.
- Use a measuring tape or ruler and chalk for accurate lines.
- Cut one leg, then use it as a guide for the second leg to ensure symmetry.
- When marking, stand directly in front of a mirror or have a friend help.
Jeans Become Too Short
Cause: Cutting too much off, or the fabric stretching differently after cutting.
Solution:
- When in doubt, cut less. You can always trim more off.
- Try the jeans on frequently throughout the process.
- Remember that different fabrics will stretch or shrink differently. For instance, raw denim can stretch significantly.
Wobbly or Puckered Stitches
Cause: Uneven tension on a sewing machine, using the wrong needle or thread, hand-stitching too loosely.
Solution:
- For machine sewing, check your machine’s tension settings and use a denim needle.
- For hand-sewing, use consistent stitch length and tension.
- Press firmly with an iron after sewing to help smooth out puckering.
No-Sew Hem Falls Apart
Cause: Using low-quality adhesive, not activating it properly with heat, washing too soon.
Solution:
- Invest in a good quality fabric glue or hemming tape designed for fabrics like denim.
- Follow the product’s instructions precisely regarding application and activation (often heat from an iron).
- Allow adequate drying/setting time before washing or wearing the jeans.
Table: Hemming Method Comparison
Here’s a quick breakdown to help you choose the best method for your needs:
| Method | Pros | Cons | Best For |
|---|---|---|---|
| Classic Sewn Hem (Machine/Hand) | Durable, professional finish, very secure. | Requires sewing skills/machine, more time-consuming. | Long-term wear, structured look, permanent alterations. |
| No-Sew (Glue/Tape) | Fast, easy, no sewing skills needed, quick fix. | Can be less durable, may come undone over time or with heavy washing, can look bulky if not done carefully. | Temporary hemming, quick alterations, no sewing equipment available. |
| Frayed Hem | Casual, stylish look, very forgiving, easy to achieve. | Can fray too much, not suitable for all styles, may require occasional maintenance. | Casual outfits, distressed denim look, informal styles. |
| Preserving Original Hem | Most authentic look, preserves unique detailing. | Time-consuming, requires precision, higher risk of mistakes. | Vintage jeans, preserving original factory hem, advanced crafters. |
Frequently Asked Questions (FAQ)
Q1: How much length should I leave for hemming flare jeans?
A1: For a clean hem, plan for at least 1 to 1.5 inches for a double fold. This gives you enough fabric to create a neat, enclosed edge. For a frayed hem, you just need to cut to your desired length and allow for fraying.
Q2: Can I hem flare jeans without a sewing machine?
A2: Absolutely! You can use fabric glue or hemming tape for a no-sew option, or hand-stitch the hem. A frayed hem also requires no sewing machine.
Q3: What’s the best way to mark my jeans for hemming?
A3: Fabric chalk or an erasable fabric marker is best. Pins can also be used, but chalk allows for more precise lines on the fabric itself.
Q4: How do I ensure my hem is even on both legs of flare jeans?
A4: Lay the jeans flat and measure precisely. Cut one leg, then lay the second leg exactly on top of the first and use the first as a guide to cut the second. This ensures matched lengths and angles.
Q5: Will hemming change the way my flare jeans look?
A5: If done correctly, hemming should improve how your flare jeans look by ensuring they hang properly. The key is to maintain the original balance and proportion from knee to hem. A properly hemmed flare jean should still showcase its distinctive wide leg.
Q6: How often should I mend or re-hem my jeans?
A6: This depends on how often you wear them and how you care for them. Frayed hems will naturally get more frayed with washing. Sewn or glued hems can last a very long time, but might need minor touch-ups if they start to unravel or fray from excessive wear.
Q7: Can I hem my jeans if they are made of stretchy denim?
A7: Yes, you
.lwrp.link-whisper-related-posts{
margin-top: 40px;
margin-bottom: 30px;
}
.lwrp .lwrp-title{
}.lwrp .lwrp-description{
}
.lwrp .lwrp-list-container{
}
.lwrp .lwrp-list-multi-container{
display: flex;
}
.lwrp .lwrp-list-double{
width: 48%;
}
.lwrp .lwrp-list-triple{
width: 32%;
}
.lwrp .lwrp-list-row-container{
display: flex;
justify-content: space-between;
}
.lwrp .lwrp-list-row-container .lwrp-list-item{
width: calc(25% – 20px);
}
.lwrp .lwrp-list-item:not(.lwrp-no-posts-message-item){
max-width: 150px;
}
.lwrp .lwrp-list-item img{
max-width: 100%;
height: auto;
object-fit: cover;
aspect-ratio: 1 / 1;
}
.lwrp .lwrp-list-item.lwrp-empty-list-item{
background: initial !important;
}
.lwrp .lwrp-list-item .lwrp-list-link .lwrp-list-link-title-text,
.lwrp .lwrp-list-item .lwrp-list-no-posts-message{
}@media screen and (max-width: 480px) {
.lwrp.link-whisper-related-posts{
}
.lwrp .lwrp-title{
}.lwrp .lwrp-description{
}
.lwrp .lwrp-list-multi-container{
flex-direction: column;
}
.lwrp .lwrp-list-multi-container ul.lwrp-list{
margin-top: 0px;
margin-bottom: 0px;
padding-top: 0px;
padding-bottom: 0px;
}
.lwrp .lwrp-list-double,
.lwrp .lwrp-list-triple{
width: 100%;
}
.lwrp .lwrp-list-row-container{
justify-content: initial;
flex-direction: column;
}
.lwrp .lwrp-list-row-container .lwrp-list-item{
width: 100%;
}
.lwrp .lwrp-list-item:not(.lwrp-no-posts-message-item){
max-width: initial;
}
.lwrp .lwrp-list-item .lwrp-list-link .lwrp-list-link-title-text,
.lwrp .lwrp-list-item .lwrp-list-no-posts-message{
};
}


