


Don’t let too-long mom jeans ruin your look! Learn a simple, step-by-step method to easily hem your favorite pair, achieving a perfect, custom fit and a flattering silhouette without professional alterations. Get ready for stunning results you can do yourself.
How To Hem Mom Jeans: Stunning & Effortless Results
Mom jeans are a wardrobe staple, offering that perfect blend of comfort and retro cool. But what happens when your beloved pair is just a little too long? That awkward bunching at the ankle can quickly turn a stylish outfit into a sloppy one. You might think hemming is a job for a tailor, but it’s actually a straightforward DIY project. With a few basic tools and this easy guide, you’ll be able to achieve a neat, professional-looking hem right at home. We’ll walk you through each step, ensuring your jeans fit just right and look fabulous, giving you the confidence to tackle this common clothing fix yourself.
Why Hemming Mom Jeans Matters

The right jeans can elevate any outfit, but ill-fitting ones can drag it down. Mom jeans, with their signature high waist and relaxed fit, are particularly susceptible to looking “off” when the length is wrong. A hem that’s too long creates a visual break, making your legs appear shorter and the overall silhouette less polished. Conversely, a perfectly hemmed pair elongates your legs and enhances the natural lines of the jeans, creating a flattering and intentional look. It’s about making your clothes work for you, and a proper hem is key to unlocking the true potential of your favorite denim.
Gathering Your Hemming Essentials
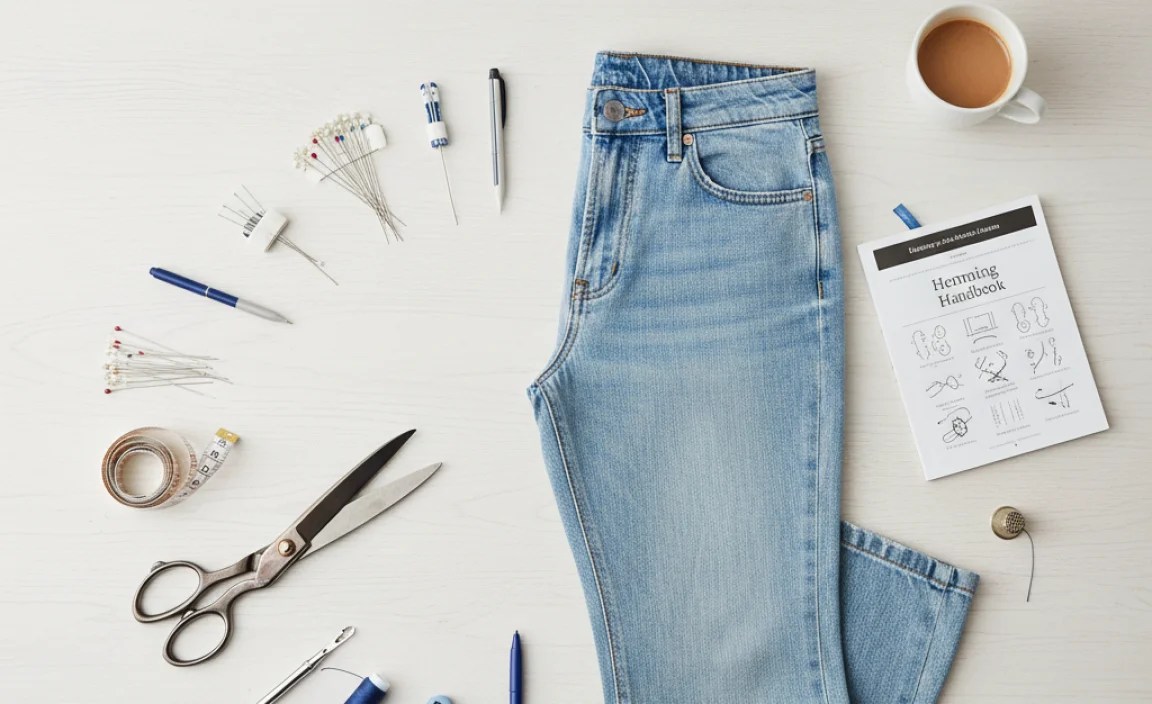
Before you start cutting, let’s make sure you have everything you need. This project is surprisingly simple and doesn’t require a sewing machine, though you can certainly use one if you prefer. The key is to have the right materials for a clean, durable finish.
Essential Tools for a Perfect Hem
- Fabric Scissors: Sharp scissors are crucial for a clean cut. Dull scissors can snag or chew the fabric, leading to a messy edge. Dedicated fabric scissors are a good investment for any sewing or crafting projects.
- Measuring Tape or Ruler: Precision is important. You want to ensure both legs are hemmed to the exact same length.
- Pins: Good quality pins will hold the fabric in place while you work. Longer pins are often easier to handle.
- Fabric Chalk or a Washable Marker: This allows you to mark your cutting line accurately on the denim.
- Iron and Ironing Board: Pressing seams as you go makes a huge difference in achieving a professional finish.
- Thread: Choose a thread color that closely matches your jeans. For classic mom jeans, a golden or tan thread is often used for the hem stitching.
- Needle: A standard sewing needle is fine for hand-sewing. If you have a sewing machine, use a needle appropriate for denim.
- Seam Ripper (Optional but Recommended): This is useful if you want to remove any existing factory hem for a cleaner look before re-hemming.
- Sewing Machine (Optional): If you have one and are comfortable using it, a sewing machine will make the hemming process faster and create a very durable stitch.
Step-by-Step Guide: Hemming Your Mom Jeans

Let’s get started! This guide focuses on a simple, hand-sewn hem that looks fantastic and requires minimal equipment. We’ll cover creating a clean, double-folded hem for durability and a polished appearance.
Step 1: Try On and Mark Your Desired Length
This is the most critical step. Wear the shoes you typically wear with your mom jeans. Stand in front of a mirror and decide how long you want your jeans to be. Consider the original rise of your mom jeans; you generally don’t want the hem to fall too low and disrupt the intended silhouette. You’re looking for the length where the jeans hit your foot comfortably, without bunching. Once you’ve decided, use your fabric chalk or washable marker to make a small mark on the outer seam of one leg at your desired hemline. It’s often easier to hold the jeans up and have someone else mark directly, or to pin the excess fabric at the ankle.
Step 2: Measure and Mark the Second Leg
Lay your jeans flat on a table or the floor. Smooth out the fabric. Measure from the marked hemline on the first leg to the bottom edge of the original hem. This measurement is the amount of fabric you need to remove from the second leg. Now, transfer this measurement to the second leg, ensuring it’s mirrored exactly. Use your measuring tape or ruler to mark the desired hemline on the second leg, again using your fabric chalk or washable marker. Double-check that both marks are at the same height from the waistband.
Step 3: Cut Off the Excess Fabric
Once you’ve accurately marked both legs, it’s time to cut. Before you cut, carefully consider the hem allowance. For mom jeans, a common and effective hem is a double-folded hem, which accounts for the fabric folded inward. You’ll need to leave about 1 to 1.5 inches of fabric below your marked line for this fold. Mark this new cutting line. Use your sharp fabric scissors and carefully cut along this new line. Cut off the original hem seam and any excess fabric below your intended hemline. Take your time for a clean cut.
Pro Tip: If your mom jeans have a thick or distressed original hem you want to preserve its look, you can cut just below that existing cuff, and then fold up what’s left to meet the bottom of that cuff. This gives a slightly chunkier, more casual look.
Step 4: Create the First Fold
Take one leg and lay it flat. Fold the raw edge up towards the inside of the jeans by about 0.5 to 0.75 inches. Use your fabric chalk or washable marker to trace this fold. Press this fold firmly with your iron. This creates a neat edge and hides the raw fabric. Ensure the fold is even all the way around the leg. If using pins to hold it in place, insert them perpendicular to the fold.
Step 5: Create the Second Fold
Now, fold the already-folded edge up again, this time by about 0.5 to 0.75 inches, to create the actual hem. The amount of this second fold will depend on how much fabric you left for your hem allowance. You want to fold it up so that the raw edge is completely enclosed within the fold. Press this second fold firmly with your iron. You should now have a clean, double-folded hemmed edge. Pin it securely in place.
Important Note: For a more authentic mom jean look, some people opt for a single fold or even just a single roll and stitch, especially if the original denim had a nice selvedge edge. However, a double fold is the most durable and traditional method for a clean finish.
Step 6: Hand-Sew the Hem
Thread your needle with thread that matches your jeans. Tie a knot at the end of the thread. Begin sewing the hem from the inside of the jean leg, starting at the inseam or side seam where it’s less visible. Use a small, neat stitch, like a “hemming stitch” or a small “running stitch.” Try to catch just a few threads of the main jean fabric on each stitch, so the stitches are barely visible from the outside. Work your way all around the leg, ensuring the hem stays flat and even. When you reach the starting point, tie off the thread securely with a knot and trim any excess.
Advanced Tip: For a completely invisible hem, you would use a blind hem stitch. However, for mom jeans, a small, neat visible stitch is often perfectly acceptable and even adds to the vintage aesthetic.
Step 7: Repeat for the Other Leg
Lay the first leg flat to ensure the hem looks as you intended. Then, repeat steps 4, 5, and 6 for the second leg. Take your time to make sure the second hem matches the first one exactly in width and appearance. Once both legs are sewn, give them a final press with your iron to set the stitches and ensure a crisp finish.
Using a Sewing Machine for a Faster Hem

If you have a sewing machine, the process is similar but faster. After completing steps 1-3 and creating your double folds (steps 4 and 5), you can use your machine.
- Set up your sewing machine with a denim needle and matching thread.
- Align the folded hem under the presser foot.
- Sew around the leg, keeping a consistent seam allowance (usually about 1/8 inch from the folded edge) for a neat finish. Backstitch at the beginning and end to secure the stitching.
- Press the hem with an iron.
A sewing machine can create a very strong and durable hem, perfect for everyday wear. You can also explore decorative stitches if you want to add a unique touch.
Choosing the Right Hem Style for Mom Jeans

Mom jeans can accommodate a variety of hem styles, each offering a different look. The best style for you depends on the original wash, the fabric weight, and your personal aesthetic.
Common Hem Styles for Denim
- The Double Fold Hem: This is what we detailed above. It’s classic, durable, and creates a very clean finish. It works well for most denim weights and styles.
- The Single Fold Hem: This involves folding the fabric up once, usually about 0.5 inches, and stitching. It’s quicker but less durable and can fray more easily over time than a double fold. It gives a slightly more raw edge look.
- The Cuffed Hem: This is where you fold the jeans up once or twice and press them into place, then stitch along the top edge of the cuff to secure it. This creates a visible cuff and is great for showing off a unique shoe or adding a bit of visual interest. For mom jeans, a double cuff can look quite stylish.
- The Raw Hem: This involves cutting the jeans to your desired length and then leaving the edge completely unfinished, allowing it to naturally fray. To prevent excessive fraying, you can create a very narrow double fold and then snip threads, or use fray check liquid. This is a very casual, trendy look.
For mom jeans, the double fold hem offers a balanced approach – it’s neat, durable, and complements the often-structured nature of the denim. However, if you’re going for a more relaxed vibe, a cuffed or even a carefully managed raw hem can be excellent choices.
Troubleshooting Common Hemming Issues
Even with the best intentions, you might run into a hiccup. Here are some common problems and how to solve them:
Common Problems and Solutions
| Problem | Cause | Solution |
|---|---|---|
| Uneven Hem Line | Inaccurate measuring or cutting; fabric shifting during sewing. | Start again, ensuring precise measurements and marking. Use plenty of pins to hold the fabric taut while sewing. If hand-sewing, take smaller, more consistent stitches. If machine sewing, use a walking foot and ensure even tension. |
| Stitches Too Visible | Using too large of a stitch; not catching enough fabric. | For hand-sewing, use smaller, consistent stitches and try to only catch 1-2 threads of the main fabric. Experiment with a blind hem stitch for a truly invisible finish. Ensure thread color matches perfectly. |
| Fabric Puckering | Thread tension too tight (machine); inconsistent stitches (hand). | For machine sewing, adjust thread tension. For hand-sewing, try to pull the thread through with consistent but not excessive force. Ironing flat after sewing can help relax puckered areas. |
| Hem Fraying Excessively | Raw edge not properly secured; incorrect hem style. | Ensure you’ve used a double-folded hem or serged the raw edge if using a single fold or raw hem. Apply a fray-stop liquid product along the raw edge if adopting a raw hem look. |
| Original Hem is Too Thick to Fold Properly | Original hemming thread is too coarse or bulky for a new fold. | Carefully use a seam ripper to remove the original hem entirely. Then proceed with creating your new double-folded hem on the raw edge. This will result in a cleaner finish than trying to re-fold an already-hemmed edge. |
Maintaining Your Hemmed Mom Jeans
Once your mom jeans are perfectly hemmed, you want them to stay that way. Proper care will ensure your stitches hold and the denim maintains its integrity.
Care Tips for Longevity
- Washing: Always wash your jeans inside out in cold water. This protects the outer fabric and preserves the color. Use a gentle cycle. For heavily distressed or darker washes, consider washing them separately or with similar dark items for the first few washes.
- Detergent: Opt for a mild detergent. Avoid harsh bleaches or fabric softeners, as these can break down denim fibers and damage stitching over time. If you were trying to achieve a specific look with OxiClean, be mindful of its bleaching properties and follow product instructions carefully.
- Drying: Air drying is the best method for preserving the shape and integrity of your jeans. Hang them by the waistband or lay them flat. If you must use a dryer, use the lowest heat setting and remove them while slightly damp to prevent shrinking and excessive creasing.
- Ironing: You can iron your jeans if needed, but use a medium heat setting and iron them inside out to protect the outer fabric. Pressing the hem after washing can keep it looking crisp.
- Storage: Fold your jeans neatly or hang them to prevent creasing. Avoid overcrowding your closet, which can lead to stretching or misshaping.
Frequently Asked Questions About Hemming Mom Jeans
Got more questions? Here are answers to some common beginner queries:
Q1: Do I need a sewing machine to hem my mom jeans?
No, you do not need a sewing machine. Hand-sewing with a needle and thread can produce beautiful, durable, and professional-looking results, especially for denim.
Q2: How much fabric should I leave for the hem?
For a double-folded hem, plan for at least 1 to 1.5 inches of fabric below your desired finished length line. This allows for an initial 0.5-0.75 inch fold, and a second fold of the same amount.
Q3: Can I hem my jeans without cutting them?
Yes, you can create a cuffed hem without cutting by simply folding the jeans up to your desired length and then stitching the cuff in place. However, if you want a shorter, cleaner hem without the bulk of a cuff, cutting is usually necessary.
Q4: How do I get a hem that looks professional?
The keys to a professional-looking hem are accuracy in measuring, clean and consistent folds, and neat stitching. Pressing with an iron at each folding stage also makes a significant difference.
Q5: What if my mom jeans have elastic in the waistband? Does that affect hemming?
The elastic in the waistband generally doesn’t affect the hemming process at the leg opening. You’ll hem them just as you would any other pair of jeans, focusing on the ankle length.
Q6: How can I ensure the hem looks like the original factory hem?
This is tricky as factory hems are often sewn with specialized machines. However, you can get a similar look by using a thicker, contrasting thread (like gold or tan) and a straight stitch on a sewing machine, or by carefully replicating the stitch appearance by hand. Sometimes, carefully removing the original hem and reattaching it is an option if you’re experienced.
Conclusion
Hemming mom jeans is a rewarding DIY project that can significantly improve the way your favorite denim fits and looks. By following these clear, step-by-step instructions, you’ve learned how to take precise measurements, create neat double folds, and secure your hems with either hand-sewing or a sewing machine. Remember, accuracy in measuring and patience in folding and stitching are your best tools for achieving stunning, effortless results. Now you can confidently tackle any pair of jeans that are a little too long, ensuring a flattering silhouette and a polished appearance every time you wear them. Enjoy your perfectly fitted mom jeans!


