


Quick Summary: Learn how to easily hem relaxed jeans at home. This beginner-friendly guide breaks down the process, from measuring to finishing, ensuring a perfect, professional-looking fit without needing a sewing machine.
How to Hem Relaxed Jeans: Effortless Beginner Guide
Are your favorite relaxed-fit jeans a little too long, making them drag on the floor or bunch up awkwardly at your ankles? It’s a common problem, but thankfully, one you can fix yourself with a few simple tools and a little patience. You don’t need to be a master seamster to achieve a neat, custom hem. This guide will walk you through the entire process, step-by-step, so you can give your jeans the perfect length and a clean finish. Let’s get those jeans looking and feeling just right.
Why Hemming Relaxed Jeans Is Easier Than You Think

Relaxed fit jeans are designed for comfort and a looser drape, but their length can be tricky. Unlike super skinny jeans where every millimeter counts, relaxed jeans offer a bit more forgiveness. This makes them ideal for beginners experimenting with hemming. The looser fabric is easier to handle, and small imperfections are less noticeable. Plus, achieving a professional look at home saves you money and gives you a great sense of accomplishment. We’ll cover two simple methods: one with a sewing machine and another for those completely new to stitching, using iron-on hemming tape.
Gather Your Hemming Supplies

Before you start, having everything ready makes the process smooth. Here’s what you’ll need:
- Your Relaxed Jeans: The star of the show!
- Measuring Tape or Ruler: For accurate length.
- Fabric Scissors: Sharp scissors are crucial for a clean cut.
- Fabric Marker, Chalk, or Pins: To mark your hemline.
- Iron and Ironing Board: Essential for both methods.
- Needle and Thread (Matching Color): For hand-sewing or if using a sewing machine.
- Sewing Machine (Optional): If you’re comfortable using one.
- Iron-On Hemming Tape (Optional): A no-sew solution.
- Seam Ripper (Optional): If you need to adjust a previous hem.
Step 1: Measure Twice, Cut Once (for the Perfect Length)

This is the most critical step. Getting the length right ensures your jeans will fit perfectly. It’s better to start longer and trim later than to cut too short.
- Try On Your Jeans: Put on the jeans you want to hem. Wear the shoes you usually wear with them. This is important because different shoe heights can affect the desired length.
- Stand Naturally: Don’t suck in your stomach or puff out your chest. Stand in a relaxed, natural posture.
- Determine Desired Length: Look in a mirror. Decide where you want the hem to fall. Common options are:
- Just touching the top of your shoe.
- Slightly above the sole of your shoe.
- A “trickier” hem that just barely skims the floor.
For relaxed jeans, a little length is often desired, so aim for it to hit the top of your shoes or just slightly above.
- Mark the Length: Use your fabric marker or chalk to make a small mark on the inside seam of one leg, at your desired length.
- Measure and Mark the Other Leg: Lay the jeans down flat. Fold them in half, aligning the seams. Use your measuring tape from the marked spot on the first leg straight across to the hem of the second leg. Make a matching mark on the second leg. This ensures the length is even on both sides.
- Add Hem Allowance: You need extra fabric for the actual hem. For a standard hem that you’ll fold over, add about 1 to 1.5 inches (2.5 to 3.8 cm) below your marked finished length. Mark this new line. Your final cut will be along this lower line.
Tip: If you’re unsure, always err on the side of leaving more fabric. You can always trim more, but you can’t add it back!
Step 2: Cut Off the Excess Fabric

Now it’s time to make the cut. This will feel a bit drastic, but it’s necessary for a clean hem. Ensure your scissors are sharp for a precise cut.
- Lay Jeans Flat: Lay one leg of the jeans flat on your cutting surface. Make sure there are no wrinkles.
- Cut Along the Marked Line: Use your sharp fabric scissors to cut straight across the leg, following the lower line you marked for your hem allowance.
- Repeat for the Other Leg: Fold the jeans in half again, aligning seams, and cut the second leg to match the first. Verify the lengths are identical by holding them up side-by-side.
Step 3: Choose Your Hemming Method
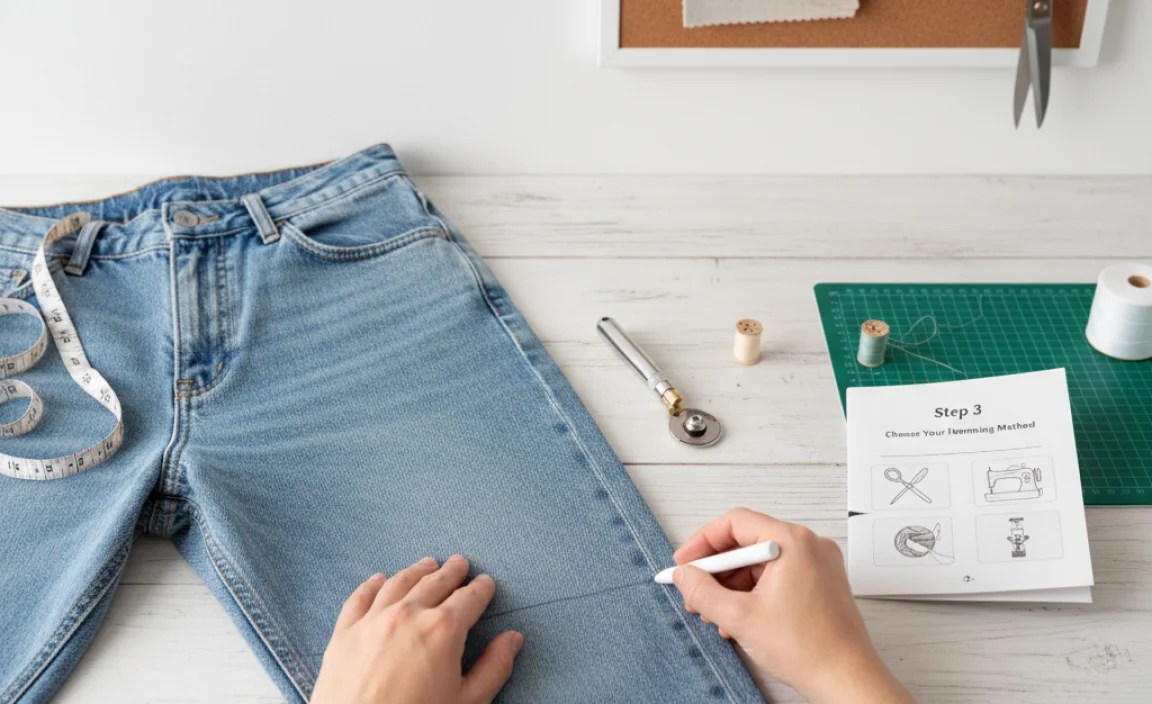
You have a few options for creating the actual hem. We’ll cover the two most common for beginners:
Method 1: The Sewn Hem (Hand or Machine)
This method provides the most durable and professional finish. If you have a sewing machine and know the basics, it’s quick. Hand-sewing is also very achievable but takes more time.
Preparing the Hem:
- Fold Up the Hem Allowance: Take the cut edge of one leg and fold it upwards by about 0.5 inches (1.3 cm). Press firmly with your iron to create a crisp crease.
- Fold Again: Fold the hem up a second time, so the raw edge is now tucked inside this fold. This fold should be roughly the same width as your first fold, bringing your total hemmed fabric to your desired finished length. Press again with the iron.
- Secure with Pins: Once you have the double fold creased evenly along the entire circumference of the leg, use pins to hold it in place. Place pins perpendicular to the folded edge.
- Repeat for the Other Leg: Do the same for the second leg, ensuring the folds and pin placement are consistent.
Sewing the Hem:
| Tool | Description | Why It’s Important |
|---|---|---|
| Sewing Machine | A machine that stitches fabric with a needle and thread. | Faster and creates a very strong, consistent stitch. |
| Needle and Thread | Appropriate needle for denim and strong thread that matches your jeans’ color. | Essential for creating the stitches. Matching thread creates a near-invisible repair. |
| Iron | Used to press creases and iron materials. | Helps create crisp folds and secure temporary bonds. |
Option A: Using a Sewing Machine
- Thread Your Machine: Use a strong thread that matches the color of your jeans’ original stitching. A universal needle or a denim needle is recommended.
- Stitch: Sew along the top edge of the folded hem, about 1/8 inch (3mm) from the inside fold. Aim for a straight stitch. Sew around the entire leg. When you reach the beginning, overlap your stitches by about half an inch and backstitch to secure the end.
- Repeat for Other Leg: Do the same for the second leg.
- Trim Excess Thread: Once both legs are sewn, trim any loose threads.
Option B: Hand-Sewing the Blind Hem Stitch
This classic stitch is designed to be almost invisible from the outside.
- Thread Your Needle: Knot one end of your thread.
- Start Sewing: Insert your needle from the inside of the hem, passing through the folded fabric.
- The Stitch: Pick up just a tiny thread or two of the main jean fabric every 1/2 inch to 1 inch. Then, pass your needle through the folded hem section. Continue this pattern around the leg. The idea is to catch very little of the outer fabric so the stitches don’t show.
- Finish: When you get back to where you started, tie a knot securely on the inside of the hem and trim any excess thread.
- Repeat for Other Leg: Hand-sew the second leg using the same technique.
Method 2: The No-Sew Hem with Iron-On Hemming Tape
This is an excellent option for absolute beginners or when you need a quick fix. Iron-on hemming tape (also known as hemming web or fusible webbing) creates a strong bond when heat is applied.
Preparing the Hem:
- Fold Up the Hem Allowance: Fold the raw edge of the leg upwards by about 0.5 inches (1.3 cm) and press with an iron to create a crease.
- Apply Hemming Tape: Cut a piece of hemming tape to fit along the inside of this first fold.
- Fold Again: Fold the hem up a second time, covering the raw edge and the hemming tape. This should bring you to your desired finished length. Press firmly with the iron to keep this second fold in place.
- Secure with Pins: Pin the hem in place all the way around.
- Repeat for the Other Leg: Prepare the second leg identically.
Ironing the Hem:
| Tool | Description | Why It’s Important |
|---|---|---|
| Iron-On Hemming Tape | A fusible web that bonds fabric when heated. | Creates a strong, permanent hem without sewing. Look for brands specifically recommended for denim. |
| Iron | Used to activate the hemming tape’s adhesive. | Heat is required for the tape to melt and bond the fabric layers. |
| Pressing Cloth (Optional) | A thin piece of cotton fabric (like a pillowcase or scrap). | Protects the iron and the fabric from direct, intense heat, preventing scorching or shine marks. |
- Check Tape Instructions: Always read the specific instructions on your hemming tape package, as temperatures and times can vary.
- Set Iron Temperature: Set your iron to the temperature recommended for cotton or denim (usually a medium to high setting), but turn OFF the steam function.
- Press Sections: Place the jeans on the ironing board with the folded hem facing upwards. Press the iron onto the hem for the recommended time (often 5-10 seconds). Work in sections, lifting and moving the iron.
- Use a Pressing Cloth: If using a pressing cloth, place it over the hem before applying the iron.
- Allow to Cool: Let the hem cool completely before moving the jeans. This helps the bond set properly.
- Check for Bond: Gently try to pull the hem apart. If it feels loose, repeat the ironing step.
- Repeat for Other Leg: Apply hemming tape and iron the second leg, ensuring consistent pressure and timing.
External Link: For more information on fabric adhesives and their uses, consult resources like the Fabric Selection Guide on Fusible Webbing.
Step 4: Finishing Touches and Trying Them On
Once your hemming is complete, it’s time for the final check.
- Trim Loose Threads: Carefully snip away any stray threads close to the fabric.
- Inspect Your Work: Check the seam on both legs to ensure it’s even, secure, and that the stitches (or tape) are holding well.
- Try Them On: Put on your newly hemmed jeans with your usual shoes. Walk around, sit down, and check the length. Does it feel right? Does it look clean and professional?
If the length is still not quite right, and you have enough fabric, you can repeat the process by folding the hem up a little more. If you cut too much off initially, you might need to consider adding a cuff or using a different pair of jeans.
Common Issues and How to Avoid Them
Even with simple guides, a few hiccups can occur. Here’s how to address them:
- Wavy Hem: This can happen if the fabric isn’t smooth during cutting or sewing, or if your sewing machine’s tension is off. Pressing firmly with an iron can help, but it’s best prevented by keeping fabric taut and ironing each fold carefully.
- Uneven Hem: Usually caused by inaccurate marking or cutting. Always measure on a flat surface and double-check your marks before cutting.
- Stitches Showing on the Outside: If hand-sewing, ensure you’re only picking up a tiny thread of the main fabric. For machine sewing, a blind hem stitch attachment can help, or carefully guiding the fabric.
- Unraveling: Make sure to secure your stitches by backstitching at the beginning and end. For sewn hems, ensure the raw edge is fully contained within the double fold.
- Hemming Tape Not Sticking: Ensure your iron is hot enough (no steam!), that you’re pressing long enough, and that you’re using tape suitable for denim. A pressing cloth can sometimes help distribute heat more evenly.
Alternatives for Hemming Jeans at Home
While sewing or using hemming tape are popular, other methods exist, each with its own pros and cons.
| Method | Pros | Cons |
|---|---|---|
| Cuffing the Jeans | No cutting or sewing required, reversible, trendy look. | Adds bulk, can be too casual for some looks, not a permanent solution. |
| Cutting and Fraying | Creates a distressed, casual look. | Can be messy, may unravel too much over time, not suitable for all jean styles. |
| Fabric Glue | Quick and easy, no sewing needed. | Can be stiff, may not be as durable or wash-proof as other methods, can leave residue. |
For relaxed jeans, a simple cuff can look great if they’re just a bit too long. If you prefer a frayed look, make sure to cut above where you want the fraying to stop and stabilize it with a stitch or fabric glue to prevent excessive unraveling. You can find tutorials on creating the perfect DIY fray hem from reputable sources like Threads Fabric DIY Guides.
Caring for Your Hemmed Jeans
Proper care ensures your expertly hemmed jeans last.
- Washing: Always wash your jeans inside out in cold water on a gentle cycle. This protects the new hem and the overall fabric color.
- Drying: Air drying is best. If you must machine dry, use a low heat setting. High heat can weaken threads and adhesives, especially for no-sew hems.
- Ironing: If your hem gets wrinkled, iron it from the inside on a medium heat setting.
Frequently Asked Questions (FAQ)
Q1: How much extra fabric should I leave for hemming?
A: It’s generally recommended to leave about 1 to 1.5 inches (2.5 to 3.8 cm) of extra fabric below your desired finished length. This provides enough room for a double fold, which conceals the raw edge and creates a cleaner finish.
Q2: Can I hem jeans without a sewing machine?
A: Absolutely! Using iron-on hemming tape is a popular and effective no-sew method. Hand-sewing with a blind hem stitch is also a great option for a nearly invisible finish.
Q3: How do I get my hem to look like the original?
A: For a truly identical look, you’d ideally want to replicate the original stitch type, which might be a chain stitch or a specific double-needle stitch. However, a neat, straight stitch with matching thread using a standard sewing machine or a careful hand stitch will look very professional and clean.
Q4: What kind of needle and thread should I use for hemming jeans?
A: For sewing machines, a “denim” or “jeans” needle (size 9


