


Need to shorten your relaxed fit jeans but dread the fuss? This guide shows you how to hem relaxed jeans easily, even by hand. You’ll get a neat, custom fit without a sewing machine, making your favorite denim look just right.
Relaxed fit jeans are incredibly comfortable, but sometimes they’re just a little too long. That common problem can make your favorite pair look sloppy or cause you to trip. Don’t worry, hemming them yourself is much simpler than you might think. This guide will walk you through every step with clear, easy-to-follow instructions. You’ll gain the confidence to tackle this common clothing alteration and enjoy perfectly fitting denim.
Why Hem Your Relaxed Jeans?


The beauty of relaxed fit jeans lies in their looser silhouette, offering comfort and a casual aesthetic. However, the “relaxed” fit can sometimes translate to a relaxed approach to length. This often leads to jeans dragging on the floor, getting caught on shoe heels, or creating an unintended “puddling” effect at the ankle. This not only looks unkempt but can also wear out the original hem faster. A proper hem ensures your jeans maintain their intended style while fitting your proportions perfectly.
Consider these common scenarios where hemming becomes essential:
- Buying Jeans Online: Sizing can vary, and inseam lengths aren’t always accurate.
- Shrinkage: Jeans can shrink in the wash, particularly if they’re 100% cotton.
- New Style: You might want to wear your relaxed jeans with different shoes, requiring a shorter inseam.
- Personal Preference: Sometimes, you just want that ideal length for a cleaner look.
Hemming them yourself is a practical skill that saves money and gives you control over your wardrobe. We’ll cover everything from gathering supplies to achieving a professional-looking finish.
Gathering Your Hemming Essentials


Before you start cutting, make sure you have the right tools. Having everything ready will make the process smooth and efficient. For hemming relaxed jeans, especially by hand, you’ll need a few key items:
Essential Tools for Hemming
- Fabric Scissors: Sharp scissors dedicated to fabric will ensure clean cuts. Regular scissors can snag or leave ay edge.
- Measuring Tape or Ruler: Accuray measurement is crucial for an even hem.
- Fabric Marker or Chalk: For marking the desired hemline. These are washable.
- Pins: Straight pins to hold the folded hem in place.
- Needle: A sharp needle suitable for denim.
- Thread: Choose a thread color that closely matches your jeans’ original thread or your desired visible stitch. For a classic look, a contrasting thread can be used ironically.
- Iron and Ironing Board: To press the folds for crisp lines and easier sewing.
- Seam Ripper (Optional but Recommended): If you want to preserve the original hem and reattach it for an authentic look.
- Your Relaxed Jeans: The star of the show!
Having these items on hand means you’re prepared to tackle the hemming project with confidence. You can find most of these at any craft or fabric store.
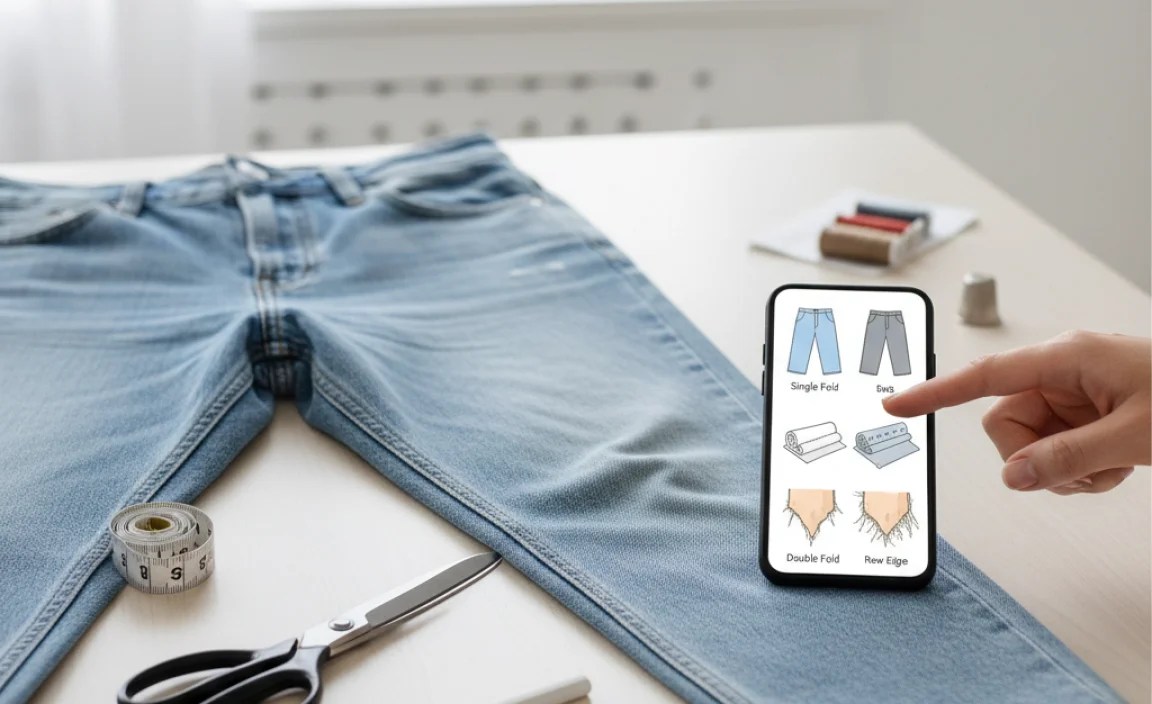
Step-by-Step: How to Hem Relaxed Jeans


Here’s a straightforward method to hem your relaxed jeans. This guide focuses on a simple, clean hem suitable for beginners, with an option to preserve the original hem later if you choose.
Step 1: Prepare Your Jeans
Start by washing and drying your jeans as you normally would. This ensures that if they shrink, they do so before you alter them. Lay your jeans flat on a clean, hard surface like a table or the floor.
Step 2: Determine the Desired Length
Put on the shoes you typically wear with your relaxed jeans. This is important because shoes affect how your jeans will hang. Stand in front of a mirror and decide where you want the hem to fall. A common spot is just above the sole of your shoe or where the denim naturally wants to rest without excessive bunching. For a cleaner look, aim for the hem to hit the top of your shoe’s vamp.
Pro Tip: If you’re unsure, it’s always better to err on the side of slightly too long. You can always trim more fabric later, but you can’t add it back.
Step 3: Mark the Hemline
While wearing the jeans and shoes and looking in the mirror, use your fabric marker or chalk to make small dots or lines on the inside of the leg at your desired hem length. Make these marks on both legs. Then, take off the jeans and lay them flat again.
Using your ruler or measuring tape, draw a straight line connecting the marks on each leg. Measure from the new line to the original hem. You’ll want to add about 1 to 1.5 inches for the new hem allowance. This allowance will be folded up to create the finished hem. For example, if you want the final length to be 30 inches, and you marked that point, add 1.5 inches for your cutting line, meaning you’ll cut at 28.5 inches from the waist, or you’ll have a 1.5-inch doubled hem allowance below your desired finished length.
Important: Ensure the cutting line and the final hem allowance are consistent on both legs and all the way around each leg.
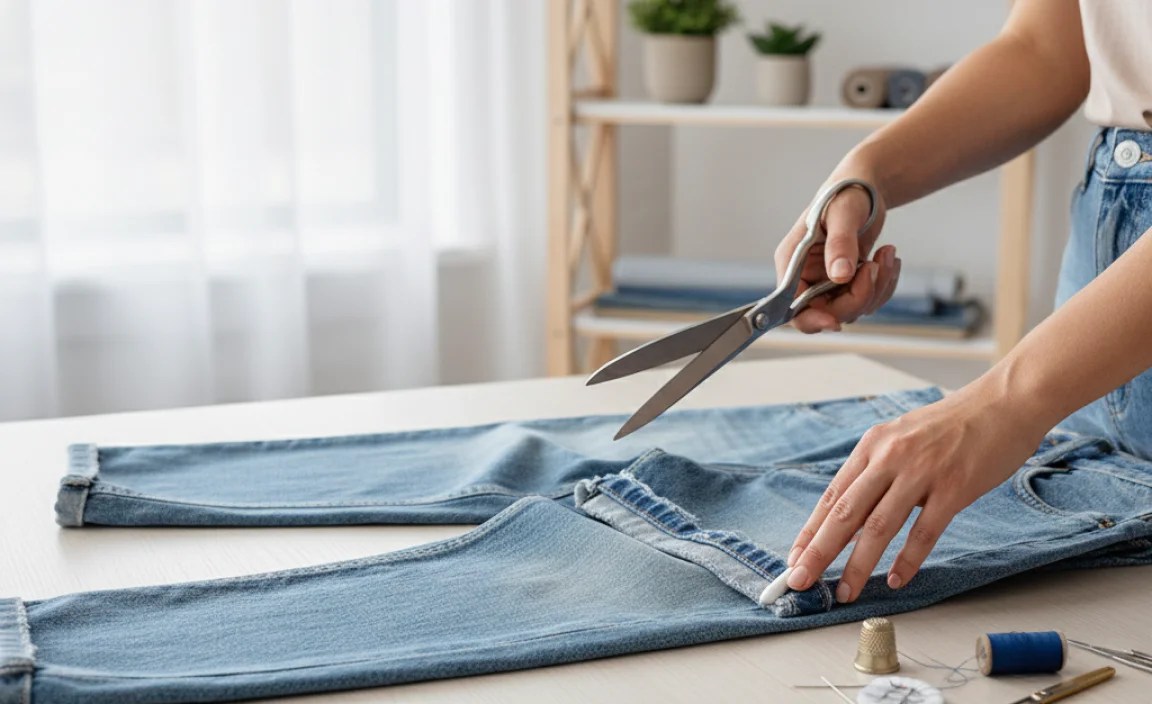
Step 4: Cut Off Excess Fabric
Carefully cut along the marked cutting line using your sharp fabric scissors. Cut through both layers of fabric on each leg. Remember, it’s better to cut too much than too little. You can trim more later if needed.
Step 5: Create the First Fold
Take the raw edge of the fabric on one leg and fold it upwards towards the inside of the jeans. Align this raw edge with your marked finished hemline. Press this fold flat with your iron. This creates a crisp crease, making the hemming process much easier.
Step 6: Create the Second Fold (The Hem Allowance)
Now, fold that creased edge upwards again. This second fold should be about 0.5 to 1 inch wide, enclosing the raw edge completely. You are essentially creating a double-folded hem. Press this second fold firmly with your iron. This creates a clean, finished edge that won’t fray. Secure the folded hem in place using pins, placing them perpendicular to the folded edge.
Step 7: Sew the Hem
This is where the hand-sewing comes in. Thread your needle with a length of thread that’s comfortable to work with (about 18-24 inches). Tie a knot at the end of the thread. Choose your stitch. For a nearly invisible hem, a blind stitch (or slip stitch) is ideal. For a more visible, traditional look, you can use a straight stitch along the top edge of the hem fold, mimicking the original industrial stitch.
Blind Hem Stitch (For an Invisible Finish)
Start by inserting your needle from the inside of the folded hem, just above the raw edge, to hide your knot. Then, take a small stitch (about 1/8 inch) on the main part of the jean leg, catching only one or two threads. Next, bring your needle back into the folded hem, taking a small stitch directly opposite where your needle emerged from the leg, again just above the raw edge. Continue this pattern, alternating between the jean leg and the folded hem. Pull the thread gently after each few stitches to gather the fabric, creating a snug but not tight stitch. Aim to keep stitches small and consistent.
Catch Stitch or Straight/Zigzag Stitch (For a Visible Finish)
If you prefer a visible hem, you can use a simple straight stitch or zigzag stitch for durability. You can either sew through all layers of the folded hem and the jean leg for maximum security, or you can try to catch just a thread of the jean leg on your blind stitch, creating a subtle row of stitches on the outside. For a more authentic look, use a thread color that matches or contrasts intentionally, and try to mimic the width and spacing of the original jean stitching.
Continue sewing all the way around the leg. When you reach the starting point, tie off your thread securely with a knot on the inside of the hem. Trim any excess thread.
Step 8: Repeat for the Other Leg
Once you’ve successfully hemmed one leg, repeat steps 1 through 7 for the other leg. Make sure to measure the second leg against the first to ensure they are the exact same length and drape evenly. Lay them flat side-by-side to visually check.
Step 9: Final Press and Check
With both legs hemmed and stitched, give the hems a final press with your iron. This will set the stitches and give your newly hemmed jeans a crisp, finished look. Try them on with your shoes one last time to admire your work!
Preserving the Original Hem: The Trickiest, Most Authentic Look


If you want your relaxed jeans to look like they were bought with the perfect length, preserving the original hem is the way to go. This method involves carefully removing the original hem, shortening the jeans, and then reattaching the original hem. It’s a bit more time-consuming but yields the most authentic result, especially on jeans with distinctly colored stitching or a double-stitched hem.
Tools You’ll Need (Added):
- Seam Ripper
- Starch (optional, for pressing)
Steps for Preserving the Original Hem:
- Mark and Cut: Follow steps 1-4 above to determine your desired length and cut off the excess fabric. Cut about 1.5 to 2 inches below your desired finished hemline.
- Carefully Remove Original Hem: Lay the jeans flat, inside out. Use your seam ripper to meticulously unpick the stitches of the original hem. Be patient! Work slowly to avoid damaging the fabric or losing the original hem band. For double-stitched hems, you’ll need to unpick the outer stitch first, then the inner one. Once unpicked, carefully detach the original hem band and set it aside.
- Shorten the Jean Leg: Now you have a raw edge where the original hem was. Fold the jeans to your desired finished length, pressing a crease. Then, fold upwards again by about 0.5 inches to create a narrow, single-fold hem allowance. Press this firmly.
- Reattach Original Hem: Place the jeans right-side out on a flat surface. Position the original hem band around the bottom of the jean leg, aligning its top edge with the folded raw edge you just created. It should fit perfectly if you measured correctly. Pin the original hem band in place, ensuring the original stitching line on the band aligns with the folded edge of the jean leg.
- Sew the Original Hem: Using a needle and thread that matches the original thread color, carefully sew the original hem band back onto the jean leg. Aim to stitch in the original stitch line if possible, or very close to it. A sturdy stitch like a backstitch or a reinforced straight stitch works well. If your sewing machine is available and you want to mimic factory stitching, you can use a double-needle or a specific denim stitch setting.
- Final Press: Once stitched, press the hem firmly with an iron. You might want to use starch to help achieve a crisp finish.
This method requires more precision but results in a hem that is virtually indistinguishable from the factory original.
Choosing the Right Hemming Method
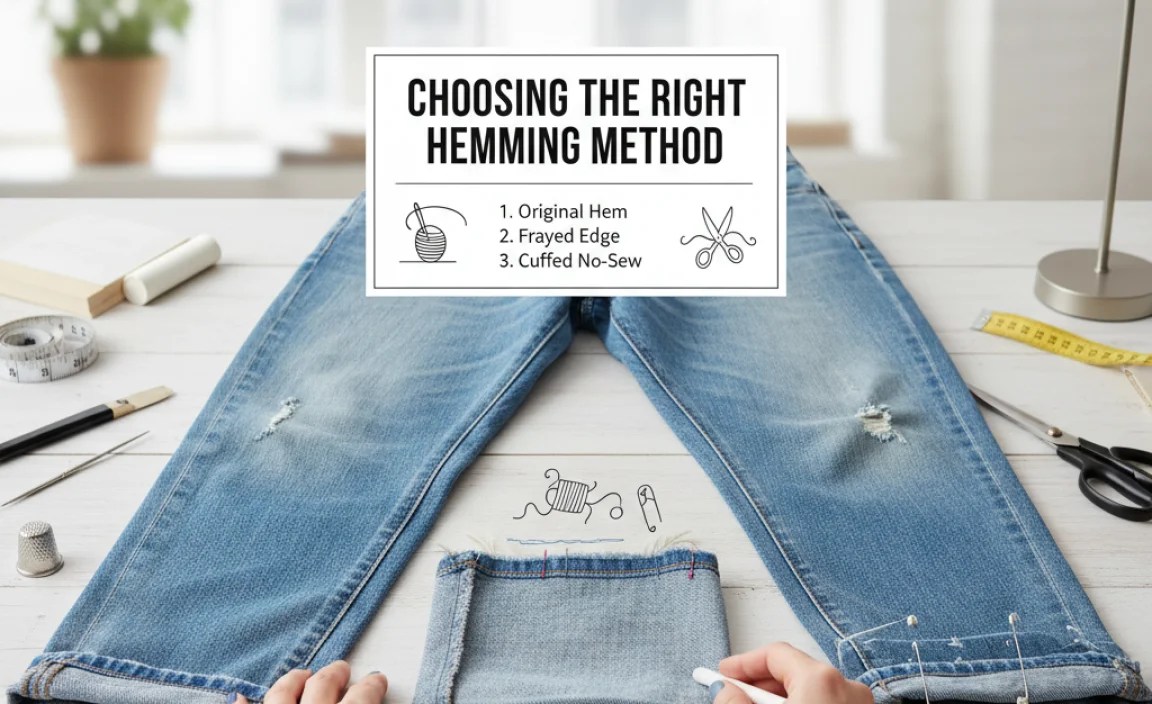

The best hemming method depends on the look you want and the time you have. Here’s a quick comparison:
| Method | Pros | Cons | Best For |
|---|---|---|---|
| Simple Double Fold Hem (Hand-Sewn) | Easy, quick, no special tools needed beyond basic sewing kit. Good for everyday wear. | Visible stitching on the outside unless using a very neat blind stitch. Might not look as “factory” as original. | Beginners, casual jeans, when a quick fix is needed. |
| Preserving Original Hem | Most authentic, factory-like finish. Keeps original look. | Time-consuming, requires a seam ripper and patience. Risk of damaging fabric. | Designer jeans, jeans with unique stitching, when a perfect, unnoticeable hem is desired. |
| Using a Sewing Machine (for both) | Faster and creates stronger, more uniform stitches than hand-sewing. | Requires access to a sewing machine and knowledge of its operation. May be more difficult with thick denim. | Regularly hem clothes, need for speed and durability. |
For most casual relaxed jeans, the simple double-fold hem is perfectly adequate and achieves a great result. If you’re aiming for perfection on a prized pair, consider the original hem preservation method. You can also find excellent resources on denim repair and alteration from institutions like the University of Vermont Extension, which often provides practical guides for home economics and textile care.
Troubleshooting Common Hemming Issues
Even with the best intentions, things can sometimes go awry. Here are a few common issues and how to fix them:
- Uneven Hemline: This is the most common problem. If you notice it after sewing, you can try to carefully unpick the stitches and re-press and re-sew. For slight unevenness, a wider leg opening on relaxed jeans can sometimes mask minor discrepancies. In severe cases, you might need to recut and start that section over.
- Wavy or Puckered Hem: This usually happens if the fabric is stretched too much while sewing, or if the thread tension is off (if using a machine). For hand sewing, ensure you’re not pulling the thread too tightly. Pressing with steam can sometimes help relax the puckering.
- Thread Breaking: If your thread keeps breaking, ensure you’re using a needle appropriate for denim (a denim needle if using a machine) and that your thread isn’t old or frayed.
- Stitches Showing Too Much: If you wanted an invisible hem and can see the stitches, try making smaller stitches and catching fewer threads on the main jean fabric. A blind stitch is designed to be discreet.
- Cutting Too Short: This is the worst-case scenario! If you cut too much off, you can buy some iron-on hem tape and a strip of matching denim fabric and try to create a faux cuff or add a decorative band to the bottom. Alternatively, you might need to buy a new pair of jeans.
The key to overcoming these issues is patience and practice. Don’t be discouraged if your first attempt isn’t perfect. Each project will teach you something new.
Frequently Asked Questions (FAQ)
Q1: Can I hem relaxed jeans without a sewing machine?
A: Absolutely! This guide focuses on hemming by hand, which is perfectly effective for denim. You’ll just need a needle, thread, pins, and scissors.
Q2: How much fabric should I leave for the hem allowance?
A: For a clean, durable hem, leave about 1 to 1.5 inches of fabric for a double-folded hem. This allows you to fold the raw edge twice, hiding it completely.
Q3: What kind of stitch is best for hemming jeans?
A: For an invisible finish, a blind stitch or slip stitch is best. For a more visible, durable stitch that mimics factory seams, a straight stitch or zigzag stitch along the top edge of the hem fold works well.
Q4: How do I make sure both legs are the same length?
A: Measure carefully while wearing the jeans and shoes. Mark both legs similarly, then lay them flat side-by-side to double-check measurements and length before cutting and sewing.
Q5: What if my jeans are thick denim?
A: Use a strong needle, ideally a denim needle if using a machine. For hand-sewing, a sharp, sturdy needle is essential. You may need to use a thimble to push the needle through thicker layers. Go slowly and steadily.
Q6: How can I make my hand-sewn hem look professional?
A: Press each fold crisply with an iron. Use consistent, small stitches. Match your thread color closely to the jeans, or intentionally use a contrasting color for decorative effect. Practicing your stitch on a scrap piece of denim first can also help.
Conclusion
Hemming your relaxed jeans is a rewarding DIY skill that can significantly improve the fit and look of your favorite denim. Whether you opt for a simple, clean double-fold hem or the more intricate method of preserving the original hem, the steps are manageable for any beginner. With the right tools, careful measurement, and a little patience, you can achieve a professional-looking result right in your own home. Don’t let ill-fitting jeans sit in your closet any longer. Empower yourself with these easy-to-follow instructions and enjoy perfectly
.lwrp.link-whisper-related-posts{
margin-top: 40px;
margin-bottom: 30px;
}
.lwrp .lwrp-title{
}.lwrp .lwrp-description{
}
.lwrp .lwrp-list-container{
}
.lwrp .lwrp-list-multi-container{
display: flex;
}
.lwrp .lwrp-list-double{
width: 48%;
}
.lwrp .lwrp-list-triple{
width: 32%;
}
.lwrp .lwrp-list-row-container{
display: flex;
justify-content: space-between;
}
.lwrp .lwrp-list-row-container .lwrp-list-item{
width: calc(25% – 20px);
}
.lwrp .lwrp-list-item:not(.lwrp-no-posts-message-item){
max-width: 150px;
}
.lwrp .lwrp-list-item img{
max-width: 100%;
height: auto;
object-fit: cover;
aspect-ratio: 1 / 1;
}
.lwrp .lwrp-list-item.lwrp-empty-list-item{
background: initial !important;
}
.lwrp .lwrp-list-item .lwrp-list-link .lwrp-list-link-title-text,
.lwrp .lwrp-list-item .lwrp-list-no-posts-message{
}@media screen and (max-width: 480px) {
.lwrp.link-whisper-related-posts{
}
.lwrp .lwrp-title{
}.lwrp .lwrp-description{
}
.lwrp .lwrp-list-multi-container{
flex-direction: column;
}
.lwrp .lwrp-list-multi-container ul.lwrp-list{
margin-top: 0px;
margin-bottom: 0px;
padding-top: 0px;
padding-bottom: 0px;
}
.lwrp .lwrp-list-double,
.lwrp .lwrp-list-triple{
width: 100%;
}
.lwrp .lwrp-list-row-container{
justify-content: initial;
flex-direction: column;
}
.lwrp .lwrp-list-row-container .lwrp-list-item{
width: 100%;
}
.lwrp .lwrp-list-item:not(.lwrp-no-posts-message-item){
max-width: initial;
}
.lwrp .lwrp-list-item .lwrp-list-link .lwrp-list-link-title-text,
.lwrp .lwrp-list-item .lwrp-list-no-posts-message{
};
}
Related Posts


.lwrp.link-whisper-related-posts{
margin-top: 40px;
margin-bottom: 30px;
}
.lwrp .lwrp-title{
}.lwrp .lwrp-description{
}
.lwrp .lwrp-list-container{
}
.lwrp .lwrp-list-multi-container{
display: flex;
}
.lwrp .lwrp-list-double{
width: 48%;
}
.lwrp .lwrp-list-triple{
width: 32%;
}
.lwrp .lwrp-list-row-container{
display: flex;
justify-content: space-between;
}
.lwrp .lwrp-list-row-container .lwrp-list-item{
width: calc(25% – 20px);
}
.lwrp .lwrp-list-item:not(.lwrp-no-posts-message-item){
max-width: 150px;
}
.lwrp .lwrp-list-item img{
max-width: 100%;
height: auto;
object-fit: cover;
aspect-ratio: 1 / 1;
}
.lwrp .lwrp-list-item.lwrp-empty-list-item{
background: initial !important;
}
.lwrp .lwrp-list-item .lwrp-list-link .lwrp-list-link-title-text,
.lwrp .lwrp-list-item .lwrp-list-no-posts-message{
}@media screen and (max-width: 480px) {
.lwrp.link-whisper-related-posts{
}
.lwrp .lwrp-title{
}.lwrp .lwrp-description{
}
.lwrp .lwrp-list-multi-container{
flex-direction: column;
}
.lwrp .lwrp-list-multi-container ul.lwrp-list{
margin-top: 0px;
margin-bottom: 0px;
padding-top: 0px;
padding-bottom: 0px;
}
.lwrp .lwrp-list-double,
.lwrp .lwrp-list-triple{
width: 100%;
}
.lwrp .lwrp-list-row-container{
justify-content: initial;
flex-direction: column;
}
.lwrp .lwrp-list-row-container .lwrp-list-item{
width: 100%;
}
.lwrp .lwrp-list-item:not(.lwrp-no-posts-message-item){
max-width: initial;
}
.lwrp .lwrp-list-item .lwrp-list-link .lwrp-list-link-title-text,
.lwrp .lwrp-list-item .lwrp-list-no-posts-message{
};
}
Related Posts
.lwrp.link-whisper-related-posts{
margin-top: 40px;
margin-bottom: 30px;
}
.lwrp .lwrp-title{
}.lwrp .lwrp-description{
}
.lwrp .lwrp-list-container{
}
.lwrp .lwrp-list-multi-container{
display: flex;
}
.lwrp .lwrp-list-double{
width: 48%;
}
.lwrp .lwrp-list-triple{
width: 32%;
}
.lwrp .lwrp-list-row-container{
display: flex;
justify-content: space-between;
}
.lwrp .lwrp-list-row-container .lwrp-list-item{
width: calc(25% – 20px);
}
.lwrp .lwrp-list-item:not(.lwrp-no-posts-message-item){
max-width: 150px;
}
.lwrp .lwrp-list-item img{
max-width: 100%;
height: auto;
object-fit: cover;
aspect-ratio: 1 / 1;
}
.lwrp .lwrp-list-item.lwrp-empty-list-item{
background: initial !important;
}
.lwrp .lwrp-list-item .lwrp-list-link .lwrp-list-link-title-text,
.lwrp .lwrp-list-item .lwrp-list-no-posts-message{
}@media screen and (max-width: 480px) {
.lwrp.link-whisper-related-posts{
}
.lwrp .lwrp-title{
}.lwrp .lwrp-description{
}
.lwrp .lwrp-list-multi-container{
flex-direction: column;
}
.lwrp .lwrp-list-multi-container ul.lwrp-list{
margin-top: 0px;
margin-bottom: 0px;
padding-top: 0px;
padding-bottom: 0px;
}
.lwrp .lwrp-list-double,
.lwrp .lwrp-list-triple{
width: 100%;
}
.lwrp .lwrp-list-row-container{
justify-content: initial;
flex-direction: column;
}
.lwrp .lwrp-list-row-container .lwrp-list-item{
width: 100%;
}
.lwrp .lwrp-list-item:not(.lwrp-no-posts-message-item){
max-width: initial;
}
.lwrp .lwrp-list-item .lwrp-list-link .lwrp-list-link-title-text,
.lwrp .lwrp-list-item .lwrp-list-no-posts-message{
};
}
