Quick Summary: Effortlessly hem your relaxed jeans in minutes using iron-on patches. This no-sew method offers a quick, clean, and durable solution to achieve the perfect fit for your favorite denim without special tools or sewing skills. Get ready to enjoy perfectly fitting jeans with this simple technique.
How To Hem Relaxed Jeans: Genius Iron-On Patches
Are your favorite relaxed-fit jeans a little too long? It’s a common frustration. That extra fabric can bunch up, look messy, or even cause you to trip. The good news is you don’t need to be a sewing expert to fix it. With the clever use of iron-on patches, you can achieve a neat, professional-looking hem quickly and easily. This guide will walk you through a simple, no-sew method that will have your jeans fitting perfectly in no time.
Forget the hassle of needles, thread, and measuring tape that can feel intimidating. This method is designed for anyone, especially if you’re new to clothing alterations. We’ll cover everything from choosing the right patches to achieving a smooth, lasting finish. Get ready to transform your denim and wear your jeans with confidence!
Why Iron-On Patches Are a Game-Changer for Hemming Jeans

When it comes to altering your clothing, sewing often comes to mind. However, for common fixes like hemming, iron-on patches offer a brilliant alternative. They are specifically designed to bond fabric together with just heat, making them incredibly user-friendly.
Here’s why they are an excellent choice for hemming your relaxed jeans:
- Speed: This is the fastest way to hem jeans. You can complete the process in under an hour.
- No Sewing Skills Required: Absolutely no prior sewing experience is needed. If you can use an iron, you can do this.
- Clean Finish: When done correctly, the hem looks neat and professional, with no visible stitches from the outside.
- Durability: Good quality iron-on patches create a strong bond that holds up well to washing and wearing.
- Cost-Effective: It’s much cheaper than taking your jeans to a tailor or buying new ones.
- Reversible (Often): In many cases, a sewn hem is permanent, but with iron-on patches, you might be able to carefully remove them later if needed, though this is not guaranteed and depends on the specific product.
Choosing Your Iron-On Hemming Patches

Not all iron-on patches are created equal, especially when it comes to garment hemming. For this specific task, you’ll want to look for products designed as “hemming tape,” “fabric fusing tape,” or “iron-on hem tape.” These are usually thin, flexible strips of adhesive that melt when heated.
Consider these factors when making your choice:
- Material: Most are made with a flexible adhesive that bonds fabric. Some might have a slightly stiff feel once applied, so look for ones that explicitly mention flexibility for clothing.
- Width: Hemming tapes come in various widths, usually ranging from 1/2 inch to 2 inches. A common width for hemming jeans is between 1 to 1.5 inches. Wider tape provides a more substantial hem.
- Color: They often come in white, black, or clear. White is good for lighter fabrics, black for dark denim, and clear can work for most colors. If your jeans are dark, a black or clear tape is usually best.
- Brand Reputation: Look for well-known brands that specialize in fabric adhesives. Reading reviews can help you identify reliable products.
A popular and reliable option for fabric fusing is HeatnBond Ultrahold, which is a strong, permanent adhesive. Another widely used product specifically for hemming is Dritz Hem Tape. For a truly no-sew approach, products like “Super Fabsil Tape” are also very effective.
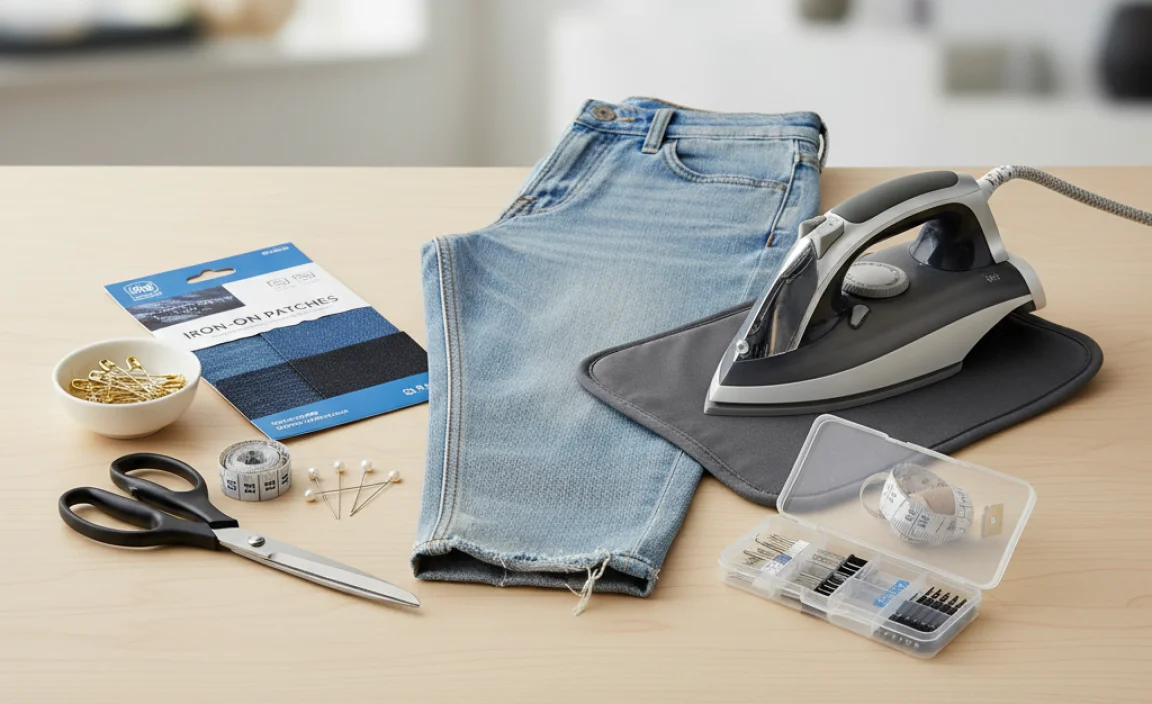
What You’ll Need: Your Hemming Toolkit

Gathering the right tools makes the process smooth and efficient. You probably have most of these items at home already. The key is preparation!
Essential Tools:
- Iron-On Hemming Patches: Your chosen fabric fusing tape.
- Iron: A standard household iron. Make sure it has a steam setting (though you’ll likely use it without steam for this).
- Ironing Board: A stable, heat-resistant surface to work on.
- Scissors: Sharp fabric scissors or sharp craft scissors to cut the tape.
- Measuring Tape or Ruler: To measure the desired hem length.
- Fabric Marker or Chalk: To mark your hemline.
- Flat Surface: A table or other flat area to lay out your jeans.
Optional (but helpful) Tools:
- Seam Ripper: If you’re shortening jeans with a factory-finished hem that you want to preserve, you might need this to carefully remove the original stitching.
- Old Towel or Pressing Cloth: To protect your iron and ironing board from adhesive residue and to ensure even heat distribution.
- Straight Pins: To hold fabric in place temporarily while you iron.
Step-by-Step: How to Hem Relaxed Jeans with Iron-On Patches

Follow these simple steps to get a perfectly hemmed pair of relaxed jeans. We’ll aim for a clean, folded hem here, but this method works for simply fusing the fabric directly as well.
Step 1: Prepare Your Jeans
Start with your jeans clean and dry. Wrinkles can interfere with an even application of the tape. Lay your jeans flat on a large, clean table or floor.
Step 2: Determine the Desired Length
Put on the jeans (or have someone help you) to see where you want the hem to fall. If you’re not wearing them, use a pair of perfectly fitting jeans as a guide. Decide how much you want to shorten them. It’s always better to err on the side of leaving them slightly too long, as you can always trim more if needed. A typical hem allowance is about 1 to 1.5 inches for a clean fold.
Step 3: Mark Your Hemline
Take the jeans off and lay them flat again. Measure up from the existing hem to your desired new hem length. Use your fabric marker or chalk to make a small mark on the inseam and outseam of one leg. Ensure the marks are level. Use your ruler to draw a straight line across the fabric where you want the bottom of your hem to be. Repeat this for the other leg, ensuring the length is identical. Consistency is key!
Pro Tip: When measuring, mark the folded hem position. If you plan to fold the jeans up twice (once for a small fold and again for the main hem), mark the final desired length. For example, if you want to fold up 1 inch and then another 0.5 inch, mark where the fabric will sit after the 1.5 inch fold.
Step 4: Prepare the Existing Hem (Optional, but Recommended for a Cleaner Look)
If your jeans have a substantial factory hem (the thick band at the bottom with double stitching), you might want to remove it for a super clean finish.
- Carefully use a seam ripper to undo the stitching of the original hem. Work slowly to avoid damaging the jean fabric.
- Once the stitching is removed, press the original hem flat with your iron. This removes any bulk and creates a smooth edge to work with. You’ll then proceed to create your new shorter hem.
If you’re skipping this or your jeans have a very simple hem, just proceed to creating your new fold.
Step 5: Create the New Hem Fold
Now, create your new hemline.
- At your marked hemline, fold the fabric upwards.
- If you removed the original hem, fold the raw edge up by about 0.5 to 1 inch to create a small, clean folded edge. Press this fold with your iron to set it.
- Then, fold the entire hem up again to your marked final desired length. You are essentially creating a new, narrower hem. Press this fold firmly with the iron to create a crisp crease.
- If you did not remove the original hem, you will be folding the extra length up and inwards, hiding the original hem inside. Fold the jeans up to your marked length and press the crease. This will create a slightly thicker hem but works well if you want to retain the original look.
Your jeans should now be the correct length, with the extra fabric folded up inside. You can secure this fold temporarily with pins if needed, but make sure they don’t interfere with ironing.
Step 6: Apply the Iron-On Hemming Tape
This is where the magic happens. Read the instructions on your specific hemming tape package, as application times and temperatures can vary. General guidelines are below:
- Cut a piece of hemming tape slightly longer than the circumference of the leg opening.
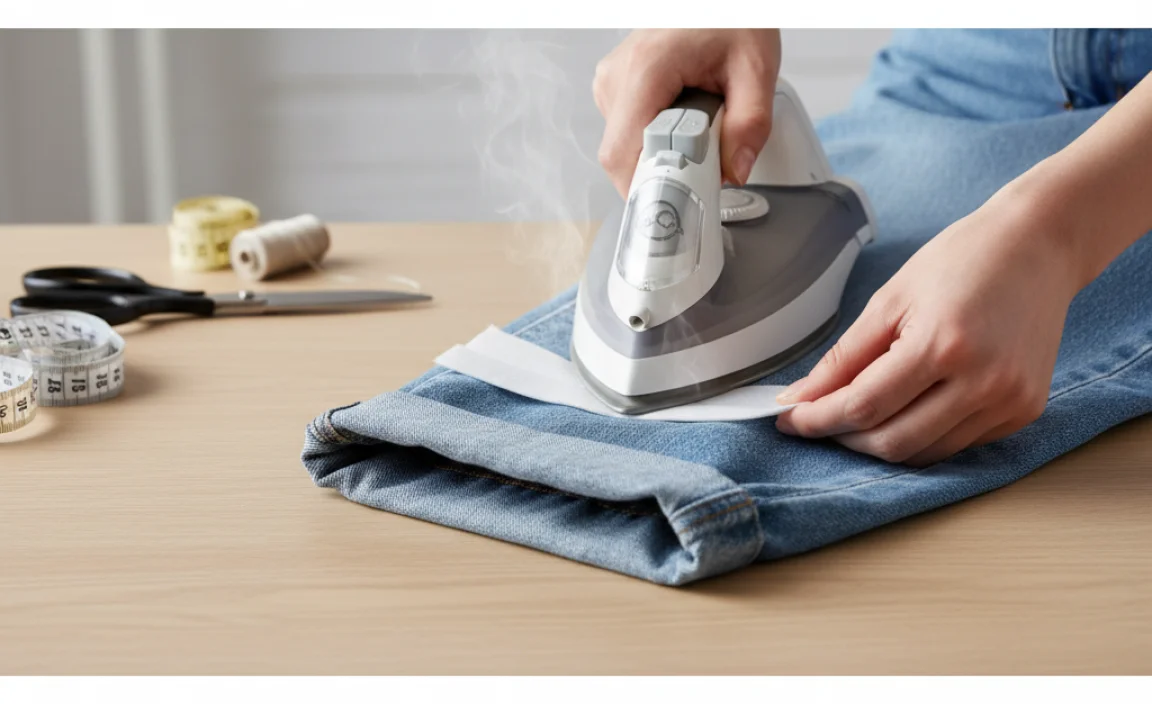
- Carefully place the hemming tape along the inside of the fold you just created. It typically adheres to one side of the fabric first. Position it so it bridges the raw edge (if it was folded up) and the main fabric of the leg, or simply along the inside of the fold to secure it.
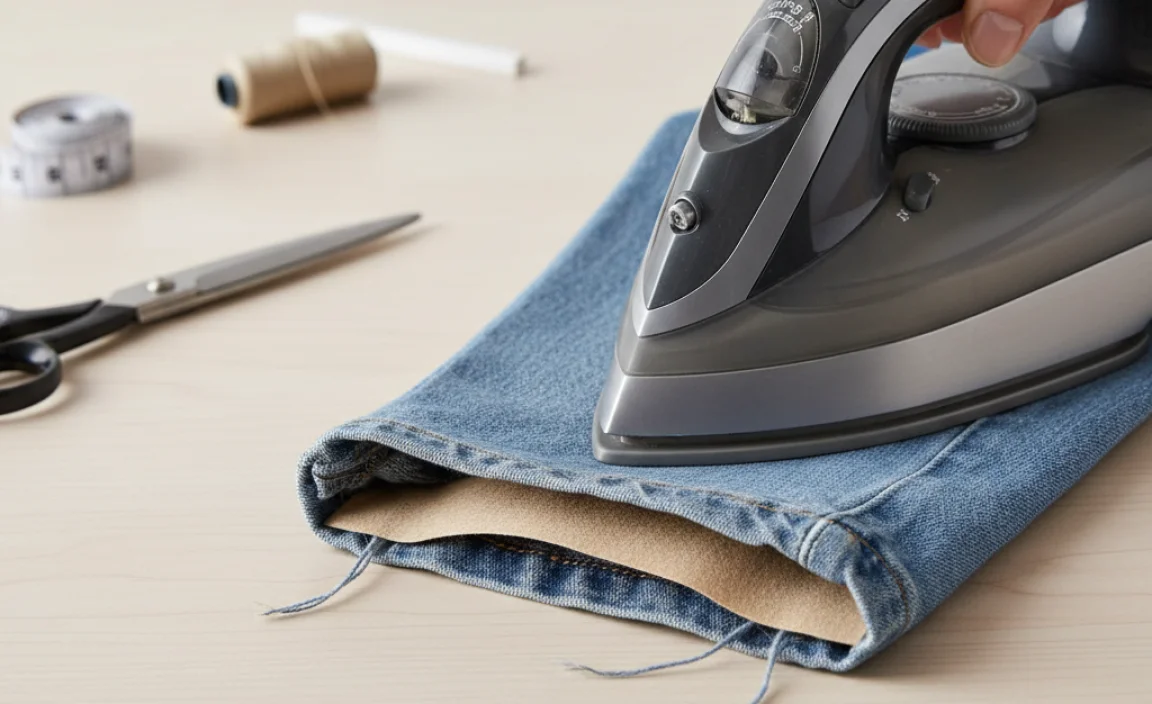
- Lay a pressing cloth or an old towel over the tape and the fabric. This protects your iron and ensures an even heat distribution.
- Set your iron to the temperature recommended by the patch manufacturer. This is usually a medium-high heat for cotton fabrics. Crucially, turn off the steam function. Steam can prevent the adhesive from bonding properly.
- Press the iron firmly onto the pressing cloth, holding it in place for the recommended duration (often 8-15 seconds). Do not glide the iron; use a pressing motion.
- Lift the iron and peel back the pressing cloth.
- Carefully check if the tape has bonded. If it looks secure, great! If not, replace the pressing cloth and press again for a few more seconds.
- Move to the next section of the hem and repeat until the entire circumference is secured.
Important Note on Material: For denim, typically a medium to high heat setting is required for permanent adhesion. However, always test on an inconspicuous area first if you are concerned about scorching or damaging your jeans. You can find general fabric care and ironing temperature guides from sources like https://www.t-fal.com/ (though this links to a manufacturer, their guides on fabric types are often informative for general ironing practices).
Step 7: Let it Cool and Inspect
Once the tape is applied all around the hem, let the fabric cool completely. Do not tug or stretch the hem while it’s still warm, as this can weaken the bond. Once cool, turn the jeans right side out.
Inspect your work. The hem should be secure, and the fold should be crisp. Gently tug on the hem to ensure it’s well-bonded. If any section feels loose, you can carefully re-apply heat with the pressing cloth as described in Step 6.
Achieving a Factory-Finished Look

For those who want their hem to look as if it came straight from the store, there’s an extra trick. This involves keeping the original hem and stitching.
Here’s how to achieve a factory-finished look with iron-on patches:
- Measure and Mark: As before, mark your desired new hem length.
- Fold Up Twice (Small Fold Inside):
- First, fold the fabric upwards to create a small inner hem, about 0.5 inches. This raw edge should be on the inside of the leg opening. Press this fold to set it.
- Then, fold the entire portion up again so that the original factory hemmed edge now sits evenly against the leg fabric, just below your marked final length. Press this second, larger fold firmly to create a crisp crease.
- Apply Iron-On Tape: Place your iron-on hemming tape on the inside of this fold, ensuring it adheres to both the leg fabric and your folded raw edge (from the first small fold). This essentially creates a reinforced, clean edge within the hem.
- Press and Cool: Apply heat according to the tape instructions, using a pressing cloth. Let cool completely.
- Optional: Replicate Stitching: To truly mimic a factory finish, you could use a sewing machine to add a decorative stitch or a functional double stitch on the outside of the hem, just above where the original hem was. This step is purely aesthetic and not required for the hem to be secure.
This method keeps the original exterior look of your jeans’ hem while shortening them cleanly from the inside.
Caring for Your Newly Hemmed Jeans
To ensure your iron-on hem lasts as long as possible, follow these care tips:
- Washing: Wash your jeans inside out in cold water on a gentle cycle. This protects the hem from excessive agitation.
- Drying: Air drying is best for preserving the adhesive. If you must use a dryer, use a low heat setting and remove them while slightly damp. High heat can degrade the adhesive over time.
- Avoid Harsh Chemicals: Do not use bleach or harsh stain removers directly on the hem area.
- Ironing: If you need to iron your jeans, iron them inside out. Avoid ironing directly over the hem area if possible, or use a pressing cloth if you must iron the outside.
Pros and Cons of Using Iron-On Patches for Hemming
Like any method, iron-on patches have their advantages and disadvantages. Understanding these can help you decide if it’s the right solution for you.
| Pros | Cons |
|---|---|
| Extremely fast and easy. | Can sometimes feel stiff if the wrong tape is used or if too much is applied. |
| No sewing skills or equipment needed. | Durability can vary depending on the quality of the tape and how well it’s applied. |
| Provides a clean, stitch-free exterior. | May not be suitable for very delicate or stretchy fabrics where precise tailoring is needed. |
| Cost-effective compared to professional alteration. | Reapplication might be necessary after many washes or years of wear. |
| Good for casual wear like denim. | Achieving a perfectly smooth, flat finish requires careful ironing and precise folding. |
| Great for quick fixes or temporary alterations. | Long-term wear and tear can eventually weaken the adhesive bond. |
Troubleshooting Common Issues
Even the simplest DIY projects can encounter a hiccup. Here are some common problems and their solutions when hemming jeans with iron-on patches:
- Hem Not Sticking:
- Cause: Insufficient heat, not enough pressing time, steam used, fabric covered in residue (fabric softener, sizing).
- Solution: Ensure your iron is hot enough (check manufacturer’s instructions and test on a scrap). Press firmly for the recommended time without moving the iron. Make sure the fabric is clean and dry. Turn off steam.
- Tape Creasing or Bunching:
- Cause: Ironing too quickly, not allowing tape to fully adhere before moving, applying tape to a very wrinkled surface.
- Solution: Press slowly and deliberately. Ensure each section is fully bonded before moving on. Start with press the fabric flat before applying the tape.
- Edge Lifting After Washing:
- Cause: Insufficient initial adhesion, repeated washing/drying on high heat, or simply normal wear and tear over time.
- Solution: Carefully apply heat again to the lifted section, using a pressing cloth. Ensure you’re following proper wash and dry care instructions (cold wash, low or no heat dry). You may need to reapply the tape if it’s significantly worn.
- Stiff Hem:
- Cause: Using a very thick or rigid hemming tape, or applying too much tape.
- Solution: Opt for thinner, more flexible hemming tapes if stiffness is a concern. Ensure you’re only using enough tape to secure the folded edge.
Always refer to the specific instructions provided with your chosen brand of iron-on hemming tape for the most accurate guidance.
Frequently Asked Questions About Hemming Jeans with Iron-On Patches
Q1: Can I hem my jeans without sewing using iron-on patches?
A1


