


Quick Summary: Effortlessly hem your relaxed jeans to a perfect fit with simple sewing machine techniques. This straightforward guide breaks down the process, ensuring a professional look without the fuss, even for beginners. Get ready to transform your jeans!
How To Hem Relaxed Jeans: Genius & Effortless
The perfect pair of relaxed jeans can be elusive, often a little too long. That frustrating drag on the floor or awkward bunching at your ankles can diminish even the best denim. But fear not! Hemming your own relaxed jeans is a surprisingly simple skill that can save you money and give you that custom fit you’ve been searching for. This guide will walk you through the process step-by-step, making it easy and achievable, even if you’ve rarely touched a sewing machine.
We’ll cover everything you need, from preparing your jeans to achieving a clean, finished hem that looks like it came straight from the tailor. Get ready to master this essential wardrobe fix and enjoy jeans that fit you perfectly, every time.
Why Hem Your Relaxed Jeans?

Relaxed fit jeans offer comfort and a laid-back style, but their looser cut can sometimes mean a less precise hemline. A hem that’s too long can:
- Look unkempt and sloppy.
- Cause premature wear and tear as the fabric frays and rips on the ground.
- Make your shoes look awkward or be hidden completely.
- Alter the intended drape and silhouette of the jeans.
Hemming them yourself ensures they sit perfectly on your shoes or at your desired length, enhancing the overall look and extending the life of your favorite denim. It’s a practical skill that pays dividends in style and wearability.
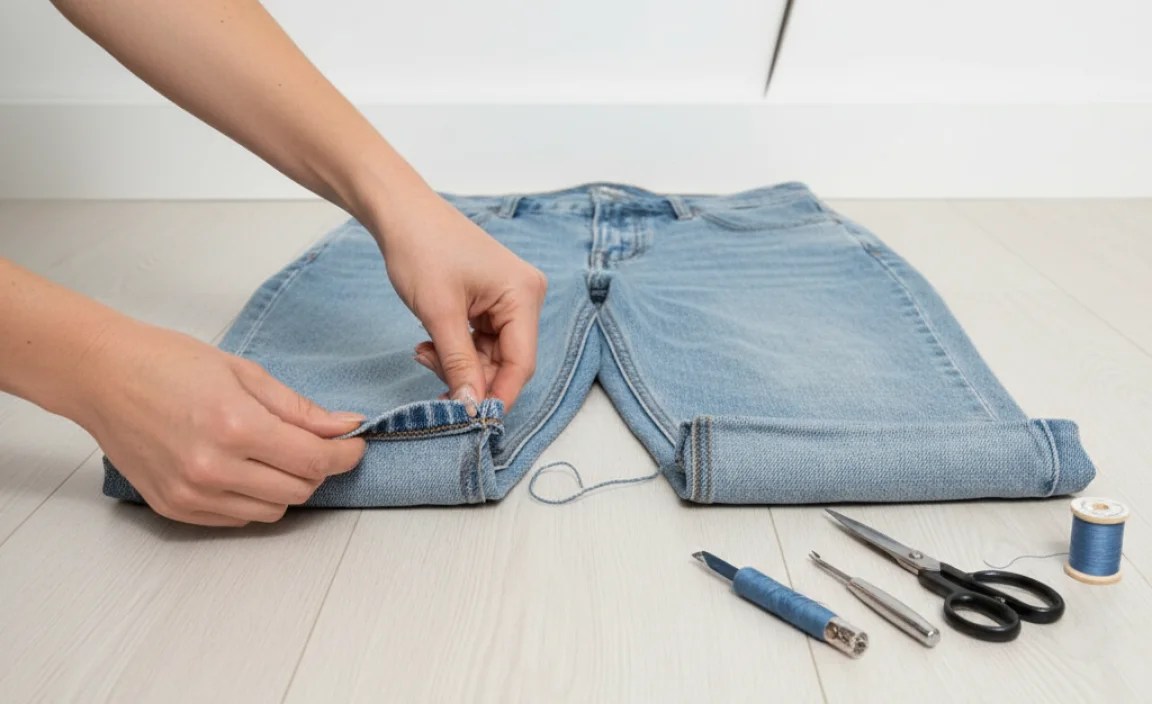
Gather Your Tools: What You’ll Need

Before you start, make sure you have these essential tools. Having everything ready will make the process smooth and efficient.
| Tool | Purpose | Notes |
|---|---|---|
| Sewing Machine | To stitch the hem. | A basic machine is perfectly fine for this task. Ensure it’s in good working order. |
| Matching Thread | To secure the hem. | Choose a thread color that closely matches your jeans. Often, a slightly contrasting thread can also create a stylish detail if done intentionally. |
| Fabric Scissors | To trim excess fabric. | Sharp scissors are crucial for a clean cut. |
| Measuring Tape or Ruler | To measure the desired hem length. | A flexible measuring tape is best for curves. |
| Fabric Chalk or Disappearing Ink Pen | To mark the hemline. | These mark the fabric without leaving permanent lines. |
| Straight Pins | To hold the fabric in place. | Use plenty to ensure a secure hold as you sew. |
| Iron and Ironing Board | To press the hem and create a crisp line. | Crucial for accurate measuring and a neat finish. |
| Seam Ripper (Optional) | To remove the original hem if you want to preserve the original look. | Only needed if you plan to reattach the original hem. |
Step-by-Step: How to Hem Relaxed Jeans

Let’s get started on achieving that perfect hem. This method focuses on a clean, double-fold hem, which is durable and looks professional.
Step 1: Prepare Your Jeans
First, wash and dry your jeans. This is important because denim can shrink. Hemming pre-shrunk jeans ensures that your new hem will hold its length. Skipping this step can lead to jeans that are suddenly too short after their first post-hemming wash!
Lay your jeans flat on a clean, hard surface. Smooth out any wrinkles.
Step 2: Determine Your Desired Length
Put on the shoes you typically wear with your relaxed jeans. This is crucial for achieving the right length because different shoe heights will affect where the hem should fall. For relaxed fit jeans, you might want them to just brush the top of your shoe or have a slight break (a gentle crease) in the front.
Carefully fold the excess fabric up on the inside of one leg until the jeans reach your desired length. Use a few pins to hold it in place. Check the length from the front and the back to ensure it looks right.
Tip: For a relaxed fit, aim for the hem to fall just above the sole of your shoe. If you prefer a more casual, slightly scuffed look, let them be a touch longer.
Step 3: Mark the Hemline
With the jeans still pinned at the desired length on one leg, take them off. Lay them flat again, ensuring the fabric is smooth.
Using your measuring tape or ruler, measure from the pinned hemline downwards to the original hem. Mark this distance on the inside of the leg. This measurement will be the amount of fabric you’ll fold up.
Now, use your fabric chalk or disappearing ink pen to draw a straight line across the inside of the leg, parallel to the original hem, at your measured distance. This is your cut line. For a neat double-fold hem, you’ll typically fold up twice. A common good starting point is to plan for a 1-inch fold (meaning you’ll fold up 1 inch, then another folded inch). So, if you want to remove 2 inches of length, your cut line will be 2 inches up from the original hem. You can also measure this from the bottom of the leg upwards. The key is consistency.
Important Note on Original Hems: Some people prefer to keep the original, slightly distressed hem of their jeans for an authentic look. If this is your goal, you’ll need to carefully remove the original stitching with a seam ripper, then reattach those original cuffs to the newly shortened jeans. This process is more advanced and requires careful attention. For beginners, simply hemming the raw edge is the most straightforward approach.
Step 4: Cut the Excess Fabric
Carefully cut along the chalk line you marked. Make sure to cut through only one layer of fabric for each leg. It’s often easier to cut with the leg lying flat, but be mindful of not accidentally cutting through the other side of the pant leg.
Pro Tip: If you’re nervous about cutting, you can fold the hem up and baste (loosely stitch) it in place, then try the jeans on again to double-check the length before cutting.
Step 5: Create the First Fold
Now, take the raw edge of the fabric you just cut and fold it upwards towards the inside of the jeans, aiming for the marked chalk line. If you planned for a double-fold hem (e.g., 1 inch then another 1 inch), this first fold creates that initial 1-inch hem allowance. Press this fold firmly with your iron to create a crisp crease. This sets the foundation for your hem.
Pin this fold securely in place all the way around the leg. Make sure the raw edge is completely enclosed within this fold.
Step 6: Create the Second Fold (The Double Fold)
You now have a single fold with a raw edge tucked inside. To create a professional and durable double-fold hem, you’ll fold this up again. Fold the already-folded edge up one more time, ensuring you are folding along the original chalk line (or making your second fold so that the new bottom edge is at your desired finished hem length). For a clean look, this second fold should ideally be the same width as your first fold (e.g., 1 inch).
Press this second fold very firmly with the iron. This second fold hides the raw edge entirely, giving you a clean finish that won’t fray. Pin this second fold in place all the way around the leg.
Table: Hem Allowance Examples for Double Fold
| Desired Finished Hem Length | First Fold Width | Second Fold Width | Total Amount to Remove from Original Length | Cut Line Location |
|---|---|---|---|---|
| 1 inch | 1 inch | 1 inch | 2 inches | 2 inches from original hem |
| 1.5 inches | 1 inch | 0.5 inches | 1.5 inches | 1.5 inches from original hem |
| 0.75 inches | 0.75 inches | 0.75 inches | 1.5 inches | 1.5 inches from original hem |
Note: The ‘Total Amount to Remove’ is the sum of your first and second fold widths. Your ‘Cut Line Location’ is the distance from the original hem where you will cut.
Step 7: Sew the Hem
Now it’s time to sew. Thread your sewing machine with the matching thread. Set your stitch length to a medium setting, around 2.5. You want the stitches to be strong but not so large that they look out of place.
Carefully guide the pinned hem under the presser foot of your sewing machine. Start sewing at the inseam (the inner leg seam) or the outseam (outer leg seam), as this is usually a thicker area. Backstitch for a few stitches to secure the beginning of your seam.
Sew all the way around the leg, following the edge of your folded hem. Try to maintain a consistent distance from the folded edge. Go slowly, especially when you approach the thick seams of the jeans, and use your machine’s handwheel for control if needed.
When you reach your starting point, backstitch again for a few stitches to secure the end of your seam. Backstitching both at the beginning and end makes the hem much more durable.
Remove the pins as you go. If you have extra thread tails, trim them neatly.
Step 8: Finishing Touches
Once you’ve sewn both legs, try on your perfectly hemmed jeans! Admire your work. If everything looks good, you’re done.
For an extra professional finish, you can press the hem again with your iron. This will sharpen the crease and make the hem lay perfectly flat. If you want to mimic the original look of a jean hem, especially the topstitching that is often visible from the right side of the garment, you can carefully topstitch along the original seam line on the outside of the jeans. However, for a clean, modern look, simply sewing along the inside edge of your double fold is sufficient.
Alternative Hemming Methods for Relaxed Jeans

While the double-fold hem is a classic and highly recommended method, there are a couple of other options to consider, especially if you’re aiming for a specific aesthetic.
1. The Original Hem Preserve Method
This method is for those who love the worn-in look of their jeans’ original hem. It’s more time-consuming but yields an authentic finish.
- Measure and Cut: Determine your desired length and mark a cutting line about 1.5 to 2 inches above the original hem. Cut off the excess fabric.
- Remove Original Hem: Using a seam ripper, carefully unpick the stitching that holds the original hem to the jeans. Be patient; this can be tedious. Gently detach the original hem band.
- Press Original Hem: Press the original hem band flat so it’s ready to be reattached.
- Prepare Jean Leg: On the newly cut edge of the jean leg, create a narrow single fold (about 0.5 inches) and press it. This neatly encloses the raw edge.
- Reattach Original Hem: Pin the original hem band back onto the prepared jean leg, aligning the top edge of the original hem band with the folded edge of the jean leg.
- Sew: Machine stitch the original hem band back onto the jeans, following the original stitch line as closely as possible.
This method requires precision but maintains the original character of your jeans. For more on preserving original jeans finishes, resources from textile conservation sites can offer insights into fabric handling.
2. No-Sew Hem Tape
For a quick, temporary fix or if you’re not comfortable with sewing at all, hemming tape is an option. This is a fusible adhesive tape.
- Measure and Fold: Fold your jeans to the desired length, creating a double fold as you would for sewing.
- Insert Tape: Cut a piece of fusible hemming tape to size. Place one strip inside the folded hem, against the fabric.
- Iron: Following the hemming tape manufacturer’s instructions, use a hot iron to fuse the tape, permanently bonding the layers of fabric.
Pros: Extremely fast, requires no sewing machine skills.
Cons: Not as durable as sewing, can sometimes come unstuck with washing and heavy wear, may not lie as flat as a sewn hem, and can create a slightly stiffer hemline.
Troubleshooting Common Hemming Issues
Even with careful work, you might encounter small bumps in the road. Here’s how to handle them:
- Uneven Hem: If your hem turned out a little wobbly, don’t despair. You can often trim the excess fabric carefully with scissors to even it out. Pressing the hem firmly with an iron can also help disguise slight unevenness. For significant issues, you might need to unpick the stitching and re-fold and re-press.
- Skipped Stitches: This usually happens if your sewing machine needle is dull, the wrong type for denim, or if the thread tension is off. Try changing your needle to a new denim needle (size 90/14 or 100/16 is usually good) and re-thread your machine. Adjusting thread tension might be necessary – refer to your sewing machine manual.
- Fabric Puckering: This can occur if you’re pulling the fabric too hard as you sew, or if your stitch length is too short. Sew more gently, allowing the feed dogs on your machine to guide the fabric, and try a slightly longer stitch length.
- Wider Seams are Hard to Navigate: Jeans have thick seams at the sides and inseam. To make sewing over these easier, you can use a “hump jumper” or “hemming aid” – a small, stepped piece of plastic or fabric that helps your presser foot move smoothly over the thick part of the seam. Alternatively, carefully lower your presser foot after the needle is in the fabric on the other side of the seam.
Frequently Asked Questions (FAQ)
Q1: Can I hem jeans without a sewing machine?
Yes, you can. The most common no-sew method uses fusible hemming tape and an iron, which is relatively durable for casual wear. Hand-sewing is also an option, though it takes more time and effort to achieve a strong, even stitch.
Q2: What kind of needle should I use for hemming jeans?
For sewing machines, a “Denim” or “Jeans” needle is highly recommended. These needles are specifically designed to penetrate thick fabrics like denim. A size 90/14 or 100/16 is typically appropriate.
Q3: Should I hem my jeans before or after washing?
Always wash and dry your jeans before hemming. Denim can shrink, especially in length. Hemming them after they’ve gone through the wash and dry cycle ensures your finished hem will maintain its intended length.
Q4: How much length should I take off my relaxed jeans?
This depends on your personal preference and the shoes you wear. For relaxed fit jeans, you typically want them to fall just above the sole of your shoe, sometimes with a slight “break” (a small crease) in the front. Trying them on with your shoes and marking the length is the best approach.
Q5: How wide should the hem allowance be for relaxed fit jeans?
A double-fold hem is best. A common and effective width is a first fold of 1 inch and a second fold of another 1 inch, meaning you’ll cut off 2 inches from the original length. This creates a sturdy, clean hem that mimics the look of a professionally done hem. You can adjust this to 1.5 inches for a slightly narrower hem.
Q6: What if I want to keep the original hem of my jeans?
This requires more advanced technique. You’ll carefully remove the original hem stitching with a seam ripper, measure and cut the excess fabric higher up the leg, then re-attach the original detached hem band to the new, shorter length using a sewing machine


