


Quick Summary: Learn how to hem your straight jeans yourself for a perfect, custom fit. This guide breaks down the simple steps, required tools, and essential tips to achieve a professional-looking finish at home, ensuring your jeans always look their best.
How to Hem Straight Jeans: Your Essential Guide
Ever bought a pair of perfectly fitting jeans, only to realize the length is just a little bit off? It’s a common frustration. Too long, and they bunch at the ankle or make you trip. Too short, and they can look awkward. But fear not! You don’t need to be a master tailor to fix this. With a few simple tools and this step-by-step guide, you can easily hem your straight jeans to the ideal length, giving them a clean, polished look that feels made just for you. Let’s get them fitting perfectly!
Why Hemming Your Straight Jeans Matters

Straight jeans are a timeless wardrobe staple. Their versatile cut works with almost any shoe or occasion. However, getting the length just right is crucial for them to look their best. An incorrect hem can throw off the entire silhouette of the jeans, making them appear boxy or ill-fitting. Hemming them yourself means you have complete control over the final look. You can achieve a precise length that complements your favorite footwear, whether it’s sneakers, heels, or boots. It’s a small alteration that makes a huge difference in how your jeans look and feel.
Essential Tools You’ll Need
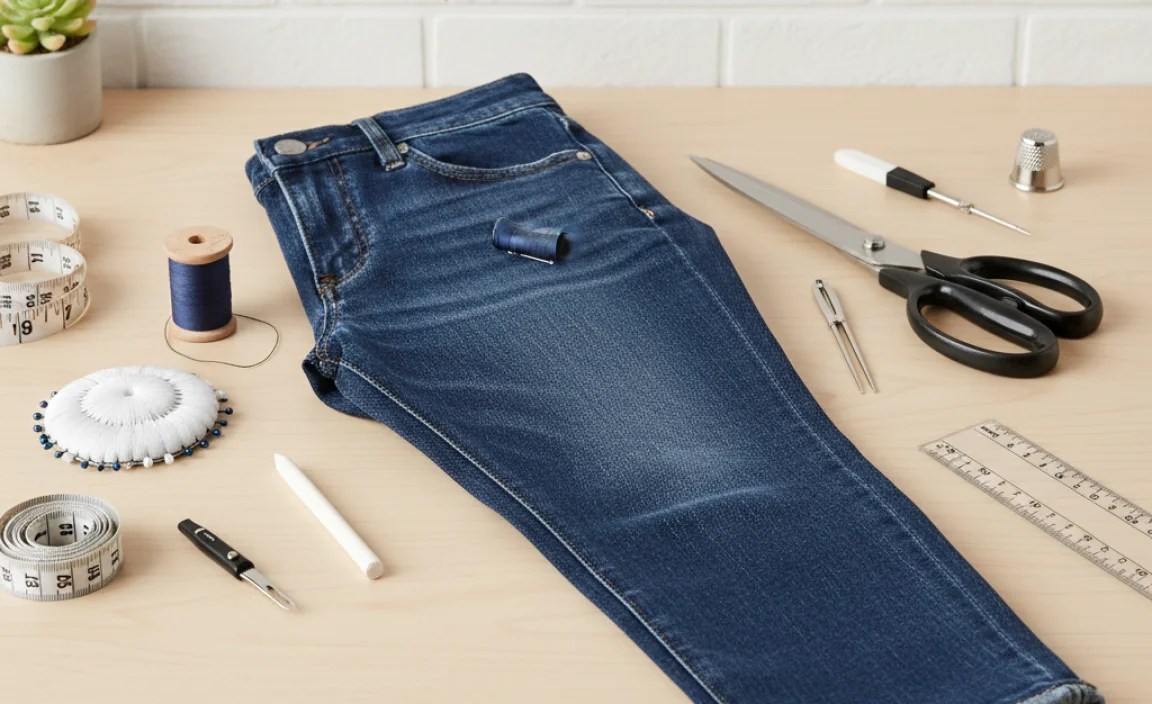
Before we start cutting, let’s gather everything you’ll need. Having all your supplies ready will make the hemming process smooth and efficient. Don’t worry if you don’t have everything; many of these items are readily available at craft or fabric stores.
- Fabric Scissors: Sharp scissors designed for cutting fabric are essential for a clean edge. Regular scissors can fray or snag the denim.
- Measuring Tape or Ruler: A flexible measuring tape or a sturdy ruler is needed to accurately measure the desired length.
- Fabric Chalk or Disappearing Ink Pen: This allows you to mark your cut line directly onto the denim without leaving a permanent mark.
- Straight Pins: To hold the folded hem in place while you prepare to sew.
- Sewing Machine (Recommended): While you can hand-sew, a sewing machine will give you a more durable and professional-looking stitch.
- Thread: Choose a strong thread that matches your jeans as closely as possible. For a more visible “original” hem look, you might opt for a slightly contrasting thread, just like jeans often have.
- Iron and Ironing Board: Essential for pressing your hem neatly and creating crisp folds.
- Seam Ripper (Optional): If you want to preserve the original hem for a more authentic look, a seam ripper can help you detach it carefully.
- A Friend (Optional, but helpful): Sometimes, having someone help you measure while you’re wearing the jeans makes things easier.
Step-by-Step Guide to Hemming Straight Jeans

Let’s get started! Follow these steps closely for a flawless hem:
Step 1: Try On Your Jeans and Determine the New Length
This is the most important step. Wear the shoes you plan to wear most often with these jeans. Stand in front of a mirror and assess the current length. Do they drag on the floor? Do they hit at an awkward spot on your footwear? Use your fabric chalk or pen to mark where you want the hem to fall. For a classic look, the hem should typically hit right at the top of your shoes or slightly above. If you want a very clean, no-break look, aim for the hem to end just above the shoe’s laces or the top of the shoe itself. If you prefer a slight break, let the denim fall naturally onto the top of your shoe.
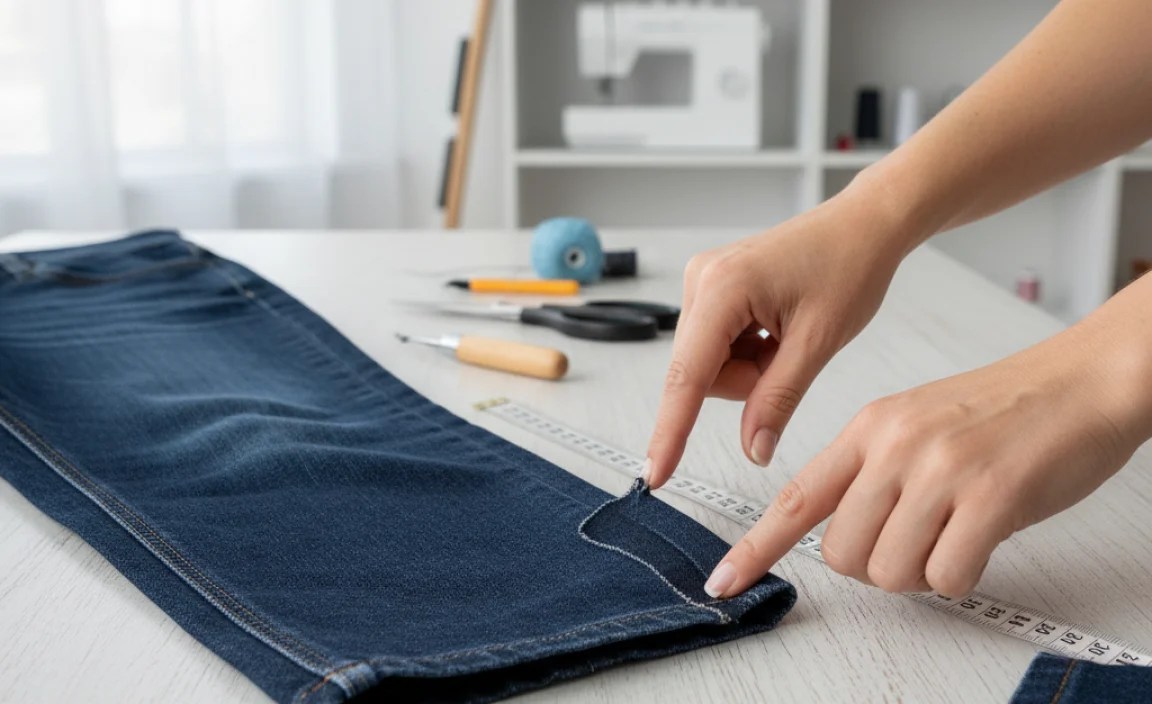
Step 2: Measure and Mark Your Cut Line
Take off the jeans and lay them flat on a clean surface. You’ll need to account for the hem allowance. A standard hem allowance for denim is typically 1 to 1.5 inches. This is the amount of fabric you’ll fold up. If you marked at the desired final length, now measure down from that mark by your chosen hem allowance and draw a straight line across. Ensure this line is parallel to the original hem. Repeat for the other leg, being careful to make both legs the exact same length. You can use your measuring tape and chalk to ensure accuracy.
Important Note on Even Legs: Always measure from the crotch seam down to your marked hem line on each leg. This is more accurate than measuring from the waistband, as waistbands can sometimes be cut slightly unevenly.
| Hem Type | Recommended Hem Allowance | Best For |
|---|---|---|
| Clean, No-Break Hem | 1 – 1.25 inches | Crisp look, perfect with sneakers or boots. |
| Slight Break Hem | 1.25 – 1.5 inches | Classic look, allows denim to softly rest on shoes. |
| Double Cuffed or Rolled Hem | 2 – 3 inches (for each fold) | Casual, stylish look, can hide a slightly too-short length. |
Step 3: Cut Off the Excess Fabric
Using your sharp fabric scissors, carefully cut along the marked line on each leg. Take your time to ensure a straight, even cut. This is why having good fabric scissors is so important – a clean cut makes for a much neater final hem.
Step 4: Prepare the Fold
Now, you’ll create the fold for your hem. There are a couple of ways to do this, depending on the look you want:
- Simple Hem: Fold the raw edge of the fabric up by your chosen hem allowance (e.g., 1 inch). Press it down firmly with your iron. Then, fold it up again by another 1/2 inch to create a double-fold hem. This encloses the raw edge, preventing fraying and giving a clean finish. Press this second fold again, ensuring it’s crisp.
- Original Hem Look: If you want to maintain the original, worn hem, you’ll need to carefully remove it using a seam ripper. Once removed, you can reattach this original hem to the newly cut leg. This is a trickier method but results in a look that’s indistinguishable from the factory hem. You’d measure and cut, leaving enough fabric to re-sew the original hem back on.
For beginners, the simple double-fold hem is more straightforward and yields excellent results. Ensure your folds are even and pressed firmly.
Step 5: Pin the Hem in Place
Once you’ve pressed your double fold, use straight pins to secure the hem. Insert the pins perpendicular to the folded edge, placing them about every 2-3 inches. This will hold the fabric neatly in place while you sew, preventing it from shifting.
Step 6: Sew the Hem
This is where your sewing machine or needle and thread come in. You have a few options for sewing:
- Using a Sewing Machine:
- Thread your machine with a strong thread that matches your jeans.
- Set your machine to a straight stitch. A medium stitch length is usually best for denim.
- Sew as close to the inner folded edge as possible. This will create a neat, single line of stitching.
- Begin sewing from an inseam (the seam inside the leg) if possible, as this is where the seam is less visible and you can easily hide the start and end of your stitch.
- Go slowly, especially over the thicker seams of the jeans. Backstitch at the beginning and end of your seam to secure it.
- Hand Sewing:
- Use a strong needle and thread.
- A “hem stitch” or “blind stitch” is ideal for a nearly invisible finish. This involves catching just a few threads of the denim fabric on one side and then passing the needle through the folded hem on the other side.
- Alternatively, a simple “running stitch” can be used, but it will be more visible from the outside.
- Ensure your stitches are small and consistent.
- Backstitch at the beginning and end to secure.
For a truly authentic look resembling factory jeans, consider using a twin needle if your sewing machine has one. This creates two parallel lines of straight stitching on top and a zigzag on the underside, mimicking the original construction. You can learn more about twin needle sewing from resources like Singer’s Official Website.
Step 7: Finish and Press
Once you’ve sewn the hem, remove the pins. Trim any loose threads. Give the hem a final press with your iron. For a really professional finish, press from the inside of the jean leg. This final pressing ensures the hem lies flat and looks crisp.
Alternative Hemming Techniques for Straight Jeans

While the double-fold hem is fantastic, other methods can give your jeans a unique flair or cater to specific needs.
Preserving the Original Hem
Many jeans have a distinctive “chain stitch” hem created with a special machine. If want to keep this look:
- Step 1: Measure and Mark. Follow steps 1 and 2 above, but leave extra fabric – about 1 to 1.5 inches beyond the original hem.
- Step 2: Carefully Remove the Original Hem. Use a seam ripper to detach the original hem from the leg. Be patient, as this can be tricky.
- Step 3: Cut the Excess. Cut the leg to your desired final length, remembering to leave enough fabric to reattach the original hem.
- Step 4: Reattach the Original Hem. Align the original hem with the new, cut edge of the jean leg. Pin securely.
- Step 5: Sew. Use your sewing machine (ideally with a regular needle, not a ballpoint) to sew the original hem back onto the leg. Sew as close to the original stitching line as possible. Some people use a slightly thicker thread to mimic the original look.
No-Sew Hemming Options
For a quick fix or if you don’t have sewing equipment:
- Fabric Glue: Use a flexible fabric glue specifically designed for garments. Fold your hem as you would for sewing, apply a thin, even line of glue along the inner fold, and press firmly. Allow it to dry completely according to the product instructions. This is great for a temporary fix or for lightweight denim.
- Hem Tape (Iron-On): This is a fusible web tape. You’ll fold your hem, insert the tape between the layers of fabric, and use a hot iron to fuse the layers together. Ensure you use a pressing cloth to protect your iron and jeans. This is a sturdy no-sew option.
For more durable results, especially with thick denim, sewing is always recommended. Resources like The Spruce Crafts offer detailed guides on these no-sew methods.
Troubleshooting Common Hemming Issues
Even with the best intentions, you might run into a few snags. Here’s how to fix them:
Issue: Uneven Hemline
- Cause: Difficult to measure accurately, or hem folded unevenly.
- Solution: If you’ve already sewn it, you might need to unpick the stitches and re-do it. If it’s just slightly off, you can sometimes “cheat” by slightly adjusting your stitching line to even it out. For future hemming, use a large, flat surface and double-check your measurements.
Issue: Fabric Fraying Excessively
- Cause: Not enough hem allowance, or raw edge left exposed.
- Solution: A double-fold hem (folding twice) effectively encloses the raw edge and prevents fraying. If you’ve only done a single fold, consider unpicking and creating a double fold. For extreme fraying, you can use a fabric sealant on the raw edge before folding.
Issue: Stitches are too visible or look messy.
- Cause: Thread color mismatch, stitch length too long/short, or incorrect needle.
- Solution: Match your thread as closely as possible to the jeans. Experiment with stitch length on a scrap piece of denim. Ensure you’re using the right needle for denim (a universal or denim needle). For a cleaner look, try hand-sewing with a blind stitch.
Issue: Jeans are now too short!
- Cause: Cut too much fabric off.
- Solution: This is unfortunate but fixable. You can carefully unpick your hem and add a cuff to the bottom. You can buy pre-made denim cuffs, or cut a strip of matching denim (or a contrasting fabric) and sew it to the bottom edge before hemming that new, longer section.
Frequently Asked Questions About Hemming Jeans
Q1: How much fabric should I leave for hemming jeans?
A: A good rule of thumb is to leave 1 to 1.5 inches of fabric for your hem allowance. This provides enough material for a clean double fold, which encloses the raw edge and prevents fraying.
Q2: Can I hem jeans without a sewing machine?
A: Yes! You can hand-sew the hem using a strong needle and thread, or use no-sew methods like fabric glue or iron-on hem tape. Hand-sewing with a blind stitch can look very professional.
Q3: What kind of needle and thread should I use for denim?
A: For sewing machines, use a denim needle (size 90/14 or 100/16) and strong polyester thread. For hand sewing, a denim needle and strong all-purpose thread work well. Matching thread color is best for a subtle look, or choose a slightly contrasting color for a more vintage appearance.
Q4: How do I make sure both legs are the same length?
A: Lay the jeans flat and measure from the crotch seam down to your desired hemline on each leg. Alternatively, wear the jeans with your shoes and have a friend mark the length on both legs evenly.
Q5: My jeans are stretched out after hemming. What went wrong?
A: This can happen if you pulled too hard on the fabric while sewing or ironing. Always work with the jeans lying flat and avoid stretching the fabric as you press or sew. Some denims are also prone to stretching after washing.
Q6: How do I get a professional-looking hem on dark wash jeans?
A: For dark wash jeans, use dark-colored thread that closely matches the denim. Ensure your folds are perfectly straight and pressed crisp using a hot iron. Sewing as close to the inner folded edge as possible creates a clean stitch line. Consider a blind stitch for a nearly invisible finish.
Conclusion
Hemming straight jeans is a straightforward and incredibly rewarding DIY project. You’ve learned how to take accurate measurements, cut your denim cleanly, create neat folds, and secure the hem with stitching. Whether you opt for a crisp, modern finish or aim to replicate the original factory look, the power to customize your jeans is now in your hands. With a little practice, you can achieve professional results that elevate your entire wardrobe. So, don’t let slightly too-long jeans gather dust. Grab your supplies, follow these steps, and enjoy perfectly fitting jeans every time!
.lwrp.link-whisper-related-posts{
margin-top: 40px;
margin-bottom: 30px;
}
.lwrp .lwrp-title{
}.lwrp .lwrp-description{
}
.lwrp .lwrp-list-container{
}
.lwrp .lwrp-list-multi-container{
display: flex;
}
.lwrp .lwrp-list-double{
width: 48%;
}
.lwrp .lwrp-list-triple{
width: 32%;
}
.lwrp .lwrp-list-row-container{
display: flex;
justify-content: space-between;
}
.lwrp .lwrp-list-row-container .lwrp-list-item{
width: calc(25% – 20px);
}
.lwrp .lwrp-list-item:not(.lwrp-no-posts-message-item){
max-width: 150px;
}
.lwrp .lwrp-list-item img{
max-width: 100%;
height: auto;
object-fit: cover;
aspect-ratio: 1 / 1;
}
.lwrp .lwrp-list-item.lwrp-empty-list-item{
background: initial !important;
}
.lwrp .lwrp-list-item .lwrp-list-link .lwrp-list-link-title-text,
.lwrp .lwrp-list-item .lwrp-list-no-posts-message{
}@media screen and (max-width: 480px) {
.lwrp.link-whisper-related-posts{
}
.lwrp .lwrp-title{
}.lwrp .lwrp-description{
}
.lwrp .lwrp-list-multi-container{
flex-direction: column;
}
.lwrp .lwrp-list-multi-container ul.lwrp-list{
margin-top: 0px;
margin-bottom: 0px;
padding-top: 0px;
padding-bottom: 0px;
}
.lwrp .lwrp-list-double,
.lwrp .lwrp-list-triple{
width: 100%;
}
.lwrp .lwrp-list-row-container{
justify-content: initial;
flex-direction: column;
}
.lwrp .lwrp-list-row-container .lwrp-list-item{
width: 100%;
}
.lwrp .lwrp-list-item:not(.lwrp-no-posts-message-item){
max-width: initial;
}
.lwrp .lwrp-list-item .lwrp-list-link .lwrp-list-link-title-text,
.lwrp .lwrp-list-item .lwrp-list-no-posts-message{
};
}


