


Quick Summary: Learn how to hem tapered jeans easily with this beginner-friendly guide. Achieve a perfect, custom fit yourself using simple tools and techniques, saving money and looking great.
How to Hem Tapered Jeans: Genius Beginner Guide
Tapered jeans are a stylish choice, but they can be tricky to get just right. That dreaded ‘pooling’ at your ankles? We’ve all been there. It can make even the coolest pair look a little sloppy. But before you head to the tailor or consider giving up on that perfect fit, know this: hemming tapered jeans is totally doable, even for beginners. With a few simple steps and the right approach, you can achieve a clean, professional look you’ll be proud of. Let’s get those jeans fitting like they were made for you.
Why Hemming Tapered Jeans Matters

The silhouette of tapered jeans is what makes them so popular. They narrow from the knee down to the ankle, creating a modern, streamlined look. When the hem is too long, this taper can be lost, leading to excess fabric bunching around your shoes. This not only looks less polished but can also make your legs appear shorter. Getting the hem length right is crucial for showcasing the intended style of tapered denim. It’s about enhancing the natural shape and ensuring your jeans complement your footwear, rather than competing with it.
Understanding the Taper
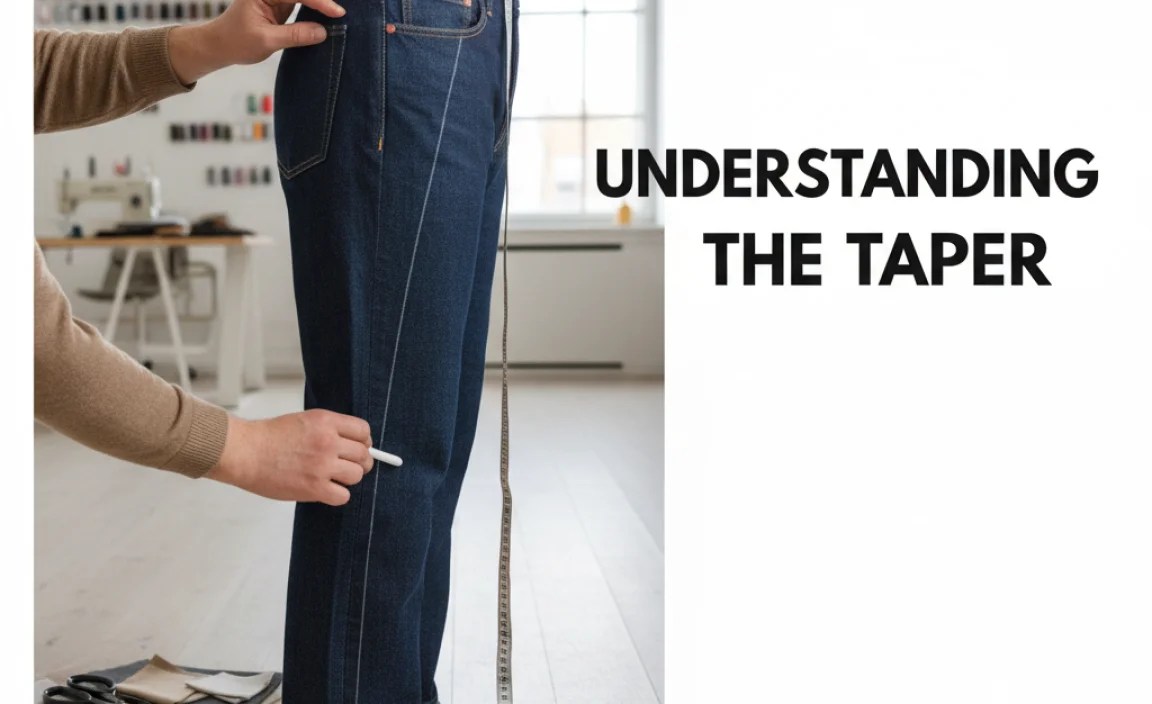
Unlike straight-leg or bootcut jeans, tapered jeans have a specific shape that needs consideration when hemming. The leg opening gets progressively narrower. This means you can’t just cut off a uniform amount from the bottom of the entire leg and expect it to look right. You need to maintain that engineered taper. The goal is to remove length without altering the way the jeans curve towards your ankle. This guide will show you how to do just that, preserving the intended style while achieving a perfect length.
Tools You’ll Need

You don’t need a fancy sewing machine or advanced skills to hem your tapered jeans. Here’s a straightforward list of what you’ll need to get started:
- Fabric Scissors: Sharp scissors are key for a clean cut. Don’t use dull scissors, as they can fray the denim.
- Measuring Tape or Ruler: For precise measurements. A flexible tailor’s tape measure is ideal, but a stiff ruler works too.
- Fabric Marker or Chalk: To mark your cut line. Test it on an inconspicuous spot first to ensure it won’t stain your jeans.
- Pins: To hold the fabric in place while you mark and sew.
- Sewing Needle: A strong, sharp needle is best for denim.
- Thread: Choose a thread that matches the color of your jeans’ existing stitching as closely as possible for an invisible finish, or opt for a contrasting color for a visible, stylistic detail.
- Iron and Ironing Board: To press seams and create a crisp hem.
- Optional: Seam Ripper: If you want to preserve the original hem for a more authentic look.
- Optional: Sewing Machine: If you have one and are comfortable using it, it can speed up the process and create a more durable seam.
Step-by-Step: How to Hem Tapered Jeans

Follow these easy steps to get your tapered jeans fitting perfectly. We’ll break it down so you can feel confident at each stage.
Step 1: Try On Your Jeans
Put on the jeans you want to hem and the shoes you plan to wear with them most often. This is crucial for an accurate measurement. Stand in front of a mirror.
Step 2: Determine Your Desired Length
Observe where the excess fabric is pooling around your ankles. Decide how much shorter you want the jeans to be. You can:
- Pinch and Pin: Gently pinch the denim at the hem of each leg, from the outside and inside, to find the point where you want the new hem to sit. Pin the excess fabric in place.
- Mark with a Ruler: Use your ruler to measure from the bottom of the hem up to where you want the new hem to be. Mark this point on the side seam.
Ensure the length is consistent on both legs. You might want to measure from the inseam up to your desired point as well, for extra accuracy.
Step 3: Mark Your Cut Line
Once pinned or measured, carefully take off the jeans. Lay them flat on a clean surface. Use your fabric marker or chalk to draw a line along the pinned edge or the measurement mark. This line should be parallel to the original hem. Add a seam allowance. A good rule of thumb for denim is to add about 1 to 1.5 inches (2.5 to 3.8 cm) below your marked cut line. This extra fabric will be used to create the new hem. Measure this allowance carefully and mark it all the way around each leg.
Step 4: Cut the Excess Fabric
Using your sharp fabric scissors, carefully cut along the marked line for your seam allowance. Try to make the cut as straight as possible. Do this for both legs. Ensure you are cutting only the excess fabric and not into your intended hem length.
Step 5: Prepare the New Hem
Take the raw edge of the fabric you just cut and fold it upwards towards the inside of the jean leg, aligning it with the original bottom hem or your desired finished hemline. Press this fold firmly with an iron to create a crisp crease. This forms the first turn of your hem. Fold it again, another 1/2 inch (about 1.3 cm) to 1 inch (2.5 cm), tucking the raw edge underneath this second fold. This creates a double-folded hem, which is neat and prevents fraying. Press this second fold firmly with the iron. Pin the hem in place.
Step 6: Sew the Hem
Now it’s time to stitch the hem. You have a few options:
Option A: Hand Sewing (Beginner-Friendly, Subtle Look)
Use a needle and thread that matches your jeans. A sturdy stitch like a whipstitch or a blind stitch works well. A blind stitch allows the stitches to be almost invisible on the outside of the jeans. If you’re aiming for a more durable stitch, a simple running stitch is fine, but ensure it’s tight.
- Thread your needle and tie a knot at the end of the thread.
- Start from an inconspicuous spot, like the inseam.
- Take small, even stitches, going through the folded hem and just catching a few threads of the main jean fabric on the outside. If using a blind stitch, you’ll pick up individual threads on the outside, making the stitch nearly invisible.
- Continue around the entire hem, maintaining even tension.
- When you reach your starting point, tie off the thread securely with a knot on the inside of the hem.
Option B: Sewing Machine (Faster, More Durable)
If you have a sewing machine, this is quicker. Use a strong needle, like a denim needle, and adjust the stitch length for denim. A straight stitch is usually best.
- Thread your machine with a matching or contrasting thread.
- Start sewing from the inseam, backstitching a few stitches at the beginning to secure the thread.
- Sew along the folded edge of the hem, keeping your stitching straight and consistent.
- As you approach the end, backstitch a few stitches to secure the thread.
- Trim any excess threads.
Option C: Preserving the Original Hem (Advanced Beginner/Authentic Look)
For a truly authentic look, you can reuse the original hem. This requires a bit more care but can yield excellent results if done properly.
- Carefully use a seam ripper to detach the original hem from the jean leg. Be patient to avoid damaging the fabric.
- Measure and cut your jeans to the desired length, remembering to add your seam allowance.
- Fold up the new hem twice as described in Step 5 and press.
- Pin the original hem back into place, carefully matching the stitching lines.
- Using your sewing machine or hand-stitching, carefully stitch the new hem to the jean leg, trying to mimic the original seam. This often involves sewing in the ditch between the original hem and the leg fabric.
Step 7: Final Press and Check
Once the stitching is complete, give the hem a final press with your iron. This will ensure it lies flat and looks crisp. Try on your jeans again. Check the length, ensure the taper still looks good, and confirm the hem is smooth and secure. You’ve done it!
Tips for Tapered Jeans and Hemming

Here are some extra pointers to make your hemming project even more successful:
- Match the Stitching: If you want your hem to be nearly invisible, use a thread color that perfectly matches your jeans. For a more stylistic, visible hem, use a contrasting thread color (like orange or gold on blue denim) that mimics designer jeans.
- Work on a Flat Surface: Always lay your jeans flat when measuring, marking, and cutting. This prevents stretching and ensures symmetry.
- Consider the Shoe: The type of shoe you wear can affect the ideal hem length. A sneaker might need a slightly shorter hem than a boot.
- Wash Before You Hem (Optional): If your jeans haven’t been washed yet, they might shrink. Consider washing and drying them once before hemming to get a more accurate final measurement.
- Practice on Scrap Fabric: If you’re using a sewing machine and are new to denim, practice your stitch on a scrap piece of denim first to get the tension right.
- Uneven Hems: Don’t worry if your first attempt isn’t perfectly straight. A slight imperfection is understandable for a beginner. You can always trim and re-hem if needed.
Hemming Tapered Jeans: A Comparison of Methods
Choosing the right hemming method depends on the look you want and the tools you have available. Here’s a quick comparison:
| Method | Pros | Cons | Best For |
|---|---|---|---|
| Hand Sewing | Accessible (no machine needed), subtle stitches possible, good control. | Time-consuming, stitches might not be as durable as machine sewing. | Beginners, subtle finishes, on-the-go repairs. |
| Sewing Machine | Fast, durable stitches, professional finish. | Requires a sewing machine, can be tricky on thick denim layers. | Frequent hemming, durable results, custom looks. |
| Preserving Original Hem | Most authentic look, retains original factory finish. | Difficult, requires care with seam ripper, might alter original fit slightly, can be bulky. | Enthusiasts aiming for factory-exact appearance, specific denim brands. |
Can I Hem Jeans Without a Sewing Machine?
Absolutely! As detailed in the hand-sewing option above, you can achieve a very neat and durable hem with just a needle and thread. The key is to use sturdy thread, take small, even stitches, and secure your knots well. A blind stitch is particularly effective for a nearly invisible finish by hand. For a more decorative look, contrasting thread and a visible stitch can also be done by hand.
What’s the Best Way to Cut Denim?
The best way to cut denim is with sharp fabric scissors. Ensure the denim is laid flat and that you’re cutting in a single, smooth motion. Avoid using dull scissors or craft knives, as these can create a jagged edge that frays unevenly and is difficult to hem cleanly. For an extra clean cut, consider using rotary cutters on a self-healing mat, especially if you’re doing a lot of precise cutting or planning to reuse the original hem.
What is a “Hem Allowance”?
A hem allowance is the extra amount of fabric beyond the finished hemline that you tuck and sew. For jeans, it’s typically between 1 to 1.5 inches (2.5 to 3.8 cm). This allowance provides enough fabric to create a double-folded hem (to hide raw edges) and allows for confident stitching without running into the main part of the jean leg. When you fold the fabric up twice, the raw edge tucks neatly inside the second fold.
How to Avoid Fraying When Hemming Jeans?
The best way to avoid fraying when hemming jeans is to create a double-folded hem. In Step 5, you fold the raw edge up once, then fold it again to create a clean, enclosed edge. Stitching close to the edge of this double fold will secure the raw edge inside. For extra security, you can use a serger or a zigzag stitch along the raw edge before folding, though this is less common for a clean jean hem. Washing your jeans after hemming can sometimes make stray threads appear, but a well-constructed double-folded hem should stand up to most wear.
How to Hem Tapered Jeans and Keep the Original Look?
To keep the original look when hemming tapered jeans, the most effective method is to use the original hem. This involves carefully removing the existing hem with a seam ripper, cutting the leg to the desired length, creating a new folded hem (often a small single fold), and then reattaching the original hem. Precision is key here, as you’ll want to stitch as close to the original seam line as possible. This preserves the wash, the fading, and the specific stitching pattern that makes the original hem look authentic. It’s a bit more complex but provides that factory-perfect finish.
Alternative Hemming Techniques for a Custom Look
While a traditional hem is classic, there are other ways to finish your tapered jeans:
- Cuffed Hem: Simply fold the jeans up from the bottom twice to your desired length, and then stitch the fold in place. This is casual and easy. You can choose to stitch just on the inseam or around the entire leg.
- Distressed or Frayed Hem: Cut the jeans to your desired length and then unravel the threads along the cut edge for a worn-in, edgy look. You can control the fraying by washing the jeans or securing the fraying with a few stitches at certain points so it doesn’t unravel too much.
- Raw Hem with Stitching: Cut to length and then sew a narrow stitch very close to the cut edge. This allows the fabric to fray naturally but prevents it from unraveling further up the leg.
When applying these techniques to tapered jeans, always remember to maintain the integrity of the taper. The focus should be on the final length and how it interacts with the narrowing leg shape.
Troubleshooting Common Hemming Issues
Even with the best intentions, you might run into a few snags. Here’s how to fix them:
- Uneven Hem: If your hem is slightly uneven after stitching, you can try ironing it very carefully. If it’s significantly uneven and you have enough fabric, you can trim it down further and re-hem. For small discrepancies, sometimes strategic pressing can disguise it.
- Skipped Stitches on Sewing Machine: This often happens with denim. Ensure you’re using a denim needle, the correct thread, and that the machine is properly threaded. Sometimes, reducing the stitch length or increasing tension slightly can help.
- Fabric Bunching: If the fabric bunches up while sewing, your tension might be too tight, or you may be pushing the fabric instead of guiding it. Sew more slowly and guide the fabric gently. When folding for the hem, ensure the fabric is smooth and not stretched.
- Thread Breaking: Denim is thick. Use strong thread (polyester is good for denim) and a sharp needle. Don’t pull too hard on the thread when hand-sewing.
- Incorrect Length: This is the most common beginner mistake. Always measure twice and cut once. If you’ve cut too much, you can try reattaching the original hem if you saved it, or you might have to accept it or find new jeans. For future hemming, always error on the side of leaving a little too much fabric.
Conclusion
Hemming tapered jeans might seem intimidating at first, but with this guide, you have the knowledge and steps to achieve a professional-looking result right at home. Whether you choose to hand-sew for a subtle finish or use a sewing machine for speed and durability, the process is straightforward. Taking the time to properly measure, mark, and sew will transform your jeans, ensuring they fit perfectly and showcase the stylish taper you bought them for. Don’t let ill-fitting jeans hold you back; grab your tools and give them a new, custom fit. You’ll be surprised at how satisfying and simple it can be!
.lwrp.link-whisper-related-posts{
margin-top: 40px;
margin-bottom: 30px;
}
.lwrp .lwrp-title{
}.lwrp .lwrp-description{
}
.lwrp .lwrp-list-container{
}
.lwrp .lwrp-list-multi-container{
display: flex;
}
.lwrp .lwrp-list-double{
width: 48%;
}
.lwrp .lwrp-list-triple{
width: 32%;
}
.lwrp .lwrp-list-row-container{
display: flex;
justify-content: space-between;
}
.lwrp .lwrp-list-row-container .lwrp-list-item{
width: calc(25% – 20px);
}
.lwrp .lwrp-list-item:not(.lwrp-no-posts-message-item){
max-width: 150px;
}
.lwrp .lwrp-list-item img{
max-width: 100%;
height: auto;
object-fit: cover;
aspect-ratio: 1 / 1;
}
.lwrp .lwrp-list-item.lwrp-empty-list-item{
background: initial !important;
}
.lwrp .lwrp-list-item .lwrp-list-link .lwrp-list-link-title-text,
.lwrp .lwrp-list-item .lwrp-list-no-posts-message{
}@media screen and (max-width: 480px) {
.lwrp.link-whisper-related-posts{
}
.lwrp .lwrp-title{
}.lwrp .lwrp-description{
}
.lwrp .lwrp-list-multi-container{
flex-direction: column;
}
.lwrp .lwrp-list-multi-container ul.lwrp-list{
margin-top: 0px;
margin-bottom: 0px;
padding-top: 0px;
padding-bottom: 0px;
}
.lwrp .lwrp-list-double,
.lwrp .lwrp-list-triple{
width: 100%;
}
.lwrp .lwrp-list-row-container{
justify-content: initial;
flex-direction: column;
}
.lwrp .lwrp-list-row-container .lwrp-list-item{
width: 100%;
}
.lwrp .lwrp-list-item:not(.lwrp-no-posts-message-item){
max-width: initial;
}
.lwrp .lwrp-list-item .lwrp-list-link .lwrp-list-link-title-text,
.lwrp .lwrp-list-item .lwrp-list-no-posts-message{
};
}


