


Hemming tapered jeans is surprisingly simple and can dramatically improve your fit and style. This guide provides an effortless, step-by-step process to achieve a perfect, custom length for your jeans, ensuring they look sharp and feel comfortable, no professional tailor needed.
Ever bought a pair of jeans that fit perfectly everywhere else, but the length just drags on the ground? It’s a common frustration, especially with tapered styles that are meant to sit neatly over your shoes. Too-long jeans can look sloppy, get damaged easily, and even be a tripping hazard. But don’t worry, hemming them yourself is not only achievable for beginners but also a truly effortless way to elevate your entire wardrobe. Get ready to say goodbye to bunching fabric and hello to crisply finished seams.
Why Hemming Tapered Jeans is a Game-Changer

Tapered jeans are designed to narrow from the knee down to the ankle. This shape is fantastic for a modern, streamlined look. However, if the length isn’t right, that flattering taper can be completely ruined by excessive fabric bunching around your footwear. Hemming them ensures the taper flows smoothly into your shoe, maintaining the intended silhouette and giving you a polished appearance. It’s a simple alteration that makes a huge difference in how your jeans look and feel.
Understanding Your Jeans: Fabric and Construction

Before you grab your scissors, it’s helpful to know a little about jeans. Most denim is made from cotton, but blends with elastane or polyester are common for stretch and durability. Tapered jeans often have a classic five-pocket design and a traditional waistband with belt loops. The hem itself is usually a double-stitched seam, designed to be strong. Understanding this will help you replicate the original look when you hem them.
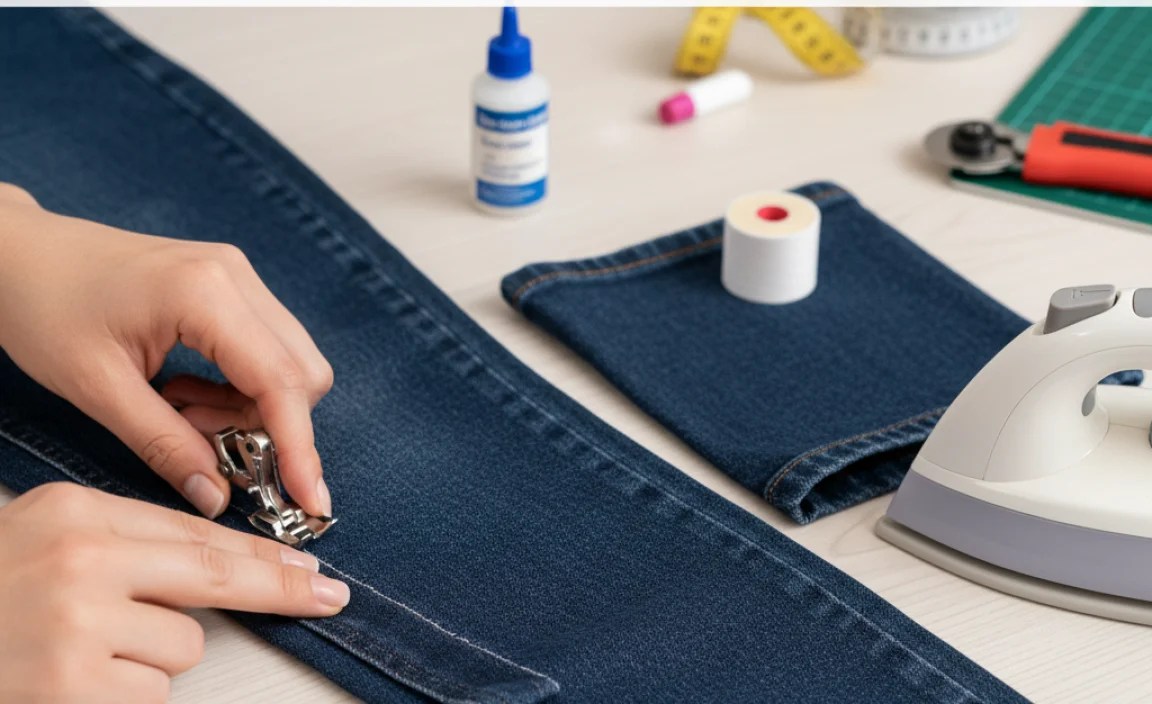
Gathering Your Essential Tools

You don’t need a fancy sewing machine or a tailor’s kit to hem your jeans. Most of these items can be found around the house or are inexpensive to purchase:
- Fabric Scissors: Sharp scissors specifically for fabric will make clean cuts.
- Measuring Tape or Ruler: For accurate measurement of your desired hem length.
- Fabric Marker or Chalk: To mark your cutting and sewing lines.
- Pins: To hold the fabric in place while you sew.
- Needle and Thread: Choose a thread color that matches your jeans, or opt for a contrasting color for a visible seam if you prefer. A heavy-duty needle is best for denim.
- Iron and Ironing Board: To press seams flat for a professional finish.
- Optional: Sewing Machine: If you have one, a sewing machine can speed up the stitching process. Use a denim or heavy-duty needle.
- Optional: Seam Ripper: If you plan to reattach the original hem (a more advanced technique).
Step-by-Step: How to Hem Tapered Jeans Effortlessly

This method focuses on creating a new, clean hem that preserves the look of your tapered jeans. It’s straightforward and designed for beginners.
Step 1: Try Them On and Determine the Right Length
Put on the jeans you want to hem and the shoes you’ll most likely wear them with. Stand in front of a mirror. Bunch the excess fabric at the ankle upwards until the hem hits the desired spot. This could be just grazing the top of your shoe, slightly shorter for a cleaner look, or at your ideal ankle length. Pin the fabric in place at the outer seam and inner seam to hold the length, ensuring there’s no excessive pulling or bunching.
Step 2: Mark Your Cut Line
Carefully take the jeans off. Lay them flat on a hard surface. The pins are marking where you want the finished hem to be. Measure from the pin marking up to where you want to cut. You’ll need about 1 to 1.5 inches (2.5 to 3.8 cm) of extra fabric for the new hem allowance. Use your fabric marker or chalk to draw a straight line across the width of the jean leg at that measurement. Repeat on the other leg, making sure the marks are even.
Step 3: Cut Off the Excess Fabric
Using your sharp fabric scissors, cut along the marked line on each leg. Take your time for a straight cut. Don’t worry if it’s not absolutely perfect; the next steps will refine it.
Step 4: Create the New Hem Allowance
On each cut leg, take the raw edge and fold it upwards towards the inside of the pant leg. This fold should be about 0.5 to 0.75 inches (1.3 to 1.9 cm) wide. Press this folded edge with an iron to create a crisp line. This is your hem allowance that will be sewn down.
Step 5: Measure and Fold Again (for Double Fold Hem)
This step creates a double-folded hem, which is more durable and looks more like the original jeans. Fold the raw edge up again, this time folding along the first crease you just made. You are essentially tucking the raw edge inside the garment. The total width of this folded hem (from the original cut line to the new folded edge) should be consistent, typically around 0.75 to 1 inch (1.9 to 2.5 cm). Press this fold firmly with your iron.
Tip for Tapered Jeans: As you fold, ensure the excess fabric isn’t creating unwanted bulk at the narrowest part of the taper. Gently smooth it out as you press.
Step 6: Pin the Hem in Place
Once you have the double fold pressed and looking neat, use your pins to secure the hem. Place pins perpendicular to the folded edge, about every 1-2 inches (2.5-5 cm). Ensure the pins go through all layers of fabric so everything stays put while you sew.
Step 7: Sew the New Hem
This is where you’ll stitch the hem. You have two main options:
- By Hand: Use a needle and a matching thread. A simple stitch like a backstitch or a running stitch will work. Aim to catch just a small amount of fabric from the inside of the pant leg with each stitch to keep the stitches as invisible as possible from the outside. If you’re going for the “how to hem tapered jeans without bleach” vibe, a matching thread is key for a discreet finish.
- By Sewing Machine: Set up your sewing machine with a denim or heavy-duty needle and matching thread. Stitch along the top folded edge of the hem, keeping a consistent distance from the edge. Go slowly, especially around the seams, and backstitch at the beginning and end to secure the stitching.
For a professional finish, aim to keep your stitch line as close as possible to the edge of the folded hem. If your jeans have a double-stitched hem originally, you can mimic this by stitching close to the inner fold, and then, if you’re feeling ambitious, adding a second stitch line about 1/4 inch (0.6 cm) further down, just like the original.
Step 8: Final Press and Inspection
Once sewn, remove the pins. Press the new hem with your iron one last time. Check all around the leg to ensure the stitching is secure and the hem is even. Try on your newly hemmed jeans with your favorite shoes to admire your work!
Alternative Hemming Techniques
While the double-fold hem is recommended for its durability and appearance, here are a couple of other common methods:
1. Single Fold Hem
This is similar to Step 4 above but you stop there. You fold the raw edge up once, press, pin, and sew. It’s quicker but less durable and the raw edge might fray over time if not finished properly.
| Technique | Pros | Cons | Best For |
|---|---|---|---|
| Double Fold Hem (Recommended) | Durable, professional look, prevents fraying, mimics original hem. | Takes slightly longer, requires more fabric allowance. | Most denim jeans, especially tapered styles, anyone seeking a lasting, neat finish. |
| Single Fold Hem | Quicker, uses less fabric allowance. | Less durable, raw edge can fray, less professional appearance unless seam is finished with a serger or zig-zag stitch. | Temporary hems, very thick denim, or when speed is the highest priority. |
| Reattaching Original Hem | Preserves original factory finish (e.g., selvedge), looks completely authentic. | Most difficult for beginners, requires careful seam ripping and re-stitching, can be tricky to match perfectly. | Jeans with unique or desirable original hems (like selvedge denim), experienced sewers. |
2. Reattaching the Original Hem
This is the most advanced method, often used to preserve the original factory-finished edge of jeans, especially selvedge denim. It involves carefully ripping out the original hem, cutting the fabric to length, and then re-stitching the original hem back on. This requires precision and is best attempted once you’re comfortable with basic sewing. Resources like guides from the Levi’s website often discuss this technique in more detail.
Tips for Perfect Tapered Jean Hems
Achieving a flawless hem is all about attention to detail. Here are some extra tips:
- Always Measure Twice, Cut Once: Rulers and measuring tapes are your best friends.
- Ironing is Key: Don’t skip ironing your folds. It makes pinning and stitching much easier and ensures a crisp, straight line.
- Match Thread Color: For a discreet hem that looks like it was done by a professional, use thread that matches your denim color.
- Use a Longer Stitch Length: On a sewing machine, a slightly longer stitch length (e.g., 3.0-3.5 mm) is often better for denim.
- Go Slow: Especially when sewing over thick seams or with a needle and thread. Patience yields better results.
- Consider Your Shoe Height: The length you choose should work with the shoes you typically wear with those jeans.
- For Super Strict Tapered Fits: If your jeans are extremely tapered or your ankles are very narrow, be mindful of how the bulk folds up inside. You might need to slightly adjust your fold width to avoid a bulky line.
When to Seek Professional Help
While hemming jeans is a fantastic DIY skill, there are times when a professional tailor might be your best bet:
- Expensive or Designer Jeans: If you have a high-value pair, you might want the peace of mind a professional provides.
- Unusual Denim or Complex Finishes: Some jeans have special washes, treatments, or extremely intricate stitching that can be hard to replicate.
- Major Alterations Beyond Length: If you need to take in the waist, seat, or significantly alter the leg shape, a tailor has the expertise.
- If You Lack the Tools or Confidence: If you don’t have the necessary tools or feel overwhelmed, a tailor can do it quickly and efficiently.
You can also consider services like Alterations.com (which links to local tailor services) to find a professional near you if DIY isn’t your preference.
Frequently Asked Questions
Q1: How much fabric should I leave for the hem?
For a standard double-fold hem, leave about 1 to 1.5 inches (2.5 to 3.8 cm) of fabric past your desired finished length. This allows for a neat fold that hides the raw edge well.
Q2: Can I hem jeans without a sewing machine?
Yes, absolutely! Hand-sewing with a needle and thread is very effective. Use a strong thread (like heavy-duty or upholstery thread) and a backstitch for durability. It takes a little more time but yields excellent results.
Q3: How do I make my hem look like the original factory hem?
The best way to mimic the original hem is to carefully unpick the original hem, cut your jeans to the desired length, and then re-attach the original hem. This is more advanced. For beginners, a neat double-folded hem with matching thread will look very professional and close to the original.
Q4: What is the best way to cut denim for hemming?
Use sharp fabric scissors and a straight cutting line. Lay the jeans flat and use a ruler or measuring tape to ensure your line is perfectly straight across the leg. Cutting on a flat surface prevents puckers and unevenness.
Q5: My tapered jeans are extra tight at the ankle. Will hemming be difficult?
Hemming naturally involves folding fabric. In very tight tapers, you might end up with a slightly thicker hem fold inside. Ensure your second fold (the one that hides the raw edge) isn’t too wide – perhaps around 0.5 to 0.75 inches. Pressing very firmly with an iron can help manage any added bulk.
Q6: How do I hem tapered jeans without losing the original “worn” look at the bottom?
If your jeans have a slightly frayed or worn hem, and you want to keep that look, the best method is to carefully unpick the original hem and reattach it after cutting. This preserves the original finish. If you’re creating a new hem, you can try to slightly distress the new hem edges after sewing for a similar effect, though it’s tricky to get perfect.
Conclusion
Hemming tapered jeans is a straightforward and rewarding DIY project that can dramatically improve your style and the life of your favorite denim. By following these simple steps, you can achieve a custom fit that looks sharp, feels comfortable, and saves you a trip to the tailor. Remember that patience and precision are your best tools. You’ve now got the knowledge to tackle that too-long hem with confidence, ensuring your tapered jeans always fall just right. So grab your scissors, a needle, and thread, and get ready to enjoy perfectly fitting jeans!
.lwrp.link-whisper-related-posts{
margin-top: 40px;
margin-bottom: 30px;
}
.lwrp .lwrp-title{
}.lwrp .lwrp-description{
}
.lwrp .lwrp-list-container{
}
.lwrp .lwrp-list-multi-container{
display: flex;
}
.lwrp .lwrp-list-double{
width: 48%;
}
.lwrp .lwrp-list-triple{
width: 32%;
}
.lwrp .lwrp-list-row-container{
display: flex;
justify-content: space-between;
}
.lwrp .lwrp-list-row-container .lwrp-list-item{
width: calc(25% – 20px);
}
.lwrp .lwrp-list-item:not(.lwrp-no-posts-message-item){
max-width: 150px;
}
.lwrp .lwrp-list-item img{
max-width: 100%;
height: auto;
object-fit: cover;
aspect-ratio: 1 / 1;
}
.lwrp .lwrp-list-item.lwrp-empty-list-item{
background: initial !important;
}
.lwrp .lwrp-list-item .lwrp-list-link .lwrp-list-link-title-text,
.lwrp .lwrp-list-item .lwrp-list-no-posts-message{
}@media screen and (max-width: 480px) {
.lwrp.link-whisper-related-posts{
}
.lwrp .lwrp-title{
}.lwrp .lwrp-description{
}
.lwrp .lwrp-list-multi-container{
flex-direction: column;
}
.lwrp .lwrp-list-multi-container ul.lwrp-list{
margin-top: 0px;
margin-bottom: 0px;
padding-top: 0px;
padding-bottom: 0px;
}
.lwrp .lwrp-list-double,
.lwrp .lwrp-list-triple{
width: 100%;
}
.lwrp .lwrp-list-row-container{
justify-content: initial;
flex-direction: column;
}
.lwrp .lwrp-list-row-container .lwrp-list-item{
width: 100%;
}
.lwrp .lwrp-list-item:not(.lwrp-no-posts-message-item){
max-width: initial;
}
.lwrp .lwrp-list-item .lwrp-list-link .lwrp-list-link-title-text,
.lwrp .lwrp-list-item .lwrp-list-no-posts-message{
};
}


