


Struggling with wide-leg jeans that are too long? Learn how to hem them yourself with this easy, step-by-step guide. You’ll achieve a perfect, effortlessly stylish fit without needing professional help. This guide covers simple techniques, essential tools, and handy tips for a flawless finish.
How to Hem Wide Leg Jeans: Your Proven, Effortless Guide
Wide-leg jeans are a fashion staple, offering comfort and style. But when they’re a touch too long, they can look sloppy and feel cumbersome. That’s a frustrating problem, especially when you love the look but can’t walk without tripping! Don’t worry. With just a few basic tools and this straightforward guide, you can easily adjust the length of your favorite wide-leg jeans to perfection. We’ll walk you through each step, making the process simple and achievable, even if you’ve never hemmed anything before. Get ready to update your wardrobe with perfectly fitting jeans!
Why Hemming Wide Leg Jeans Matters

The right hemline makes all the difference in how jeans fit and feel. For wide-leg styles, a hem that’s too long can drag on the ground, get dirty quickly, and make you appear shorter than you are. Conversely, a hem that’s just right creates a clean silhouette, elongates your legs, and ensures you can move comfortably. Achieving this perfect length can significantly elevate your entire outfit, bringing it from “okay” to “wow.” It’s about making your clothes work for you, enhancing your personal style, and ensuring your footwear is on full display.
Gathering Your Hemming Essentials
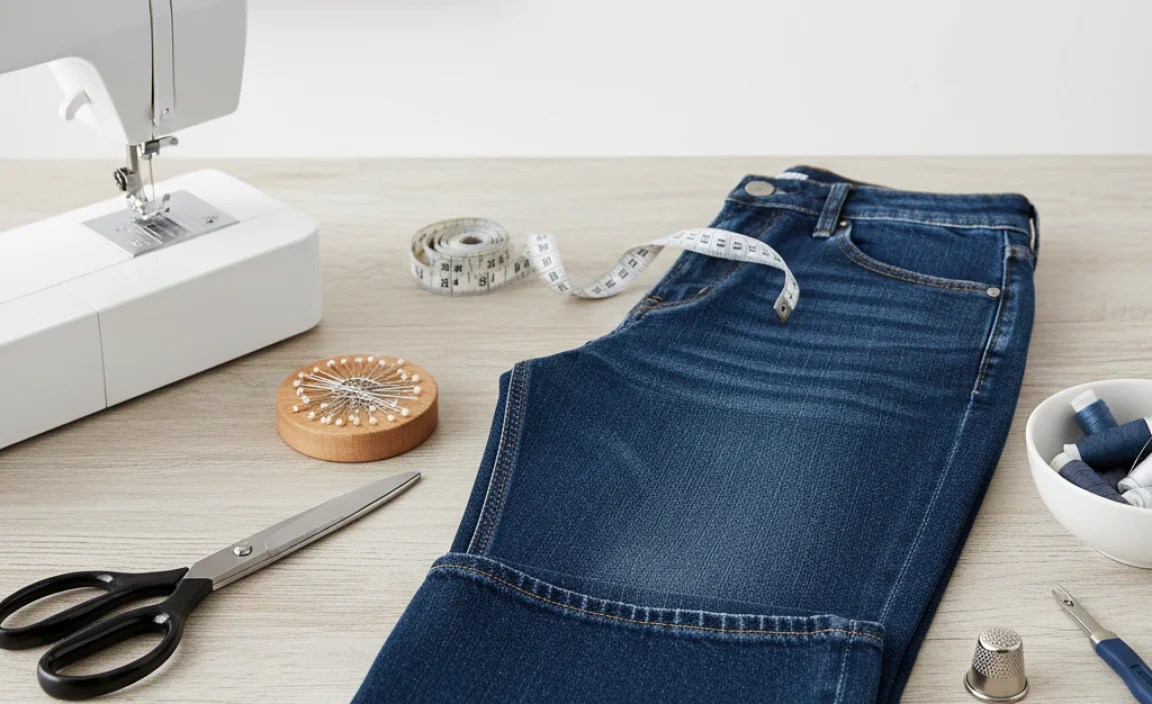
Before you start cutting, make sure you have everything you need. Having the right tools makes the process smoother and leads to a better end result. Here’s a checklist of what you’ll likely need:
- Measuring Tape: Essential for accuracy.
- Fabric Scissors: Sharp scissors designed for fabric will give you a clean cut. Dull scissors can lead to jagged edges.
- Fabric Chok/Pen/Tailor’s Chalk: For marking your hemline.
- Straight Pins: To hold the folded hem in place while you sew.
- Iron and Ironing Board: Crucial for creating crisp folds.
- Sewing Machine (Optional but Recommended): For a professional and durable finish.
- Sewing Needle and Thread: If you plan to hand-sew, choose a thread color that matches your jeans.
- Seam Ripper (Optional): If you need to remove an existing hem.
- Your Wide Leg Jeans: Of course!
Step-by-Step Guide to Hemming Wide Leg Jeans

Let’s get started! This guide breaks down the hemming process into manageable steps. Remember to take your time and measure carefully.
Step 1: Prepare Your Jeans
First, ensure your jeans are clean and dry. Wash and dry them as you normally would, as denim can shrink. Also, iron them flat to remove any wrinkles, which will make measuring and marking much more accurate.
Step 2: Try Them On and Mark the Length
This is the most critical step for getting the length right. Put on the jeans you want to hem. Wear the shoes you intend to wear most often with these jeans. Stand in front of a mirror. Adjust the jeans until they sit at your desired length. You might want them to just graze the top of your shoes, show a bit of your footwear, or hover just above the floor. Have a friend help you mark the hemline or carefully use pins. Using your fabric marker or chalk, make a small mark on the inside seam of one leg where you want the new hem to fall. Then, carefully take off the jeans.
Step 3: Transfer the Mark and Measure
Lay your jeans flat on a clean surface, like a table or the floor. Smooth out the fabric. Use your measuring tape to transfer the mark you made on the inseam to the outside seam as well, ensuring it’s consistent. You can also use a ruler to help keep the line straight. For wide-leg jeans, it’s especially important to measure from the original hemline straight up to create a consistent depth for your new hem. For example, if you want to shorten them by 2 inches, measure 2 inches up from where the original hem sits on the inside and outside seams and connect these points to create your cutting line.
Here’s a handy guide for determining hem depth based on the original construction:
| Original Hem Type | Recommended New Hem Depth (Approx.) | Notes |
|---|---|---|
| Single Fold Hem (Common) | 1 inch to 1.5 inches | Allows for a clean fold. |
| Double Fold Hem (More Durable) | 1.5 inches to 2.5 inches | Requires more fabric to fold twice; creates a thicker edge. |
| Raw or Frayed Hem | N/A (Cut to desired length) | No folding needed, but fabric will fray. |
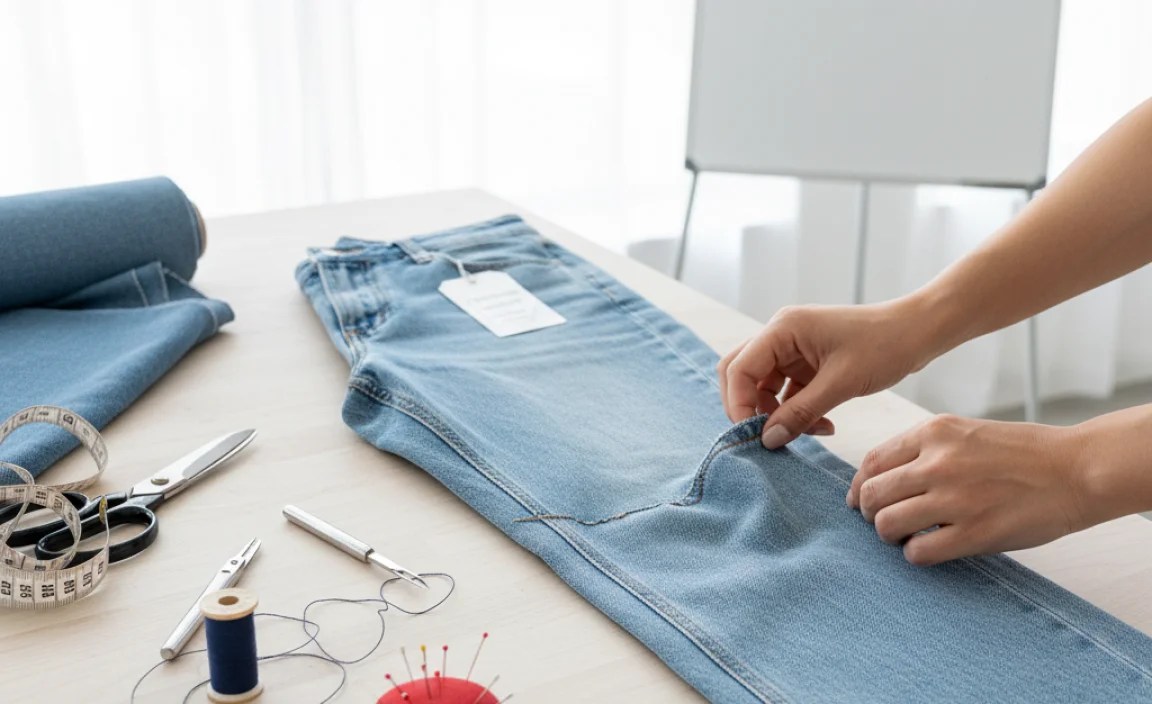
Step 4: Cut Off the Excess Fabric
Once you have clearly marked your new hemline on both legs (and it’s symmetrical!), it’s time to cut. Using your sharp fabric scissors, carefully cut along the marked line. It’s always better to cut a little less than you think you need; you can always trim more later if necessary. For wide-leg jeans, ensure the cut is straight across the entire width of the leg to maintain the intended silhouette.
Step 5: Create the New Hem
Now, you’ll create the fold for your new hem. There are a couple of common methods:
Method 1: Single Fold Hem
This is the simplest method. Fold the raw edge of the fabric up by about 1/2 inch towards the inside of the jeans. Press this fold firmly with your iron. Then, fold that same edge up again by the desired hem depth (e.g., 1 inch to 1.5 inches, depending on your original hem). Press again to create a crisp, double-layered fold. Pin the hem in place all the way around.
Method 2: Double Fold Hem (Mimicking Original Look)
This method is ideal for recreating the look of a traditional jean hem. Fold the raw edge up by about 1/4 inch to 1/2 inch towards the inside. Press well. Now, fold the same edge up again, this time to your desired finished hem length (e.g., 1 inch). The goal is to encase the raw edge completely within the fold. Press firmly. Pin the folded hem securely.
For wide-leg jeans specifically, consider this table when deciding on your hem depth:
| Desired Finished Look | Recommended Fold Depth for Single Fold | Recommended Fold Depth for Double Fold | Considerations for Wide Legs |
|---|---|---|---|
| Clean, subtle finish | 1 inch | 1.5 inches | A narrower hem complements the wide leg without overwhelming it. |
| Slightly more substantial look | 1.25 inches to 1.5 inches | 1.75 inches to 2 inches | A mid-range hem can add a bit of weight and structure. |
| Mimic original bulky hem | N/A | 2 inches to 2.5 inches | Ensures enough fabric to fold twice and create a similar thickness. |
Step 6: Sew the Hem
You have two main options here: sewing machine or by hand.
Option A: Using a Sewing Machine
Thread your sewing machine with a strong thread that matches your jeans. For a professional look, use a denim needle. Stitch along the top folded edge of the hem, keeping your seam as straight as possible. Sew slowly and steadily. Go all the way around the leg. Backstitch at the beginning and end to secure the stitching.
Option B: Hand Sewing
Use a strong needle and thread that matches your jeans. A blind hem stitch (also known as a slip stitch) is ideal for an invisible finish. Follow a tutorial for the blind hem stitch if you’re unfamiliar with it. Alternatively, you can use a running stitch or a backstitch for a more visible, decorative effect, or if durability is your primary concern. Ensure your stitches are small and consistent for the best result.
Step 7: Finish and Press
Once you’ve sewn the hem, remove all the pins. Turn the jeans right-side out. Check your stitching and ensure it’s secure. Give the hem a final press with your iron to make it lie flat and crisp. You can also press from the inside of the garment.
Advanced Tip: Preserving the Original Hem

Are you aiming for an absolutely authentic look, perhaps to keep the original distressed or frayed hem of your wide-leg jeans? This requires a bit more care, but it’s definitely achievable. You’ll be essentially removing the original hem, cutting the jeans to length, and then re-attaching the original hem. This is sometimes called “ghost hemming” or “original hem hemming.”
Here’s a simplified overview:
- Carefully remove the original hem: Use a seam ripper to gently detach the stitched hem from the bottom of the jeans. Try to keep the original hem intact.
- Cut to length: Lay your jeans flat and mark your desired new length. Cut off the excess fabric, leaving the salvaged original hem piece to reattach.
- Reattach: This can be tricky and often requires a sewing machine. You’ll be sewing the salvaged hem piece back onto the newly cut edge of the jeans, trying to match the original stitching line as closely as possible.
This method is best attempted if you have some sewing experience or are willing to practice. It’s a fantastic way to maintain the original character of vintage or heavily worn wide-leg jeans.
Troubleshooting Common Hemming Issues
Even with the best intentions, sometimes things don’t go perfectly. Here are a few common issues and how to fix them:
- Uneven Hem: If you notice your hem looks a bit wobbly after sewing, don’t despair. Often, a really good press with an iron can help smooth out minor imperfections. If it’s significantly uneven, you might need to unpick your stitches and re-mark and re-cut (if there’s enough fabric allowance).
- Stitches Dropping: Ensure your sewing machine is properly threaded and the tension is correct. If hand sewing, make sure your stitches are evenly spaced.
- Fabric Fraying Too Much: If you’re going for a clean hem but the fabric is unraveling excessively, consider using a serger or a zig-zag stitch along the raw edge before you fold and sew. This helps to control fraying.
- Jeans Still Too Long: It’s easier to take more off than to add it back. If they’re still too long after your first attempt, simply repeat the process of marking, cutting, and hemming for a second time.
Frequently Asked Questions About Hemming Wide Leg Jeans
Q1: Do I need a sewing machine to hem my wide leg jeans?
No, a sewing machine can make the job quicker and give a more professional finish, but you can absolutely hem your jeans by hand. Using a strong needle and thread with a blind hem stitch will still yield excellent results.
Q2: How much fabric allowance should I leave for hemming wide leg jeans?
When you cut, leave about 1.5 to 2.5 inches of fabric below your desired new hemline. This extra fabric allows you to create a clean double fold, similar to the original hem, or a substantial single fold, which is often best for the weight of denim.
Q3: Can I hem jeans without cutting them?
You can temporarily shorten jeans by rolling them up at the waistband, but this isn’t a permanent hem. For wide-leg jeans, a permanent hem is usually best for maintaining their shape and drape. If you want to try to keep the original hem, you can carefully remove it, cut the leg length you want, and then sew that original hem back on.
Q4: How do I hem wide leg jeans if there’s a fancy stitched design on the original hem?
If the original hem has decorative stitching or a frayed edge you want to preserve, the best approach is to carefully unpick the stitching using a seam ripper and salvage the entire original hem. Then, you’ll shorten the jeans and reattach that original hem piece. This process is more advanced but results in the most authentic look.
Q5: What kind of needle and thread should I use for hemming jeans?
For sewing machine users, a denim needle (size 90/14 or 100/16) is highly recommended. A strong polyester or cotton-poly blend thread in a color matching your jeans is ideal. For hand sewing, use a sturdy denim needle and a matching thread.
Q6: How can I make sure my hem is straight on wide leg jeans?
The key is careful measuring and marking. Lay the jeans flat, smooth out all wrinkles, and measure accurately from the original hemline. Using a yardstick or a long ruler can help ensure a straight line across the wide circumference of the leg. Marking both the inside and outside seams, and then connecting those dots, is crucial.
Conclusion
Hemming your wide-leg jeans doesn’t have to be a daunting task. With a little preparation, accurate measuring, and a methodical approach, you can achieve a professional-looking finish right in your own home. Whether you prefer a clean, subtle hem or want to perfectly replicate the original look, this guide provides the steps you need. Enjoy the confidence that comes with perfectly tailored jeans, and wear your favorite styles knowing they fit you flawlessly. Experiment with different hemming techniques and find what works best for you and your wardrobe!
.lwrp.link-whisper-related-posts{
margin-top: 40px;
margin-bottom: 30px;
}
.lwrp .lwrp-title{
}.lwrp .lwrp-description{
}
.lwrp .lwrp-list-container{
}
.lwrp .lwrp-list-multi-container{
display: flex;
}
.lwrp .lwrp-list-double{
width: 48%;
}
.lwrp .lwrp-list-triple{
width: 32%;
}
.lwrp .lwrp-list-row-container{
display: flex;
justify-content: space-between;
}
.lwrp .lwrp-list-row-container .lwrp-list-item{
width: calc(25% – 20px);
}
.lwrp .lwrp-list-item:not(.lwrp-no-posts-message-item){
max-width: 150px;
}
.lwrp .lwrp-list-item img{
max-width: 100%;
height: auto;
object-fit: cover;
aspect-ratio: 1 / 1;
}
.lwrp .lwrp-list-item.lwrp-empty-list-item{
background: initial !important;
}
.lwrp .lwrp-list-item .lwrp-list-link .lwrp-list-link-title-text,
.lwrp .lwrp-list-item .lwrp-list-no-posts-message{
}@media screen and (max-width: 480px) {
.lwrp.link-whisper-related-posts{
}
.lwrp .lwrp-title{
}.lwrp .lwrp-description{
}
.lwrp .lwrp-list-multi-container{
flex-direction: column;
}
.lwrp .lwrp-list-multi-container ul.lwrp-list{
margin-top: 0px;
margin-bottom: 0px;
padding-top: 0px;
padding-bottom: 0px;
}
.lwrp .lwrp-list-double,
.lwrp .lwrp-list-triple{
width: 100%;
}
.lwrp .lwrp-list-row-container{
justify-content: initial;
flex-direction: column;
}
.lwrp .lwrp-list-row-container .lwrp-list-item{
width: 100%;
}
.lwrp .lwrp-list-item:not(.lwrp-no-posts-message-item){
max-width: initial;
}
.lwrp .lwrp-list-item .lwrp-list-link .lwrp-list-link-title-text,
.lwrp .lwrp-list-item .lwrp-list-no-posts-message{
};
}


