


Quick Summary
Effortlessly hem your wide leg jeans for a perfect fit with simple, clever methods. This guide breaks down easy techniques, from hand-sewing to using fabric glue, ensuring a polished look without professional help. Get ready to transform your favorite denim with confidence!
How To Hem Wide Leg Jeans: A Genius Effortless Guide
Wide leg jeans are a fantastic fashion staple, offering comfort and style. But when they’re a little too long, they can drag on the floor, look sloppy, and even get damaged. Finding the perfect length can feel like a challenge, especially when you want to keep the original drape and width of your jeans. Don’t worry, hemming them yourself is much easier than you might think. This guide will walk you through several simple, effective methods to get that flawless hemline, so you can wear your favorite wide leg jeans with pride.
We’ll cover everything from gathering your supplies to the final press, ensuring your DIY hem looks as good as a tailor-made finish. Let’s get your jeans looking fantastic!
Why Hemming Wide Leg Jeans Matters

The right hemline isn’t just about aesthetics; it’s about practicality and preserving your denim. When jeans are too long, they can:
- Drag on the ground, picking up dirt and wear.
- Cause tripping hazards.
- Alter the intended silhouette of the wide leg, making it look less chic and more cumbersome.
- Get caught on things, leading to tears or frayed edges.
Achieving the perfect length ensures your wide leg jeans hang beautifully, complement your shoes, and maintain their stylish appeal for longer. It’s a small adjustment that makes a big difference in how you look and feel wearing them.
Tools You’ll Need for Hemming

Before you start, having the right tools on hand makes the process smooth and efficient. Here’s a basic checklist:
- Fabric Scissors: Sharp scissors designed for fabric ensure clean cuts.
- Measuring Tape or Ruler: Essential for accurate measurements.
- Fabric Marker or Chalk: For marking the hemline.
- Pins: To hold the fabric in place while you work.
- Iron and Ironing Board: For pressing seams and creating crisp edges.
- Sewing Machine (Optional): For a faster, more durable hem if you have one.
- Needle and Thread (if hand-sewing): Choose thread that matches your jeans.
- Fabric Glue (Optional alternative): For a no-sew hemming solution.
- Seam Ripper (Optional): If you need to remove old seams.
Measuring for the Perfect Hemline

Accuracy is key. Start by putting on the shoes you plan to wear with your wide leg jeans. This is crucial because shoes change the effective length of your pants.
- Put on your jeans and shoes. Stand in front of a mirror.
- Let the jeans hang naturally. Don’t pull them up or bunch them.
- Adjust the jeans until the hem sits at the desired spot. For wide leg jeans, this usually means the hem just kisses the top of your shoe or barely hovers above the sole. Avoid letting them pool too much on the floor, as this can look messy and cause wear.
- Mark the desired length. Use a fabric marker or chalk to make a small dot on the inside leg seam at the point where you want the hem to be. Repeat this on the outside of the leg.
- Take off the jeans. Lay them flat on a clean surface.
- Use your ruler or measuring tape to extend the mark across the entire width of the hem. You can use tailors’ chalk or a washable marker. Ensure the line is straight and level.
- Decide on the hem allowance. You’ll need extra fabric to create the folded hem. A typical allowance for jeans is 1 to 1.5 inches (2.5 to 3.8 cm). Measure this extra length down from your marked hemline and draw a second line. All the fabric below this second line will be cut off.
Method 1: The No-Sew Hem (Using Fabric Glue)

This is one of the quickest and most accessible ways to hem your wide leg jeans, especially if you don’t have a sewing machine or much sewing experience. Fabric glue offers a permanent, washable hold when applied correctly.
Step-by-Step: Fabric Glue Hem
- Prepare your jeans: Ensure they are clean and dry. Lay them flat, inside out.
- Cut off excess fabric: Using your marked lines, carefully cut off the excess fabric below the second line (your hem allowance line). You should be left with enough fabric to fold over twice.
- Fold the hem: Fold the raw edge up by about 0.5 inches (1.3 cm) and press flat with an iron. This creates a small, neat edge.
- Fold again: Fold the raw edge up again, enclosing the raw edge inside the fold. This second fold should be wide enough to cover the remaining hem allowance fabric. For example, if you have a 1.5-inch allowance, fold up 0.5 inches, then fold again to meet your original hemline mark (creating a 1-inch finished hem). Press this second fold firmly with your iron. You now have a double-folded hem ready for glue.
- Apply fabric glue: Open the second fold slightly and apply a thin, even bead of strong fabric glue along the raw edge of the first fold. Ensure you don’t use too much, as it can seep through. Brands like Aleene’s Fabric Fusion are known for their strong hold.
- Press the hem down: Immediately refold the hem, pressing the fabric firmly onto the glued edge. Smooth it out to ensure good contact.
- Secure and dry: Pin the hem in place to keep it from shifting while the glue dries. Follow the manufacturer’s instructions for drying time, which can range from a few minutes to several hours. Many fabric glues are permanent and washable once cured.
- Optional: Topstitch with Glue: For extra security and a more traditional look, after the glue has dried, you can apply another thin line of fabric glue along the top edge of the folded hem on the outside of the jean leg and press it down. This mimics a stitched topstitch.
Pros and Cons of Fabric Glue
| Pros | Cons |
|---|---|
| Extremely fast and easy. | Can feel stiff if too much glue is used. |
| No sewing skills required. | May not hold up as well to heavy wear and frequent washing as traditional stitching. |
| Washable and durable for many denims, when using a quality glue. | Requires careful application to avoid visible glue marks. |
Method 2: Hand-Sewn Hem
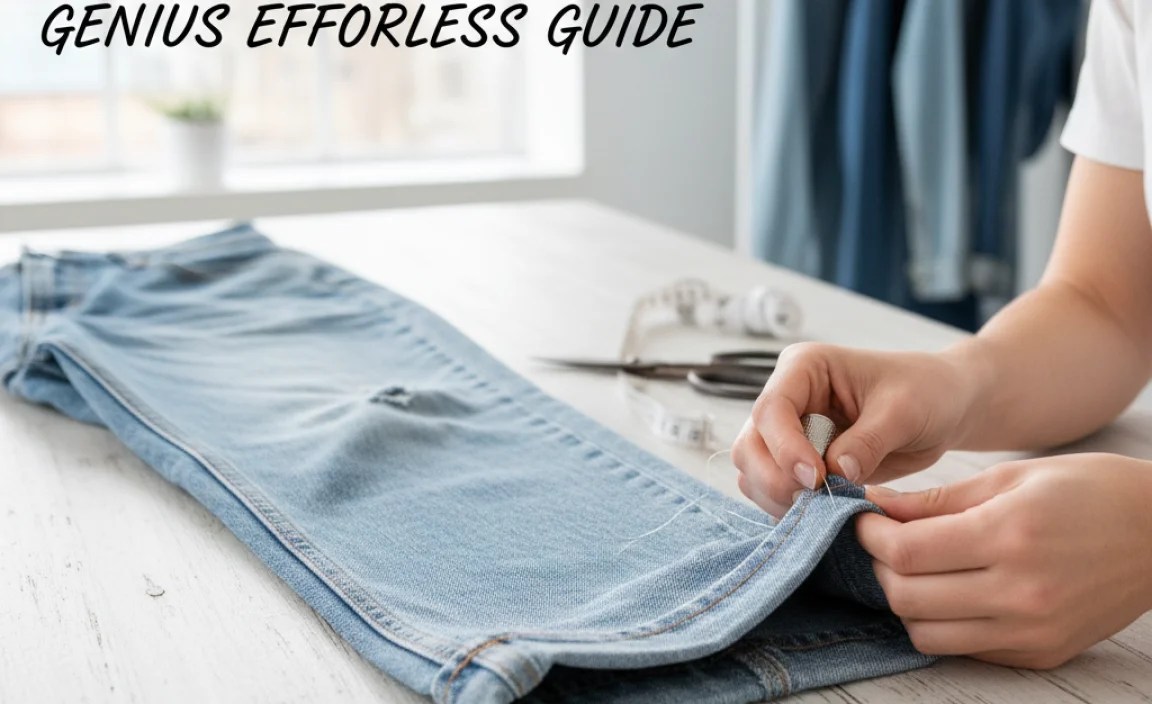
A hand-sewn hem is a classic and reliable method. It offers a clean finish and is surprisingly strong if done correctly. No fancy equipment is needed, just a needle, thread, and some patience.
Step-by-Step: Hand-Sewn Hem
- Prepare and measure: Follow steps 1-7 from the “Measuring for the Perfect Hemline” section. Ensure you have at least a 1 to 1.5-inch hem allowance.
- Cut off excess fabric.
- Fold the hem: Fold the raw edge up by 0.5 inches (1.3 cm) and press with an iron.
- Fold again: Fold the raw edge up again, enclosing the raw edge. This second fold should bring the folded edge up to your original marked hemline. Press firmly. You now have a double-folded hem.
- Thread your needle: Choose a thread that matches your jeans closely. For a strong hem, use a doubled thread.
- Start sewing: Begin at an inconspicuous point on the inside of the hem, perhaps on the inseam. Make a small knot at the end of your thread.
- Use a blind stitch (hemming stitch): This stitch creates a nearly invisible hem on the right side of the fabric.
- Take your needle through a small bit of the folded hem fabric, coming up and slightly to the side.
- Then, pick up just one or two threads from the jean fabric directly above the fold, about 0.5 inches away from where your needle emerged.
- Slide the needle through these threads, then bring it back into the folded hem fabric about 0.5 inches from where you first entered it.
- Repeat this stitch all the way around the hem.
- Maintain tension: Keep your stitches relatively even and pull the thread gently as you go to keep the hem snug but not puckered.
- Finish sewing: When you reach your starting point, secure the thread with a knot on the inside of the hem.
- Press: After sewing, give the hem a final press with your iron to set the stitches and ensure a crisp line.
Pros and Cons of Hand-Sewing
| Pros | Cons |
|---|---|
| Creates a durable and professional-looking finish. | Takes more time and requires some manual dexterity. |
| Minimal equipment needed (needle, thread, iron). | Steeper learning curve than no-sew options. |
| Very strong and long-lasting. | Stitches might be visible if not a true blind stitch. |
Method 3: Sewing Machine Hem
If you have access to a sewing machine, hemming wide leg jeans becomes a much faster and sturdier process. This method is ideal for those seeking a durable, factory-made finish.
Step-by-Step: Sewing Machine Hem
- Prepare and measure: As with the other methods, start by measuring accurately and marking your hemline and hem allowance (1 to 1.5 inches is common).
- Cut off excess fabric.
- Fold the hem: Fold the raw edge up 0.5 inches and press. Fold again to create your double-folded hem, bringing the folded edge up to your marked hemline. Press firmly. Pin the hem in place all around.
- Thread your machine: Use a needle appropriate for denim (usually a size 14 or 16) and strong polyester thread that matches your jeans.
- Sew the hem:
- Start sewing at the inseam or a less visible point.
- Set your sewing machine to a straight stitch and a medium stitch length (around 2.5-3.0mm).
- Sew along the top folded edge of the hem, staying close to the edge. Keep your stitches even and consistent.
- Backstitch at the beginning and end of your seam to secure it.
- Continue all the way around.
- Press: Once sewn, press the hem with your iron to set the stitches and create a sharp crease.
- Optional: Twin Needle Hem: For a truly authentic look reminiscent of how many jeans are originally hemmed, consider using a twin needle on your sewing machine. This creates two parallel lines of stitching on the outside and a zigzag stitch on the inside, providing both durability and a classic appearance. Adjust your machine settings according to your machine’s manual for twin needle use.
Pros and Cons of Sewing Machine Hem
| Pros | Cons |
|---|---|
| Fastest method for a durable hem. | Requires a sewing machine. |
| Very strong and professional-looking. | Can be tricky to navigate the thick seams of jeans, especially pocket areas. |
| Provides a factory-quality finish. | Learning to use a sewing machine has a learning curve. |
Keeping the Original Jean Hem (Advanced Technique)
For a truly authentic look, you might want to keep the original finished hem of your jeans. This is a bit more intricate but preserves the original ‘worn’ look.
Step-by-Step: Keeping Original Hem
- Measure and mark: On the inside of the jean leg, mark the desired finished length.
- Cut excess fabric: Cut off the excess fabric, but leave the original hem attached. You’ll need to leave enough fabric below the original hem for it to be reattached.
- Carefully detach the old hem: Use a seam ripper to carefully detach the original hem from the leg of the jean. Be patient, as this can be tricky. You’ll want to detach it from the inside.
- Prepare the jean leg: Fold the raw edge of the jean leg up to your marked finished length and press.
- Reattach the original hem: Pin the detached original hem back onto the folded raw edge of the jean leg, ensuring it’s aligned perfectly.
- Sew: Use a sewing machine with a strong needle and thread (or hand-sew) to attach the original hem. Stitch as close to the original stitching line as possible on the outside, or use a strong internal stitch.
This method requires precision but yields the most authentic result, especially if your jeans have a distressed or frayed original hem.
Dealing with Thick Seams and Extra Fabric
Wide leg jeans often have thicker seams at the hem, especially if they have a double hem or a cuffed style. When hemming, you might encounter bulk where the side seams meet the hem. Here are some tips:
- Trim seam allowances: Inside the hem allowance, trim the seam allowances from the side seams by about half. This reduces bulk significantly. Be careful not to cut through the main fabric of the jeans.
- Press seams open: If possible, press the seam allowances open inside the hem allowance.
- Use a seam zipper foot: If sewing with a machine, a seam zipper foot can help you sew closer to the edge of the hem, even over thicker areas.
- Go slow: When sewing over thick areas, go slowly and even use the handwheel of your sewing machine to control the needle’s movement over the bulk.
Maintaining Hem Quality Over Time
No matter which hemming method you choose, proper care will keep your jeans looking great:
- Wash cold, inside out: This preserves color and reduces wear on stitches or glue.
- Gentle cycle: Use a delicate setting on your washing machine.
- Air dry: Whenever possible, hang your jeans to dry instead of using a machine dryer. This is gentler on the fabric and stitching. If you must use a dryer, use a low heat setting.
- Check your hem periodically: Especially after washing, check your hem to ensure stitches haven’t come loose or glue hasn’t started to peel. Make any necessary touch-ups promptly.
- Consider professional cleaning: For very delicate or expensive denim, professional dry cleaning might be an option, but it’s often unnecessary for everyday jeans.
Frequently Asked Questions About Hemming Wide Leg Jeans
Q1: How much fabric should I leave for a hem on wide leg jeans?
A1: For most wide leg jeans, leaving a 1 to 1.5-inch (2.5 to 3.8 cm) hem allowance is ideal. This allows for a double fold, which creates a clean and durable finish without being too bulky. Always press your folds thoroughly before sewing or gluing.
Q2: What’s the best way to hem wide leg jeans if I have no sewing machine or experience?
A2: The easiest method is using fabric glue. You fold the hem twice to hide the raw edge, apply a strong fabric glue like Aleene’s Fabric Fusion between the folds, and press firmly. Always follow the glue manufacturer’s drying and washing instructions.
Q3: Will fabric glue hold up to washing?
A3: Yes, high-quality fabric glues designed for textiles are typically washable and dry-cleanable once fully cured. However, they may not be as robust as traditional stitching for very heavy wear. It’s best to wash them inside out on a gentle cycle and air dry.
<p


