


The easiest way to hem wide leg jeans is to use a no-sew hem tape or a fabric glue, ensuring the hem is even and secured correctly for a polished look without any sewing skills.
Wide leg jeans are a stylish staple, but finding the perfect length can be tricky. They can easily overwhelm your frame if they’re too long, or look awkwardly short if you cut them too much. Don’t worry, because fixing this common fashion dilemma is actually quite simple. You don’t need to be a sewing expert to get a professional-looking hem. This guide will walk you through an effortless, genius solution that will have your favorite denim fitting just right, fast. Get ready to transform your jeans and step out with confidence!
Why Hemming Wide Leg Jeans Matters

The right hem length can make or break the entire look of your wide leg jeans. Too long, and they might drag on the floor, get dirty quickly, and make you appear shorter. Too short, and they can look unflattering or out of proportion with the wide leg silhouette. For many, taking jeans to a tailor can be costly and time-consuming. Fortunately, you can achieve a salon-quality hem at home with minimal effort and inexpensive materials. This guide focuses on a solution that requires no sewing machine and minimal tools, making it accessible for everyone.
The Genius No-Sew Hem Method

This method is a game-changer for anyone who wants perfectly hemmed wide leg jeans without the hassle of sewing. It’s fast, effective, and leads to a clean, durable finish.
Materials You’ll Need:
- Your wide leg jeans
- Fabric scissors
- Fabric measuring tape or ruler
- Fabric chalk or a washable marker
- No-sew hem tape (like Stitch Witchery or Dritz Hem Tape)
- Iron and ironing board
- Optional: A damp cloth
Step-by-Step Guide:
-
Prepare Your Jeans
Start by washing and drying your jeans. This pre-shrinks them, so your hem will stay put after future washes. Lay your jeans flat on an even surface. Put on the shoes you typically wear with your wide leg jeans. This ensures you’re measuring for the correct length.
-
Measure and Mark
Decide on the desired length of your jeans. Usually, wide leg jeans should just graze the top of your shoe or hover slightly above the floor. While wearing your jeans (if you’re comfortable doing so, or have a trusted friend help), pin or mark the desired hemline on each pant leg. Alternatively, lay one pant leg flat and measure from the crotch seam down to your desired length. Use fabric chalk or a washable marker to draw a straight line across the leg at this point. Once marked, unpin or remove the jeans and lay them flat again. Measure the same distance down from the crotch on the other leg and mark it. Ensure both legs are marked at the exact same height for symmetry. Use a measuring tape to confirm the distance from the marked line up to the original hem. This will help you calculate how much you need to fold up.
-
Cut Off Excess Fabric
Using sharp fabric scissors, carefully cut along the marked line. It’s always better to cut a little more than you think you need, as you can always shorten them further, but you can’t add fabric back. Discard or save the excess fabric for other projects.
-
Prepare for the Hem Tape
Turn the pant leg inside out. Now, fold up the raw edge of the fabric by about 1/2 inch. Press this fold firmly with an iron. This creates a clean edge for the hem tape to adhere to and adds a bit of structure. You can use fabric chalk to mark this fold if it helps keep it even.
-
Apply the Hem Tape
Cut a piece of no-sew hem tape to match the circumference of the folded pant leg. Gently place the hem tape along the folded edge, ensuring it’s centered. You want it to adhere to both the raw edge and the inside of the pant leg where the fold is.
-
Iron to Secure
Following the manufacturer’s instructions for your specific hem tape, iron the hem. Place the iron over the hem tape and press down firmly. Move the iron slowly over the entire length of the hem. Some tapes require a damp cloth placed over the tape before ironing; check your product’s instructions. This heat-activated adhesive will bond the fabric layers together, creating a strong, seamless hem. Ensure edges are sealed and there are no loose bits. For extra durability, some recommend ironing for a slightly longer duration than specified, or applying heat to both the inside and outside of the hem (once cooled slightly, of course).
-
Repeat and Check
Turn the pant leg right side out and check your work. The hem should look neat and even. Repeat the entire process for the other pant leg, ensuring consistency. Try on your jeans with your chosen footwear one last time.
Tips for Perfecting the Hem:
- Precision is Key: Take your time with measurements and straight lines. A slightly crooked hem will be noticeable.
- Iron Properly: Ensure your iron is at the correct temperature for the fabric and hem tape. Too cool, and it won’t stick; too hot, and you risk damaging the denim.
- Test on Scraps: If you’re unsure about your hem tape, try a small piece on a scrap of denim first to get the hang of it.
- Consider the Original Hem: If you want to mimic the original hem texture (like a frayed or cuffed look), this no-sew method provides a clean, modern finish. For a more casual, frayed look, you can cut the jeans and then apply a fabric glue or fray check liquid instead of hem tape. For truly authentic original hems, creative solutions involving carefully detaching and reattaching the original hem band can be explored, but this requires more skill and patience.
Alternative: Fabric Glue Method
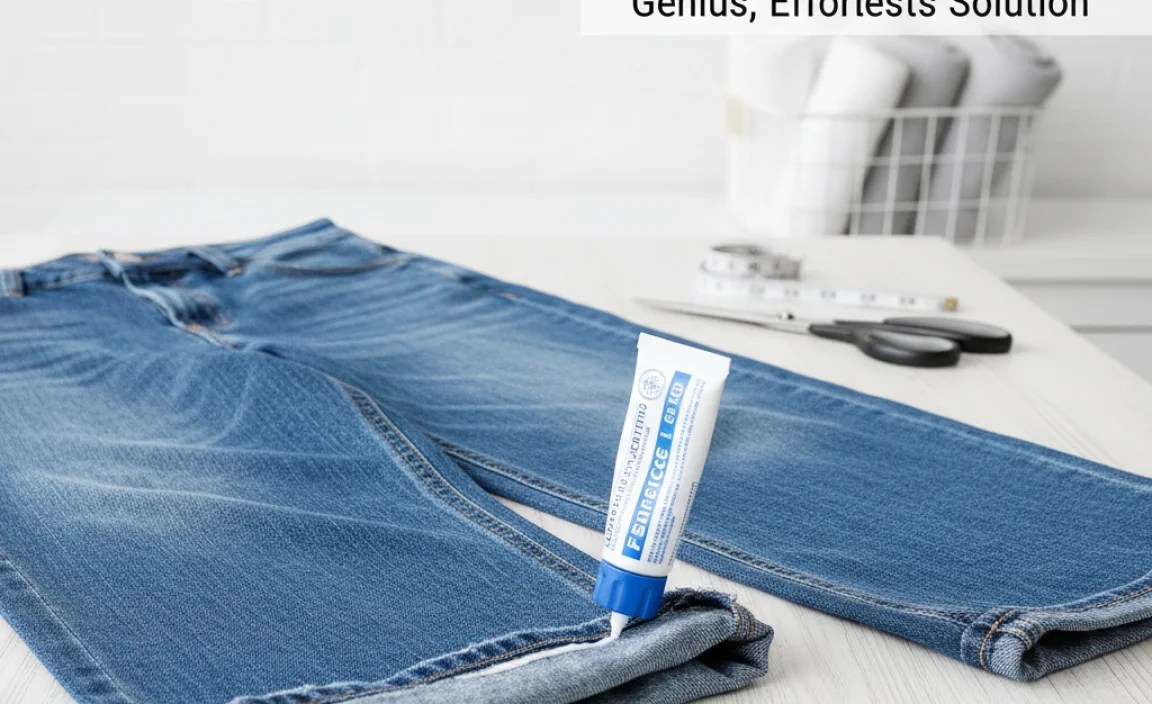
If you don’t have hem tape or prefer a different no-sew approach, fabric glue is another excellent option for hemming wide leg jeans.
Materials Needed:
- Your wide leg jeans
- Fabric scissors
- Fabric measuring tape or ruler
- Fabric chalk or a washable marker
- Strong fabric glue (like Aleene’s Fabric Fusion or Gorilla Glue Fabric Glue)
- Clothing pins or clips
- Iron and ironing board (optional, for pressing)
- A damp cloth
Step-by-Step Guide:
-
Prepare and Measure Jeans:
Follow steps 1 and 2 from the hem tape method to wash, dry, measure, and mark your jeans.
-
Cut Excess Fabric:
Follow step 3 from the hem tape method to cut off the excess fabric at your marked hemline.
-
Fold and Prepare for Glue:
Turn the pant leg inside out. Fold up the raw edge by about 1/2 inch. Press this fold with an iron for a crisp crease, or simply hold it in place.
-
Apply Fabric Glue:
Apply a thin, even bead of fabric glue along the raw edge of the fold. Ensure you apply enough to create a strong bond, but not so much that it seeps through to the outside of the jeans. A detailed applicator tip on the glue bottle is very helpful here. For a cleaner finish, some prefer to fold up then apply glue along the seam line of the fabric you are folding back onto itself.
-
Secure the Hem:
Carefully fold the raw edge (with the glue) up onto the inside of the pant leg. Press the two layers of fabric together firmly. Use clothing pins or clips to hold the hem in place while the glue dries. Make sure the pins don’t leave marks on the outside of the jeans.
-
Allow Glue to Dry:
Refer to your fabric glue’s instructions for drying time. This can range from a few hours to 24 hours for a full cure. It’s crucial not to rush this step. Some fabric glues are washable after a specific curing period.
-
Final Inspection:
Once dry, remove the pins and check that the hem is secure and looks neat. Turn the jeans right-side out and try them on with your shoes. Repeat for the other leg.
Why This Method is ‘Genius’:
Both the hem tape and fabric glue methods are considered genius because they bypass traditional sewing, making hemming accessible to everyone. They offer a permanent, washable, and professional-looking finish with minimal tools. This saves time and money, empowering individuals to maintain their wardrobe efficiently. The speed and ease of these no-sew methods make them ideal for quick adjustments or for those who find sewing daunting.
Understanding Different Denim Laundering Techniques
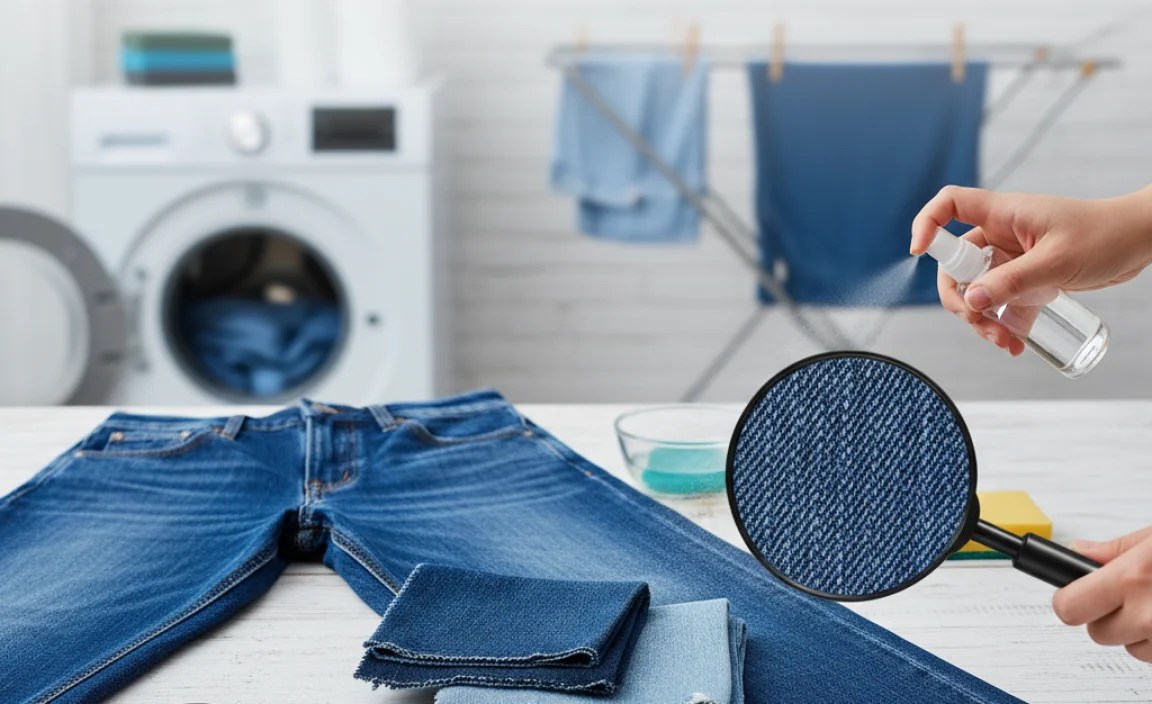
Before you start hemming, it’s good to understand a bit about denim care. The way you wash and dry your jeans can impact their fit and longevity. According to official recommendations, washing denim in cold water and air drying is the most sustainable and fabric-preserving method. Heat from a dryer can cause shrinkage and wear down fibers faster. For those who prefer a crisper finish, a low-heat tumble dry is acceptable occasionally, but always be mindful of potential size changes.
For those who are adventurous and seeking specific aesthetic outcomes, sometimes less conventional methods are explored. While not recommended for general hemming, you might encounter discussions about using household items in laundry. For instance, some users might search for ways “how to hem wide leg jeans with hydrogen peroxide.” However, hydrogen peroxide is a bleaching agent and is not designed for fabric adhesion or hemming. Its use could result in uneven discoloration and fabric damage, not a secure hem. Therefore, sticking to purpose-made fabric adhesives and tapes is the safest and most effective route.
How to Choose the Right Width for Your Hem

The width of the hem you choose for your wide leg jeans also plays a role in their overall look and how they drape. A standard hem for wide leg jeans is typically between 1/2 inch to 1 1/2 inches. Here’s a quick guide:
| Hem Width | Style Impression | Best For |
|---|---|---|
| 1/2 inch | Sleek, modern | Jeans that are already quite structured or if you want a very minimalist look. |
| 3/4 inch | Versatile, classic | Most wide leg jeans; provides enough weight to help the denim fall nicely. |
| 1 inch | Slightly more defined | Jeans with a heavier denim fabric or if you want a subtly more substantial hem. |
| 1 1/2 inches | Bold, substantial | Very wide leg styles or if you want a more pronounced hem detail. Can sometimes feel a bit heavy if the fabric is thin. |
When using no-sew hem tape, you’ll typically fold up the fabric, and the tape itself will take up about 1/4 to 1/2 inch of that fold. So, if you want a 1-inch finished hem on the outside, you’ll typically need to fold up about 1 1/4 to 1 1/2 inches of fabric from the raw edge.
When to Consider a Professional Tailor
While these no-sew methods are excellent for most situations, there are times when a professional tailor might be the better choice, especially for very expensive or fine-fabric denim.
- Complex Denim: Heavily embellished jeans, vintage denim with delicate fibers, or jeans made from unusual materials might require specialized handling.
- Specific Silhouette Needs: If you need to significantly alter the length or width of the leg for a very specific fit, a tailor has the tools and expertise to achieve complex alterations.
- Maintaining Original Look: For those who are adamant about preserving the original factory hem (the chain-stitch hem often seen on the outer seam), a tailor can detach and reattach this, though it’s a more intricate and costly process.
- Perfect Symmetry: While home hemming can be very precise, a tailor guarantees absolute symmetry, which can be crucial for certain styles.
However, for the vast majority of everyday wearers looking to simply adjust the length of their favorite wide leg jeans, the no-sew methods discussed are perfectly adequate and highly effective. Organizations like the U.S. Department of Agriculture sometimes offer advice on extending clothing life, and while they don’t detail hemming, the principle of smart garment care is universal. The key is to invest in quality tools and take your time.
Frequently Asked Questions
Q1: How do I make sure my hem is straight?
A1: Lay your jeans flat on a table or the floor. Use a measuring tape and fabric chalk to mark your desired hemline, measuring from the crotch seam down to ensure evenness. For critical accuracy, you can also use a ruler to ensure the line is perfectly perpendicular to the pant leg seam.
Q2: Can I hem jeans without ironing?
A2: Yes, you can hem jeans without ironing, especially if you use fabric glue. After applying the glue, use strong clips or pins to hold the hem in place while it dries. However, ironing helps create a cleaner fold and ensures better adhesion for hem tape, leading to a more professional finish.
Q3: How much fabric should I fold up for the hem?
A3: For no-sew methods using hem tape or glue, you’ll typically fold up about 1/2 inch to 1 inch of fabric from the raw edge, depending on how wide you want your finished hem to be and the width of your tape or glue application. For example, to achieve a 1-inch finished hem, you might fold up 1 1/2 inches of fabric and secure it.
Q4: How do I prevent my no-sew hem from falling apart?
A4: Ensure you follow the product instructions for your hem tape or fabric glue precisely. Use the correct heat setting for ironing, allow ample drying time for glue, and ensure the fabric is clean and dry before application. For extra security, some people apply a double layer of hem tape or use a permanent fabric glue known for its strength.
Q5: My hem looks stiff. How can I make it softer?
A5: Sometimes, fresh hem tape can stiffen the denim at the hem. After washing and drying your jeans once post-hemming, the fabric usually softens up considerably. You can also gently flex and work the hem with your hands before washing to help break it in.
Q6: Can I hem flared or bootcut jeans this way?
A6: Yes, these no-sew methods work well for all styles of jeans, including flared and bootcut. The key is to ensure you measure and cut them while wearing the appropriate shoes so the hem falls correctly over your footwear. The technique remains the same: measure, cut, fold, and adhere.
Conclusion
Achieving the perfect hem on your wide leg jeans is entirely within your reach, even if you’ve never picked up a needle before. The no-sew solutions using hem tape or fabric glue offer a durable, professional-looking, and incredibly easy way to get that perfect length. By following these straightforward steps, you can transform ill-fitting denim into your favorite go-to pair. Remember to measure carefully, prepare properly, and allow the adhesive to do its work. With your jeans now fitting flawlessly, you can step out feeling confident and stylish, knowing you handled this common wardrobe challenge with a genius, effortless solution.


