


Quick Summary: Learn how to perfectly hem wide leg jeans without bleach using simple tools and a clear, step-by-step method. Achieve a professional, custom fit for your favorite denim style easily and effectively, even if you’re a beginner.
How To Hem Wide Leg Jeans Without Bleach: Your Genius Guide
Wide leg jeans are a stylish staple, but finding them in the perfect length can be a challenge. They often come too long, leaving you tripping or looking a bit sloppy. The good news? You don’t need to be a sewing expert or use harsh chemicals like bleach to get a flawless hem. This guide will walk you through everything you need to know to shorten your wide leg jeans so they fit just right, making them look like they were tailor-made for you.
We know that tackling a DIY project can sometimes feel daunting, especially when it involves your favorite pair of jeans. But don’t worry! We’ll break down the process into simple, manageable steps. You’ll be confidently adjusting your denim in no time, achieving a polished look without any fuss. Let’s get your jeans looking and feeling fantastic!
Why Hemming Wide Leg Jeans is Important

The right hem length can make or break the look of your wide leg jeans. Too long, and they can drag on the floor, get dirty quickly, and make your silhouette appear shorter and less defined. Too short, and they can look awkward. For wide leg styles, the hem often interacts with your footwear, so getting it precise is key to achieving the intended drape and aesthetic.
A well-hemmed pair of jeans not only looks better but also lasts longer. By preventing excess fabric from dragging, you reduce wear and tear, keeping your jeans in great condition. Plus, a custom hem means you can wear them with your favorite shoes, from sneakers to heels, and achieve that perfect, high-fashion look.
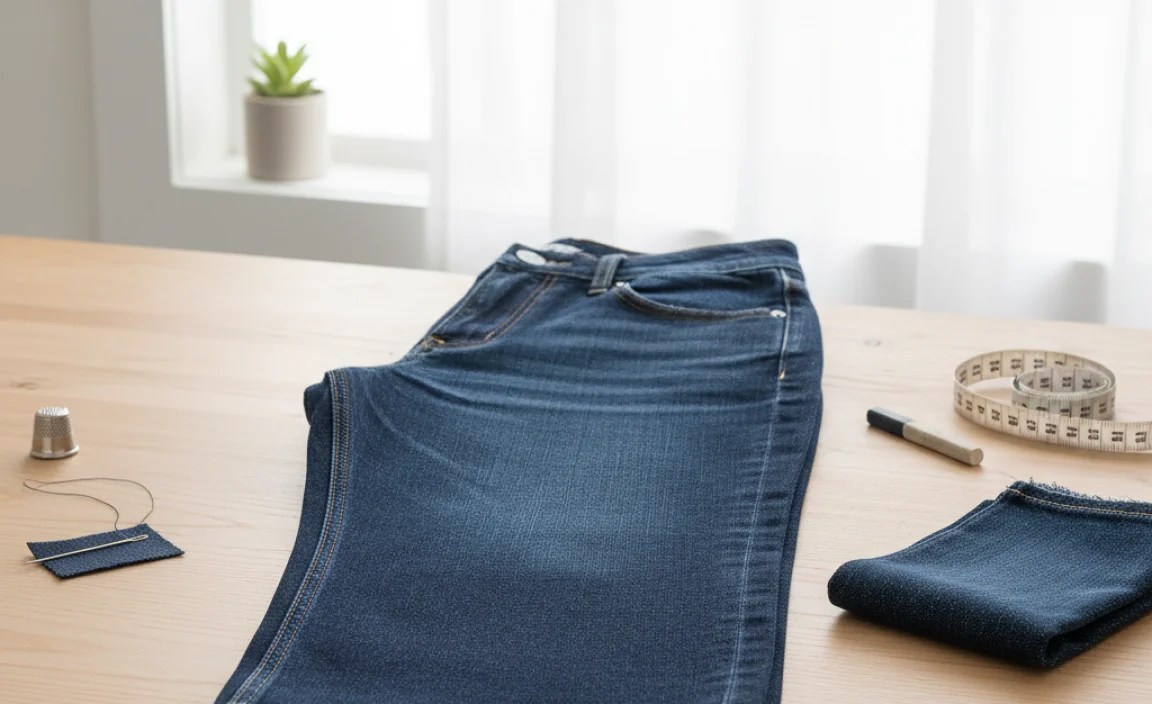
Tools You’ll Need for Hemming

Gathering the right tools makes any DIY project smoother. For hemming your wide leg jeans, you won’t need a full sewing machine for most methods, especially if you’re aiming for a no-bleach, beginner-friendly approach. Here’s a list of what you’ll likely need:
- Fabric Scissors: Sharp scissors are crucial for a clean cut. Dull scissors can snag and create a jagged edge.
- Measuring Tape or Ruler: Essential for accurate measurements to ensure an even hem. A flexible fabric measuring tape is ideal.
- Fabric Chalk or a Disappearing Ink Pen: For marking your hemline. Chalk is great for denim, and disappearing ink pens are also very useful.
- Straight Pins: To hold the fabric in place while you measure, mark, and prepare to sew or glue.
- Iron and Ironing Board: For pressing creases and ensuring your hem lies flat.
- Thread and Needle (if hand-sewing): Choose a thread color that matches your jeans as closely as possible.
- Fabric Glue or Hem Tape (optional): A great no-sew alternative that’s quick and easy. Look for brands specifically designed for fabric.
- Sewing Machine (optional): If you have one and are comfortable using it, it can make the process faster and create a more durable seam.
Step-by-Step Guide: How to Hem Wide Leg Jeans Without Bleach

Let’s get started on hemming your wide leg jeans. We’ll cover a few popular methods, focusing on ease and effectiveness without any need for bleach.
Method 1: The Classic Sewn Hem (Beginner-Friendly Hand Stitch)
This method involves a simple hand stitch that’s easy to learn and provides a durable, clean finish.
- Try on Your Jeans: Put on the shoes you most commonly wear with your wide leg jeans. Stand in front of a mirror.
- Mark Your Desired Length: Decide where you want the hem to fall. For a classic look, the hem should hover just off the floor or lightly graze your shoes. Use fabric chalk or a pen to mark the desired length on the outside of one leg. It’s helpful to have someone else mark this for you, or you can carefully use a ruler.
- Measure and Mark the Other Leg: Lay your jeans flat. Measure the distance from the marked point on the first leg down to the original hem. Transfer this exact measurement to the second leg, ensuring it’s marked at the same point all the way around. This is critical for an even hem.
- Cut Off Excess Fabric: Once you’ve marked both legs, decide how much you want to fold up. A common hem allowance is about 1 to 1.5 inches. Mark this extra line below your original length mark. Carefully cut along this second line using sharp fabric scissors. You can leave the original hem intact if you want a “double folded” hem for a cleaner look, or cut it off completely if you prefer.
- Prepare the Hem: Turn your jeans inside out. Fold the raw edge up to meet your first length mark (the one you made while wearing the jeans). Press this fold firmly with an iron.
- Second Fold: Fold the raw edge up again by about 0.5 to 1 inch, covering the raw edge. This creates a double-folded hem, which is neat and prevents fraying. Press this second fold very well to create a crisp crease.
- Pin in Place: Secure the folded hem with straight pins all the way around, placing them about every 2-3 inches.
- Hand Stitch: Thread your needle with matching thread and tie a knot at the end. Using a simple stitch like a running stitch or a blind stitch (also known as a ladder stitch) is ideal. Work your way around the hem, catching just a thread or two of the jean fabric with each stitch on the outside and the folded hem on the inside. For a blind stitch, try to make your stitches on the inside as invisible as possible from the outside. Aim for stitches about 0.5 inches apart.
- Finish and Press: Once you’ve stitched all the way around, tie off your thread securely on the inside of the hem. Trim any loose threads. Turn your jeans right side out and give the hem a final press with your iron.
Method 2: The No-Sew Hem with Fabric Glue or Hem Tape
This is the quickest and easiest method, perfect for those who want professional results with minimal effort.
- Prepare Your Jeans: Follow steps 1-3 from the sewn hem method to try on your jeans, mark your desired length, and then mark the cut line. Cut off the excess fabric, leaving about 1 to 1.5 inches for the hem allowance.
- Turn Inside Out and Fold: Turn your jeans inside out. Fold the raw edge up to meet your first length mark and press firmly with an iron.
-
Apply Fabric Glue or Hem Tape:
- For Fabric Glue: Apply a thin, even bead of fabric glue along the raw edge of the folded fabric. Ensure good coverage but avoid excessive glue, which can seep through.
- For Hem Tape: Cut strips of hemming tape to the length of the folded hem. Place the tape on the raw edge of the folded fabric.
- Second Fold and Press: Fold the hem up again by about 0.5 to 1 inch, folding the raw edge inside. Press down firmly to activate the fabric glue or adhere the hem tape. The folded edge should now be neatly tucked inside.
-
Secure the Hem:
- With Fabric Glue: Hold the folded hem in place for the time recommended by the glue manufacturer. You might need to use clamps or pins temporarily to keep it from shifting while the glue dries. Then, press the outside of the hem very well with the iron.
- With Hem Tape: Once the second fold is in place and pressed, lay a pressing cloth over the hem. Press with a hot iron (check your hem tape’s instructions for the correct temperature). Hold the iron in place for the recommended time (usually 10-15 seconds), then move to the next section. Repeat until the entire hem is secured.
- Final Press: Once the glue is dry or the tape is adhered, turn your jeans right side out and give the hem a final, smooth press with your iron. Ensure the fabric is laying flat and the hem looks even.
Method 3: The Sewn Hem (Using a Sewing Machine)
If you have a sewing machine and are comfortable using it, this method is faster and creates a very durable hem.
- Prepare Your Jeans: Follow steps 1-3 from the sewn hem method to try on your jeans, mark your desired length, and then mark the cut line. Cut off the excess fabric, leaving about 1 to 1.5 inches for the hem allowance.
- Turn Inside Out and Fold: Turn your jeans inside out. Fold the raw edge up to meet your first length mark and press firmly with an iron.
- Second Fold and Press: Fold the raw edge up again by about 0.5 to 1 inch, covering the raw edge. Press this second fold very well to create a crisp crease.
- Pin in Place: Secure the folded hem with straight pins all the way around, placing them about every 2-3 inches.
- Set Up Your Sewing Machine: Thread your sewing machine with a matching or contrasting thread. For denim, it’s often best to use a heavier-duty needle (like a denim or jeans needle) and a strong thread like polyester or cotton-wrapped polyester. Set your stitch length to a medium setting (around 2.5-3 mm).
-
Sew the Hem:
- Remove the pins as you sew to avoid hitting them with the machine.
- Start sewing at the inseam of the pants or where you can easily tuck the thread end to secure it.
- Sew as close to the inner folded edge as possible, keeping your stitching straight and a consistent distance from the edge.
- When you reach the starting point, backstitch for a few stitches to secure the seam.
- Finish: Trim any loose threads. Turn your jeans right side out and press the hem flat with your iron.
Maintaining Your New Hem
Once you’ve got your jeans perfectly hemmed, you’ll want to keep them looking great. Washing your jeans inside out on a gentle cycle with cold water can help preserve the color and the integrity of the hem. Air drying is always preferable to machine drying, as high heat can shrink and damage fabrics over time.
If you notice any fraying or stitching coming loose over time, don’t panic. A quick hand stitch or a dab of fabric glue can easily fix minor issues. For sewn hems, you might eventually want to reinforce the stitching with your sewing machine.
Understanding Hem Styles for Wide Leg Jeans

The hem style you choose can significantly impact the overall look of your wide leg jeans. While our methods focus on a clean, finished hem, here are a few variations to consider:
| Hem Style | Description | Best For |
|---|---|---|
| Clean Folded Hem | A neat, double-folded hem that is stitched or glued for a finished look. This is the most common and versatile style. | Most wide leg jeans, everyday wear, achieving a polished appearance. |
| Distressed/Raw Hem | The fabric is cut and then allowed to fray naturally over time. This creates a casual, edgy look. Note: This method is not covered in detail here as it requires specific techniques to achieve the desired look without excessive fraying. | Casual, fashion-forward styles aiming for a lived-in feel. |
| Cuffed Hem | The hem is folded up once or twice to create a visible cuff. This can be sewn in place or temporarily done. | Fashion statements, adding a stylistic detail, or slightly adjusting length. |
For our purpose of hemming without bleach and achieving a professional, no-fuss result, the clean folded hem is generally the best option. It’s durable, versatile, and classic. If you desire a distressed look, that’s a separate technique that often involves specific washing or scraping methods, which is beyond the scope of simply hemming.
Troubleshooting Common Hemming Issues
Even with the best intentions, you might run into a few snags. Here’s how to address them:
Frequently Asked Questions (FAQs)
Q1: Can I hem wide leg jeans without a sewing machine?
Yes, absolutely! Fabric glue or hem tape are excellent no-sew alternatives that work very well for denim. A simple hand stitch is also a very effective and beginner-friendly option.
Q2: How much fabric should I leave for the hem allowance?
For wide leg jeans, leaving about 1 to 1.5 inches for the hem allowance is usually sufficient. This gives you enough fabric to create a double fold for a clean finish and durability.
Q3: How do I ensure my hem is straight all the way around?
The best way is to mark your desired length and cut line while wearing the jeans. Then, lay the jeans flat and carefully measure the distance from your cut line to the original hem to ensure consistency on the other leg and all around. Using a ruler or measuring tape at several points is key.
Q4: What kind of thread should I use for hemming jeans?
For a traditional look, use a strong polyester thread that matches the color of your jeans. If you want the stitching to be visible and add a design element, you can use a contrasting, thicker thread like a denim thread or a topstitching thread.
Q5: My jeans are stretching out as I try to hem them. What can I do?
Denim can be a bit unruly when you’re trying to get it to lie flat. Ensure you’re pressing each fold firmly with an iron. If using pins, place them close together. For no-sew methods, ensure the glue or tape is fully adhered and dried before removing pins or clamps.
Q6: Will hemming affect the original look of my wide leg jeans?
If you’re hemming carefully and using matching thread (if sewing), the alteration will be seamless and won’t negatively impact the look. You’re essentially just adjusting the length to fit you better. If your jeans have a specific hem detail like a contrast stitch, try to replicate that in your new hem.
Pro Tips for Perfect Wide Leg Jean Hemming
Here are a few extra tips to elevate your hemming game and ensure fantastic results:
- Match the Original Hem: If your jeans have a distinctive stitching pattern or color along the original hem, try to match it as closely as possible with your new hem for a seamless look. This often involves using a twin needle on a sewing machine or carefully hand-stitching.
- Consider Your Footwear: Always hem with the shoes you intend to wear most often with the jeans. The height of your heel or the sole of your shoe can dramatically change the ideal hem length.
- Use a Walking Foot for Sewing Machines: If using a sewing machine, a walking foot can be incredibly helpful for feeding thick denim evenly, preventing puckering. You can learn more about sewing machine feet and their uses from resources like Singer’s guide to sewing machine feet.
- Pre-Wash New Jeans: If you’re hemming new jeans, it’s often a good idea to wash and dry them first. This accounts for any potential shrinkage before you commit to cutting and hemming.
- Don’t Rush: Take your time with each step, especially measuring and marking. Patience is key to a professional-looking finish.
| Action | Importance | Notes |
|---|---|---|
| Measure twice, cut once. | Crucial | Avoids mistakes and wasted fabric. |
| Use sharp scissors. | High | Ensures a clean, straight cut. |
| Press each fold thoroughly. | High | Creates crisp lines and makes stitching/gluing easier. |
| Try on with intended shoes. | Essential | Guarantees the perfect final length. |
| Double fold the hem. | Recommended | Provides a clean finish and prevents fraying. |
.lwrp.link-whisper-related-posts{
margin-top: 40px;
margin-bottom: 30px;
}
.lwrp .lwrp-title{
}.lwrp .lwrp-description{
}
.lwrp .lwrp-list-container{
}
.lwrp .lwrp-list-multi-container{
display: flex;
}
.lwrp .lwrp-list-double{
width: 48%;
}
.lwrp .lwrp-list-triple{
width: 32%;
}
.lwrp .lwrp-list-row-container{
display: flex;
justify-content: space-between;
}
.lwrp .lwrp-list-row-container .lwrp-list-item{
width: calc(25% – 20px);
}
.lwrp .lwrp-list-item:not(.lwrp-no-posts-message-item){
max-width: 150px;
}
.lwrp .lwrp-list-item img{
max-width: 100%;
height: auto;
object-fit: cover;
aspect-ratio: 1 / 1;
}
.lwrp .lwrp-list-item.lwrp-empty-list-item{
background: initial !important;
}
.lwrp .lwrp-list-item .lwrp-list-link .lwrp-list-link-title-text,
.lwrp .lwrp-list-item .lwrp-list-no-posts-message{
}@media screen and (max-width: 480px) {
.lwrp.link-whisper-related-posts{
}
.lwrp .lwrp-title{
}.lwrp .lwrp-description{
}
.lwrp .lwrp-list-multi-container{
flex-direction: column;
}
.lwrp .lwrp-list-multi-container ul.lwrp-list{
margin-top: 0px;
margin-bottom: 0px;
padding-top: 0px;
padding-bottom: 0px;
}
.lwrp .lwrp-list-double,
.lwrp .lwrp-list-triple{
width: 100%;
}
.lwrp .lwrp-list-row-container{
justify-content: initial;
flex-direction: column;
}
.lwrp .lwrp-list-row-container .lwrp-list-item{
width: 100%;
}
.lwrp .lwrp-list-item:not(.lwrp-no-posts-message-item){
max-width: initial;
}
.lwrp .lwrp-list-item .lwrp-list-link .lwrp-list-link-title-text,
.lwrp .lwrp-list-item .lwrp-list-no-posts-message{
};
}


