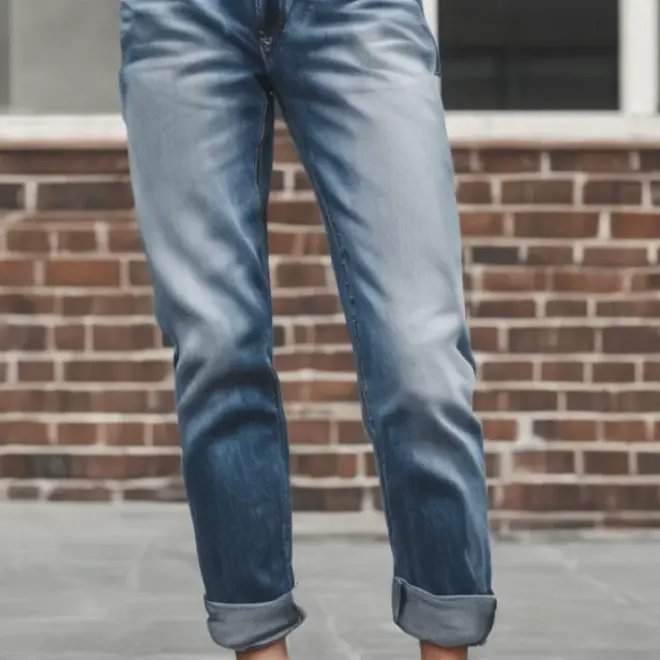
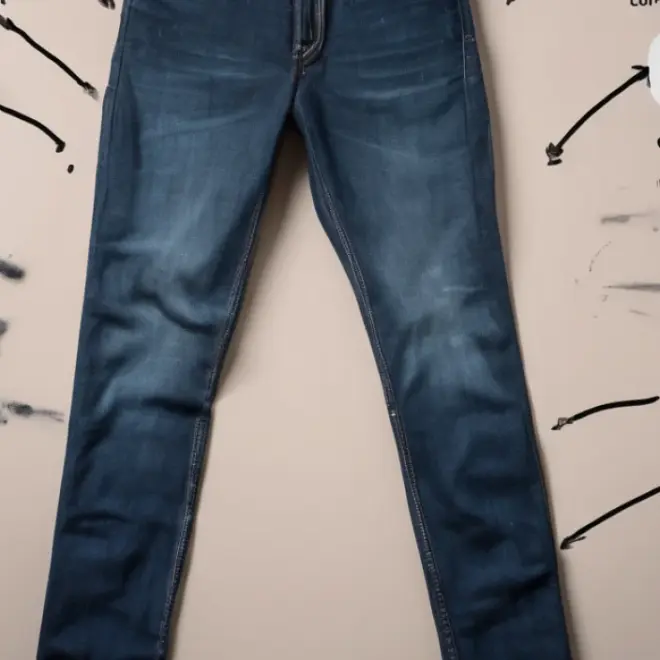
Don’t want to cut your beloved mom jeans too short? This effortless method shows you exactly how to hem mom jeans perfectly, even without a sewing machine, giving you that ideal fit and style with confidence and ease.
Mom jeans are fantastic, but sometimes they’re just a little too long, right? That awkward bunching at your ankles can ruin an otherwise great look and feel. But don’t worry! You don’t need a sewing machine or a master tailor to fix them. We’ll walk through a simple, clever way to get that perfect length. It’s easier than you think, and you’ll have your favorite jeans fitting like they were made just for you. Ready to give your jeans a stylish update? Let’s get started!
How to Hem Mom Jeans: The Genius Effortless Method

Finding the perfect pair of mom jeans is a triumph. They offer that cool, vintage vibe with a comfortable, flattering fit. However, a common hurdle is the length. Too long, and they can look messy; too short, and you lose the intended silhouette. The good news is, achieving that perfect hem is surprisingly doable, and you don’t need to be a sewing expert to master this technique. This guide focuses on a no-sew method that’s quick, effective, and leaves you with a professional-looking finish. We’ll cover everything from choosing your ideal length to the final touches, ensuring your mom jeans are perfectly tailored for you.
Why Bother Hemming Your Mom Jeans?
Before we dive into the “how,” let’s quickly touch on the “why.” Properly hemmed jeans offer several benefits:
Improved Silhouette: The right length enhances the natural shape of your jeans and your legs.
Neater Appearance: No more tripping over excess fabric or dealing with unsightly bunching.
Versatility: Perfectly hemmed jeans look great with a variety of footwear, from sneakers to heels.
Personalization: You can customize the length to match your personal style and preferred shoe height.
Tools You’ll Need for an Effortless Hem
Gathering the right supplies makes any DIY project smoother. For this no-sew hemming method, you’ll need a few key items. Most of these are likely already in your home or easily found at a craft or fabric store.
Your Mom Jeans: Make sure they are clean and dry.
Fabric Scissors: Sharp scissors are crucial for a clean cut. Dull ones can snag and fray the denim unevenly.
Fabric Glue or Hem Tape: This is the “magic” behind the no-sew hem. Choose a high-quality, permanent fabric glue or double-sided hem tape designed for denim or heavy fabrics. Brands likeDritz offer reliable options for fabric adhesives. Check out resources from the Dritz website for product details.
Measuring Tape or Ruler: For accurate measurements.
Fabric Marker or Chalk: To mark your desired hemline. A disappearing ink pen or chalk works well on denim.
Iron and Ironing Board: Essential for pressing creases and setting the adhesive.
Straight Pins: To hold the fabric in place while you work.
Cardboard or Plastic Sheet: To place inside the jean leg to prevent the glue or tape from bleeding through to the other side.
Step-by-Step: The Genius Effortless Hemming Method
This method focuses on creating a clean, folded hem that mimics a traditional sewn finish, all without a needle and thread. It’s ideal for denim and sturdy cotton blends.
Step 1: Determine Your Desired Length
This is the most important step! Try on your mom jeans with the shoes you typically wear them with. Stand in front of a mirror and decide where you want the hem to fall.
Consider your shoe height: A hem that looks perfect with sneakers might be too short with heels.
Look for the natural crease: Often, the best place to hem is just above the point where the jeans naturally crease when you’re wearing them.
Mark the spot: Have a friend help you mark the desired length with a pin or fabric marker on the side seam of each leg. Make sure to mark the finished length you want.
Step 2: Measure and Mark Your Cut Line
Once you have your desired finished length, you need to account for the fabric you’ll fold up.
Lay one jean leg flat: Smooth out any wrinkles.
Measure from the first mark: Measure down from your initial length mark to determine where to cut. For a standard hem, you’ll typically want to leave about 1 to 1.5 inches of extra fabric for folding.
Mark the cut line: Use your fabric marker or chalk to draw a straight line across the leg at your measured cut point. Be precise! This line will guide your scissors.
Repeat for the other leg: Ensure both legs are marked identically. Consistency is key for a professional look.
Step 3: Cut the Excess Fabric (Optional but Recommended)
While some no-sew methods involve folding the fabric without cutting, cutting off the excess fabric first often leads to a cleaner, less bulky hem, especially on thicker denim like mom jeans.
Use sharp fabric scissors: Position your scissors along the marked cut line.
Cut slowly and steadily: Cut all the way around the leg. Try to make one continuous cut for the smoothest result.
Check for evenness: Ensure the cut is straight and level all the way around. If it’s a bit wobbly, don’t fret; the folding process will help some.
Step 4: Prepare for Folding and Gluing/Taping
Now it’s time to create the fold that will form your new hem.
Turn the jeans inside out: This makes it easier to work with the raw edge.
Fold up the raw edge: Fold the raw edge of the denim up to meet the original hemline or your desired finished length mark.
Smooth and pin: Smooth out the fold carefully. Use your straight pins to secure the folded edge along the marked line. Insert pins every 1-2 inches. This is where a template or the fabric crayon line helps guide your fold.
Insert the barrier: Slide a piece of cardboard or a plastic sheet inside the jean leg, between the outer and inner layers of fabric, just above your fold. This prevents the fabric glue or tape from sticking the front and back of the leg together or bleeding through to the outside.
Step 5: Apply Fabric Glue or Hem Tape
This is where the magic happens!
Using Fabric Glue:
Method 1 (Most common): Apply a thin, even bead of fabric glue along the inside of the folded edge, directly onto the denim. Work in sections if it makes it easier.
Method 2 (For extra strength): Apply glue to the inside of the folded edge, and then also apply a thin layer to the underside of where the original hemline was. This creates a double bond.
Read your glue’s instructions: Different glues have different drying times and application tips. Refer to the product’s packaging for best results. For example, products from Beacon Adhesives’ Fabri-Tac are known for their strong bonds on fabric.
Using Hem Tape:
Cut the tape: Cut pieces of double-sided hem tape to fit the length of your folded hem.
Apply the tape: Peel off one side of the backing paper from the hem tape and apply it evenly along the inside of the folded edge.
Center the tape: For a stronger hold, you can also apply another strip of hem tape along the inside of the original hemline seam.
Ensure even coverage: Make sure the tape is applied smoothly without wrinkles.
Step 6: Secure the Hem with Heat (Ironing)
Heat is crucial for activating most fabric glues and setting hem tape.
Remove pins: Gently remove the straight pins you used to hold the fold.
Press with the iron: Using your iron on the appropriate heat setting for denim (check your iron’s manual), press down firmly on the folded hem. If using fabric glue, follow the recommended pressing time on the glue’s packaging – typically 15-30 seconds per section. For hem tape, follow the tape’s instructions, which usually involve pressing for a specific duration.
Work in sections: Move the iron slowly around the entire circumference of the hem, pressing each section thoroughly.
Let it cool: Allow the fabric to cool completely. This helps the adhesive bond strengthen.
Step 7: Final Press and Inspection
Once the glue or tape has set and cooled, give your new hem a final look.
Turn the jeans right-side out: Carefully check the exterior of your hem. It should look even and clean.
Optional: Second Press: You can gently iron the outside of the hem for an even crisper look, but be careful not to apply too much heat directly on the seam if using glue, as it can sometimes cause a slight shine.
Check for any gaps: Make sure the fold is securely attached all the way around. If there are small gaps, you can carefully apply a tiny bit more glue or tape and re-press.
Variations and Tips for Embellishment
This basic method is brilliant for a clean, classic hem. But you can also get creative!
Frayed Hem Effect (The “Original” Mom Jean Look)
Mom jeans often feature a slightly frayed hem, giving them that authentic vintage feel. You can achieve this easily:
1. Follow steps 1-3 to get your desired length.
2. Instead of folding and gluing/taping, carefully unravel about 0.5 to 1 inch of the fabric from the cut edge, working your way around the leg. Use tweezers or blunt scissors to pull out individual threads.
3. To stop further unraveling, you can apply a very thin layer of fabric glue or a fray-stopping liquid (like Aleene’s Fray Check) to the inside of the leg, just above where you want the fraying to stop.
4. Wash and dry your jeans. The washing process will naturally fray the edges further and give them a soft, lived-in look.
Adding a Raw Edge Hem Without Fraying
If you like the look of a raw hem but don’t want it to fray extensively:
1. Follow steps 1-3.
2. Turn the jeans inside out.
3. Fold the raw edge up by just 0.5 inches and press firmly.
4. Apply fabric glue or hem tape along the inside of this small fold.
5. Press with an iron to secure.
6. Turn right-side out. This creates a clean, raw-looking edge that won’t unravel.
Using Different Adhesives: Pros and Cons
Choosing the right adhesive is key to a durable hem.
| Adhesive Type | Pros | Cons | Best For |
| :—————– | :—————————————————————— | :———————————————————————– | :————————————————————————– |
| Fabric Glue | Strong permanent bond, flexible when dry, readily available. | Can be messy if not careful, requires drying/curing time, can stiffen denim. | Permanent hems, secure bonds, quick fixes. |
| Hem Tape | Clean application, instant bond with heat, less mess than glue. | May not be as strong as glue over time, can sometimes show through thin fabric. | Quick hemming, less mess, strong initial bond. |
| Fray Check** | Prevents fraying on raw edges, clear and flexible when dry. | Not a bonding agent; only prevents unraveling. | Securing raw edges, finishing cut hems on delicate fabrics (not ideal for denim hems unless combined with another method). |
Frequently Asked Questions (FAQ)
How often should I wash jeans hemmed with fabric glue?
For best results and to prolong the life of the hem, it’s advisable to wash jeans hemmed with fabric glue on a gentle cycle with cold water, and air dry them or tumble dry on low heat. Excessive heat or aggressive washing can weaken the adhesive over time.
Can I use this method on other types of pants?
Yes, this no-sew hemming method, particularly using fabric glue or hem tape, works well on most woven fabrics like cotton twill, linen blends, and other denims. It’s generally not recommended for very stretchy knits or delicate fabrics that don’t hold a crease well.
Will the hem look stiff after using fabric glue?
High-quality fabric glues, when used sparingly and correctly, are designed to remain flexible once cured. However, if too much glue is applied or it’s a type not formulated for fabric flexibility, it can create a slightly stiffer area. Pressing firmly while the glue is curing helps integrate it into the fabric.
How do I remove a fabric glue hem if I need to adjust it?
Removing fabric glue can be tricky, as it’s permanent. For some glues, soaking the hem in warm, soapy water and gently trying to work the fabric apart might help. You can also try applying rubbing alcohol or a specific fabric glue remover, but test on an inconspicuous area first to avoid damaging the denim. It’s often easier to add a new hem over an existing one if possible.
Can I hem my mom jeans without an iron?
While an iron significantly helps activate the adhesive and set the fold for a strong bond, it’s not entirely impossible without one. You could try pressing the folded hem very firmly with a heavy, flat object (like a book) for an extended period, or place weights on the folded edge while the fabric glue dries completely. However, the bond will likely be less secure and the crease less defined.
What if my fabric scissors aren’t sharp enough?
If your scissors are dull, they will likely snag and pull the denim threads, resulting in a ragged edge. For the best outcome, borrow or purchase a sharp pair of fabric shears. A clean cut ensures that the glue or tape has a smooth surface to adhere to, creating a neater finish.
Are there any specific types of mom jeans this method works best for?
This method is ideal for traditional, non-stretch or low-stretch denim that forms mom jeans. It works wonderfully for medium-weight to heavy-weight denim. For very thin or very stretchy denim, you might find that the weight of the folded hem pulls down more, or that a sewn hem is ultimately more durable. Sticking to durable mediums like classic mom jean styles is your best bet.
Conclusion
There you have it – a foolproof, effortless way to conquer the common problem of long jeans. By following these straightforward steps, you’ve transformed your mom jeans from ill-fitting to perfectly tailored, all without needing a sewing machine. This method gives you control over the exact length, ensuring your jeans complement your style and footwear beautifully. Whether you opted for a classic clean hem or embraced the trendy frayed look, you’ve gained a valuable skill that can be applied to many wardrobe items. Now go ahead and enjoy wearing your perfectly hemmed mom jeans with newfound confidence! This DIY fix proves that with a few simple tools and a little patience, anyone can achieve professional-looking results at home.
This was a great project, and I hope you found it as rewarding as I did. If you have any questions as you go, don’t hesitate to revisit the steps. The key is precision and taking your time with each stage. Happy hemming!


